A Little Experiment on Macaron Oven Placement and Temperature
We are going to have fun experimenting with macarons! A viewer recently asked for this tutorial (Hello, Jean-Charles!) so he would know what is the perfect macaron oven placement and temperature for these finicky little cookies. We will be using our standard macaron recipe for this guide. We aim to determine what is the best rack position and temperature to get ideal results when baking the french macaron.
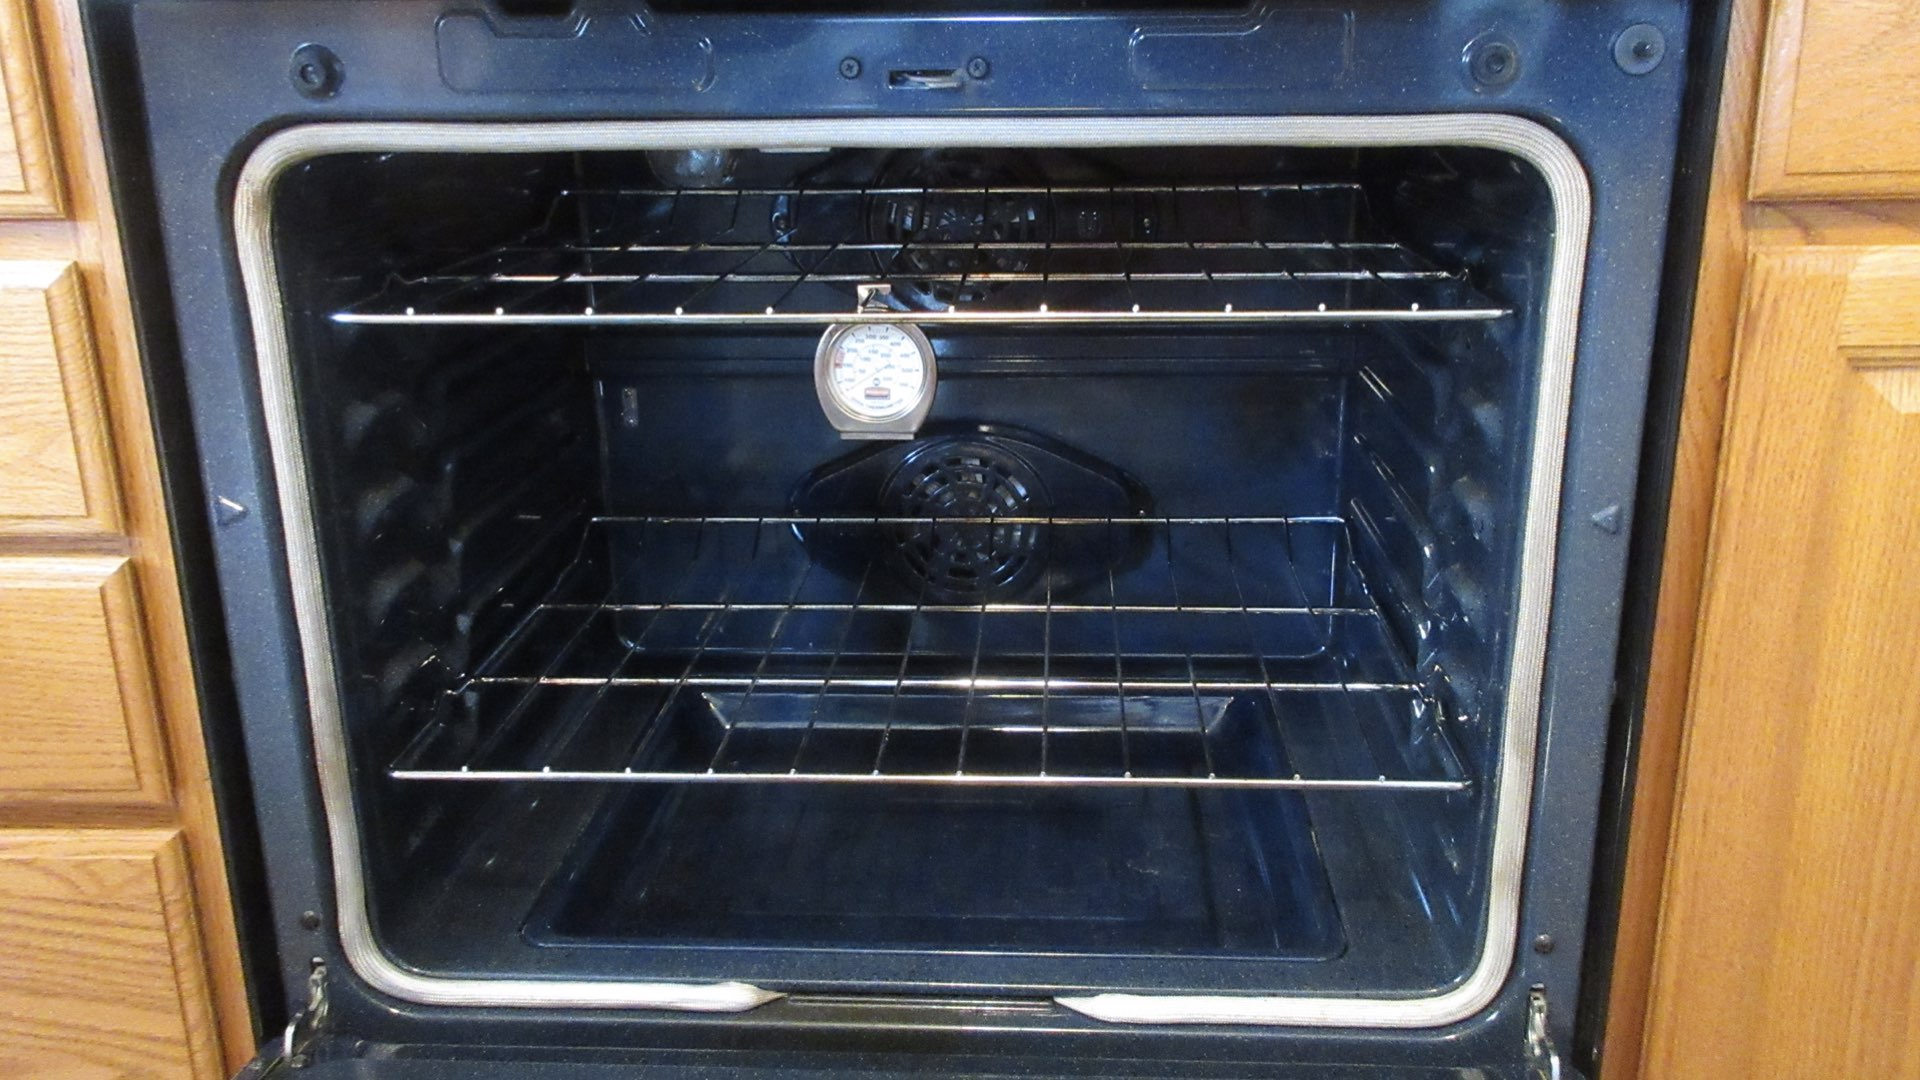
Of course, there will be limitations. First, our oven is likely different than yours. For instance, we have a 6.3 cubic foot induction range convection oven. It has six oven rack positions and the total height is around 19″ (48.26cm) with the closest center rack being near 9″ (22.86cm) from the top and bottom heating elements so we are limited to those distances. Second, our recipe is the traditional french macaron recipe. If you are using another recipe, your results will vary. Finally, we acknowledge our little experiment isn’t exact science. We are just doing this for fun and seeing if we can improve our bakings skills along the way.
What We Did
Macarons Baked at Various Temperatures
We decided to do some experimenting with macarons on a very simple level so we picked a few areas that viewers have specifically questioned in previous posts and videos comments. Simply, these particular tests were chosen in order to help a fellow macaron enthusiast or two along the way.
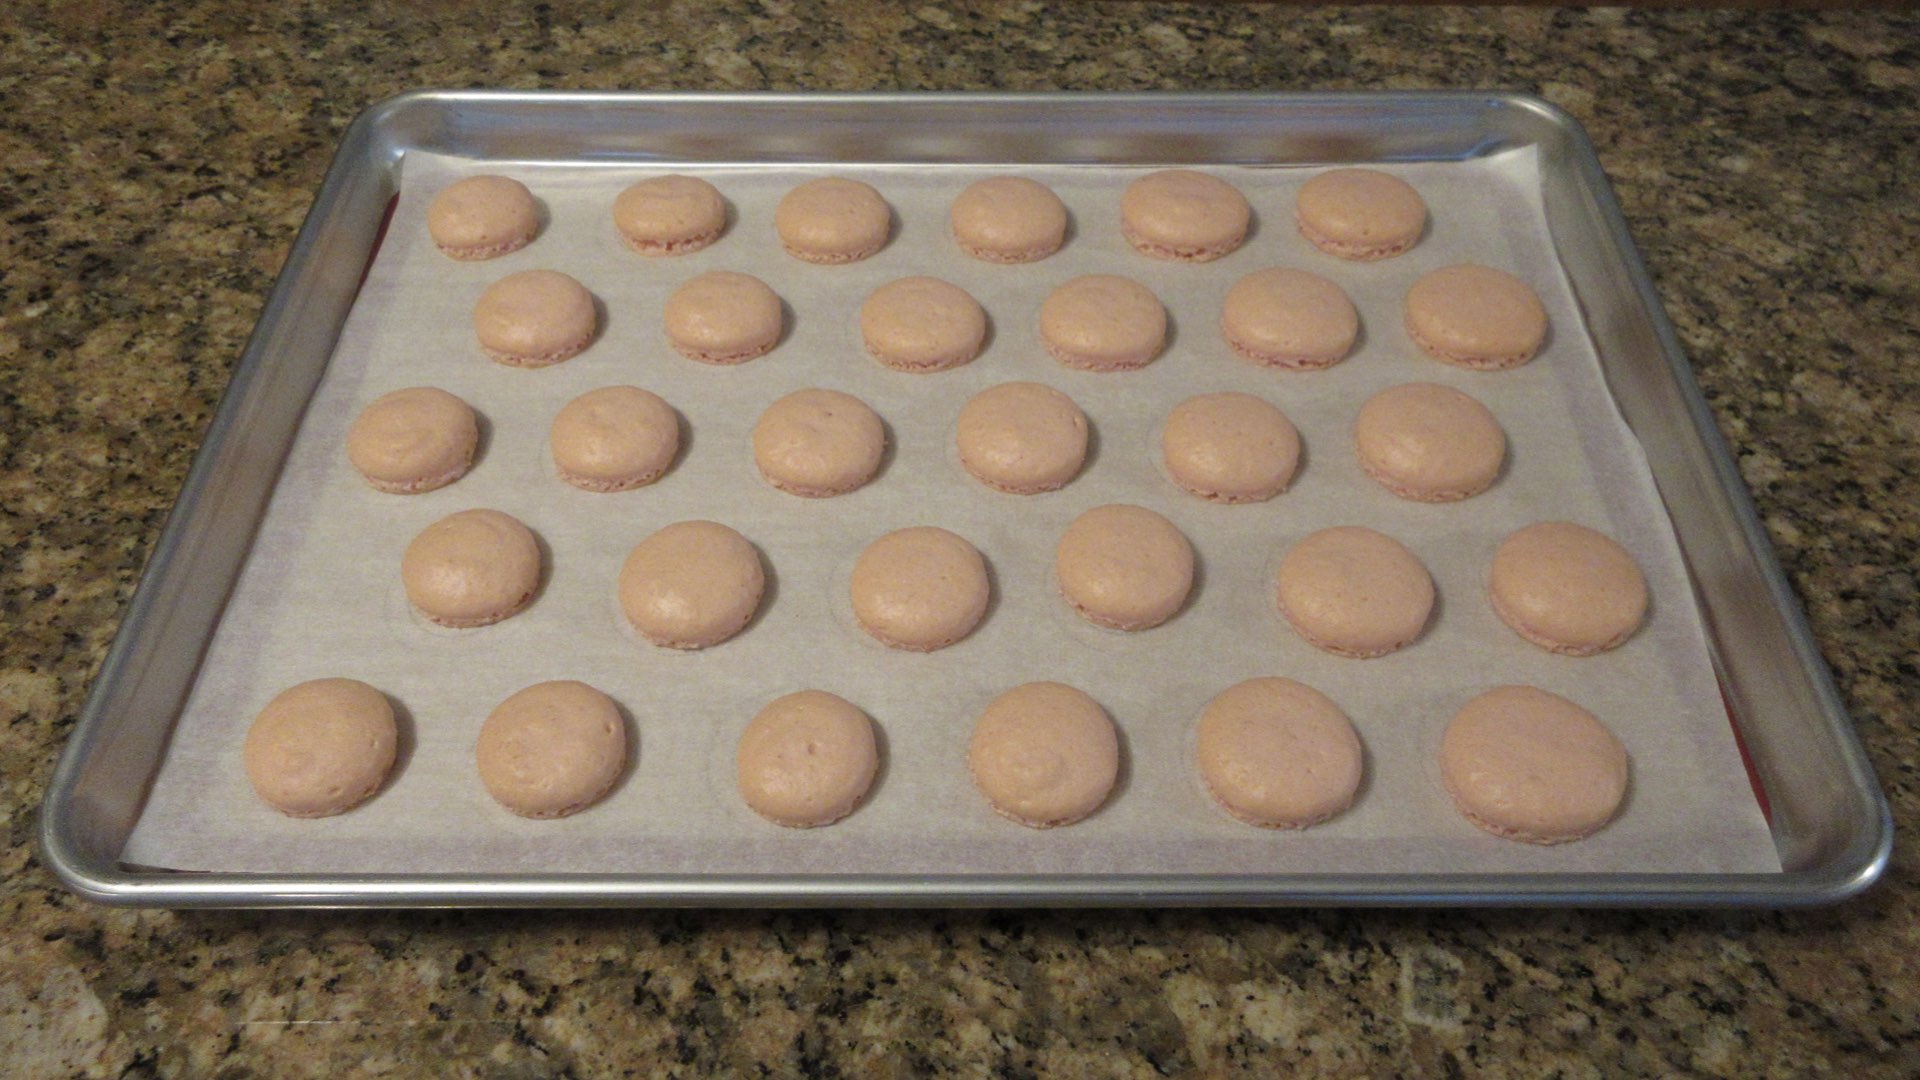
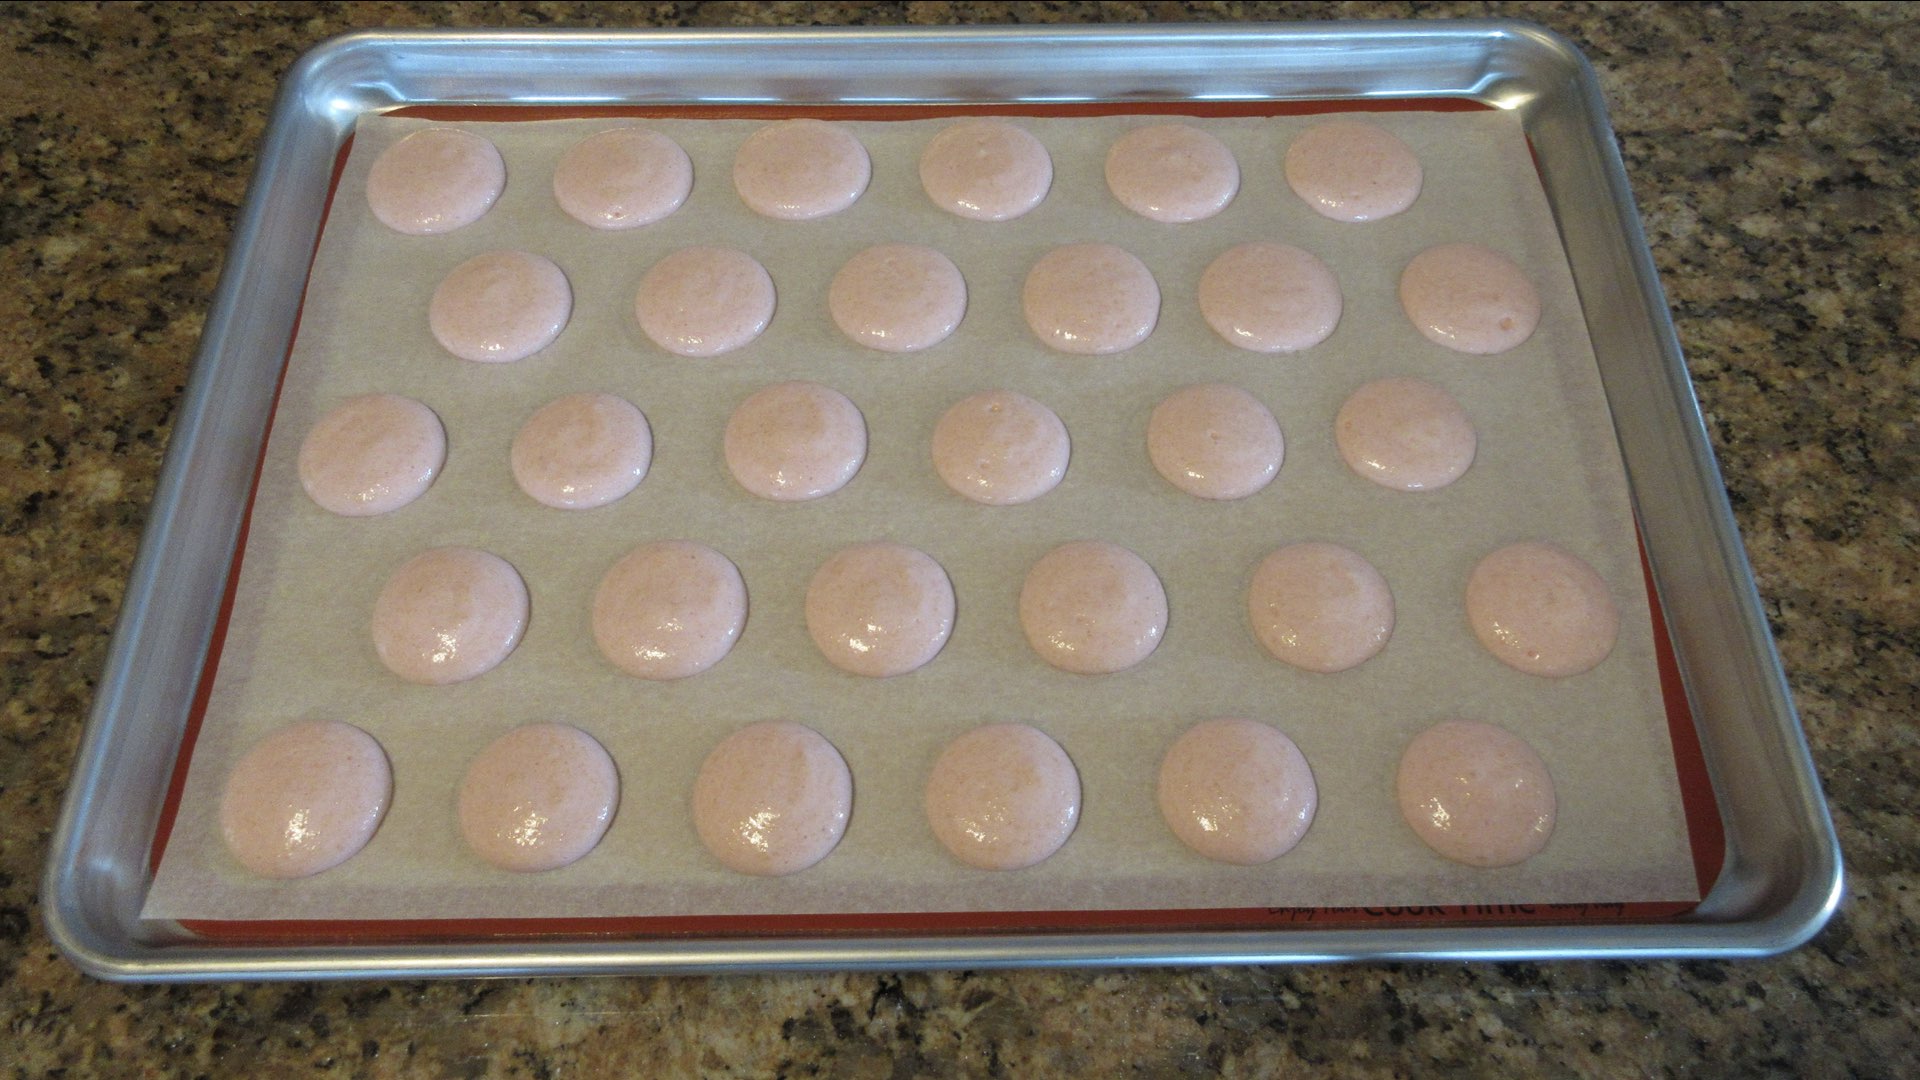
First, we baked six batches in 25°F (10°C) increments starting at 225°F and ending with 400°F (approximately 107°C – 204°C.) After baking, we compared the feet size, texture, taste, color, quality, time it took to bake and the overall consistency of the macarons. Once that happened, we decided the temperature we liked best. It is important to realize, this preferred temperature will be subjective to the baker. So keep that in mind. The specific temperatures we used for our first little experiment were the following:
225°F or107.2°C
250°F or 121.1°C
275°F or 135.0°C
300°F or 148.8°C
325°F or 162.7°C
350°F or 176.7°C
375°F or 190.6°C
400°F or 204.4°C
We will look at the results later on. But first, let’s go over our other little experimenting with macarons tests.
Macarons Baked at Various Positions in the Oven
After baking at various temperatures, we then decided the temperature we liked best. We used our preferred temperature and baked a tray at each rack position to see what would happen. Since there are six racks, we did an entire tray for each position.
The oven rack position #1 is 3″ or 7.62 cm from the top of the opening. Position #2 is 5″ down or 12.7cm. Rack #3 is 7″ down or 17.78 from the top. Oven rack position #4 is 9″ down or 22.86cm. The position #5 is 11″ or 27.94cm down. Finally, rack position #6 13″ down or 33.02 cm from the top. Since the total interior height is approximately 19″ 48.26, we chose rack position #4 to be the center rack. Yes, we know it isn’t exact, but it’s the closest. Your oven may be different, so it’s likely you will need to do some fun little experiments on your own to find that perfect position. Likewise, you may find a good place to start simply by following our little adventure.
Macarons Baked after Oven Drying
Our third experiment was baking macarons after using the oven to drying the macarons in order for them to develop the “skin.” Did you know the shell of the macaron is often referred to as having a skin in the baking world before it is baked and as a shell after baking? It’s so peculiar when you think about it. For puddings, custards and curds, you do everything to avoid forming a skin. Yet in the macaron world, this is a desirable trait. Makes me wonder what would happen if you baked a custard after a skin was formed?
Anyway, back to experimenting with macarons. The method of oven drying macarons most commonly used is as follows:
Preheat the oven to 190°F (90°C) degrees. Place the macarons in the oven. Let dry 3-5 minutes. While the macarons are still in the oven, turn the dial to 250°F (120°C) and bake for 15 minutes. Turn off the oven and ajar the oven door. Allow the macarons to stay in the oven they cool.
This method is supposed to give you excellent color and feet while combating extra humid climates. We were really excited about this since we live in a humid area. We decided to make the little trial a bit more complicated and bake a batch on each rack position and see if that changed anything.
Macarons Baked with the “No Resting Method” Using a Hot Oven
Another experiment we tried came from another viewer giving us a tip (thanks, Afy!) Since we had extra time, we decided to see what would happen. Again, this was supposed to help those in humid climates in particular, but would work for all weather conditions.
This particular no rest method is where you heat up the oven to the correct temperature and then wait 20 minutes before putting in the macarons. To me, that kind of sounds like a little bit of a rest so we decided to wait to make the macarons until the oven had already preheated and it was still heating 10 minutes later. Since it takes us around 8 – 12 minutes to make a batch of macarons, we decided this would be as close to a no rest method as we could get.
We also decided to bake these macarons at each rack position in the oven to see if the results varied for this method as well. Why not?
Macarons Baked Where the Meringue was Whipped at Different Speeds
Our final experimenting with macarons experience had to deal with the speed of the mixer. Since we still had a little bit of almond flour left over, we decided to whip up batches using the various speeds on our mixer. From low to turbo, we whipped up more meringue and made even more macarons. By the end of this, we were exhausted. And Maggie? Macaron Maggie was thrilled. You’ll see her dancing for joy in the video.
What were our results?
Some results were surprising, others expected. Regardless of the outcome from experimenting with macarons, we had loads of fun. We hope this little post encourages you instead of discourages you from continuing to bake these finicky little monsters. Have fun along the way! You will eventually be successful if you keep trying! Let’s look at our findings in the meantime.
Macarons Baked at Various Temperatures
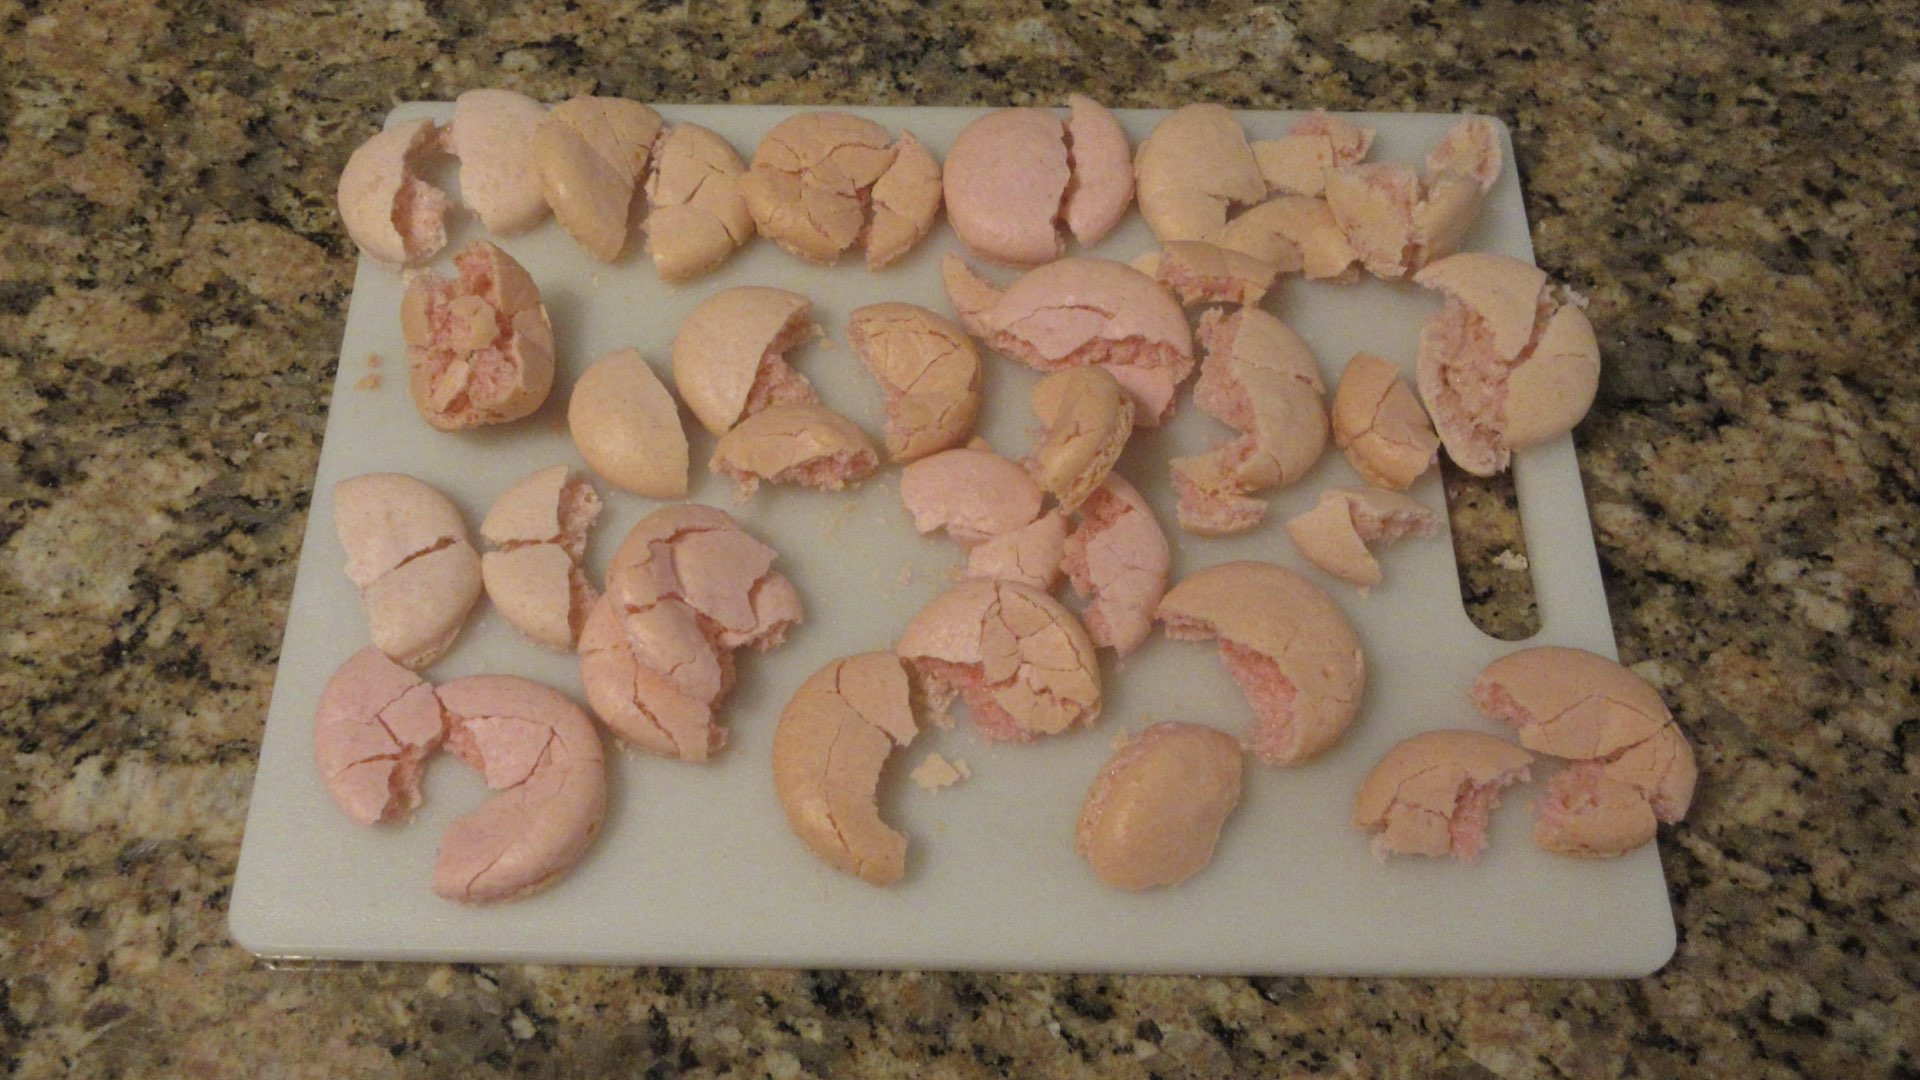
The results were somewhat surprising with our first experimenting with macarons trial. Can you look at the photo below and determine which temperature was which? We used the exact same brand and amount of food coloring for the macarons in this particular experiment. Go ahead and look closely. What are your thoughts?

Now let’s label them. Are you surprised? Maybe not if you are a seasoned baker. Here were our observations. The higher the heat, the more faded the food coloring became! It was rather drastic at one point, wasn’t it? We will go over each macaron temperature below.
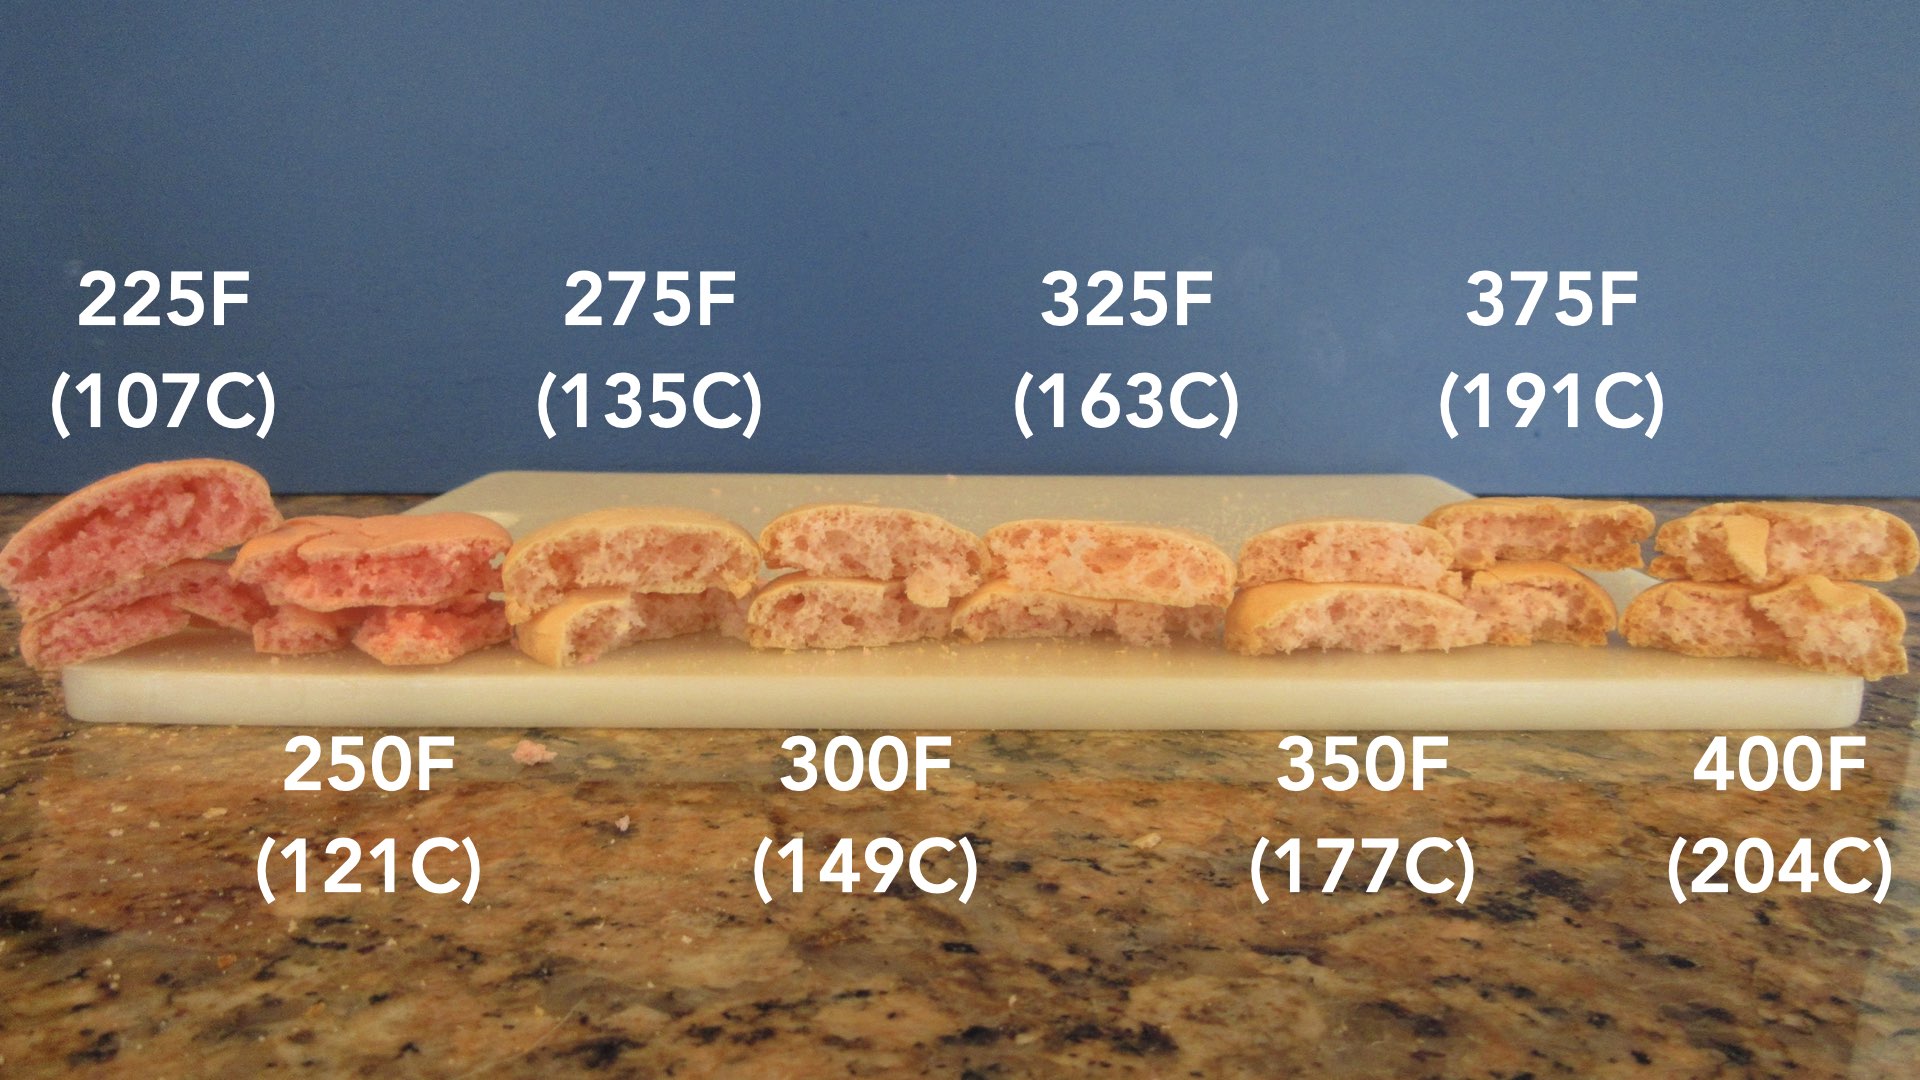
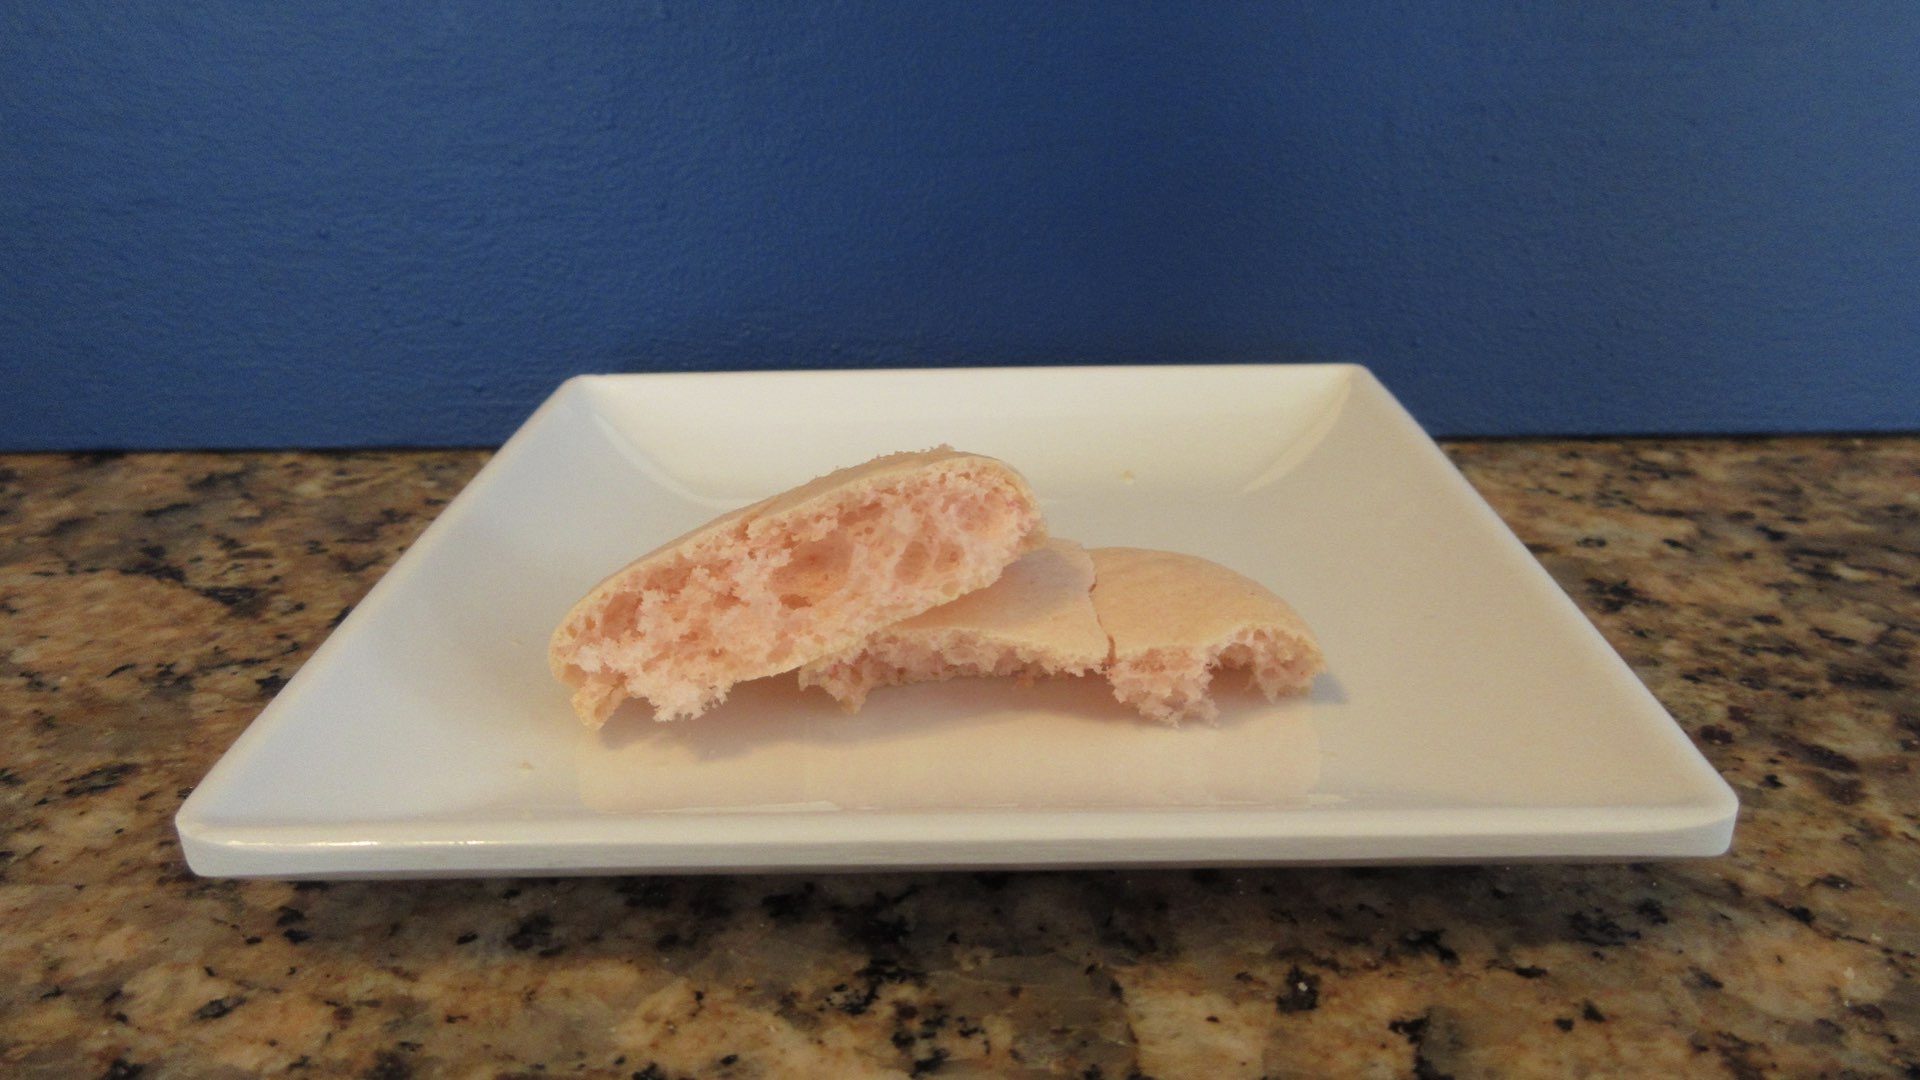
At 225°F or 107.2°C we had lovely coloring. The shells were very brittle and thin. They shattered under pressure like shards of glass, not like the eggshell we were used to. The insides were just a bit more chewy and gooey than we were hoping for. There was a hollow in the center but it wasn’t significant. It could be the time needed increased a few more minutes. We baked these for nearly 35 minutes. The color was stunning.
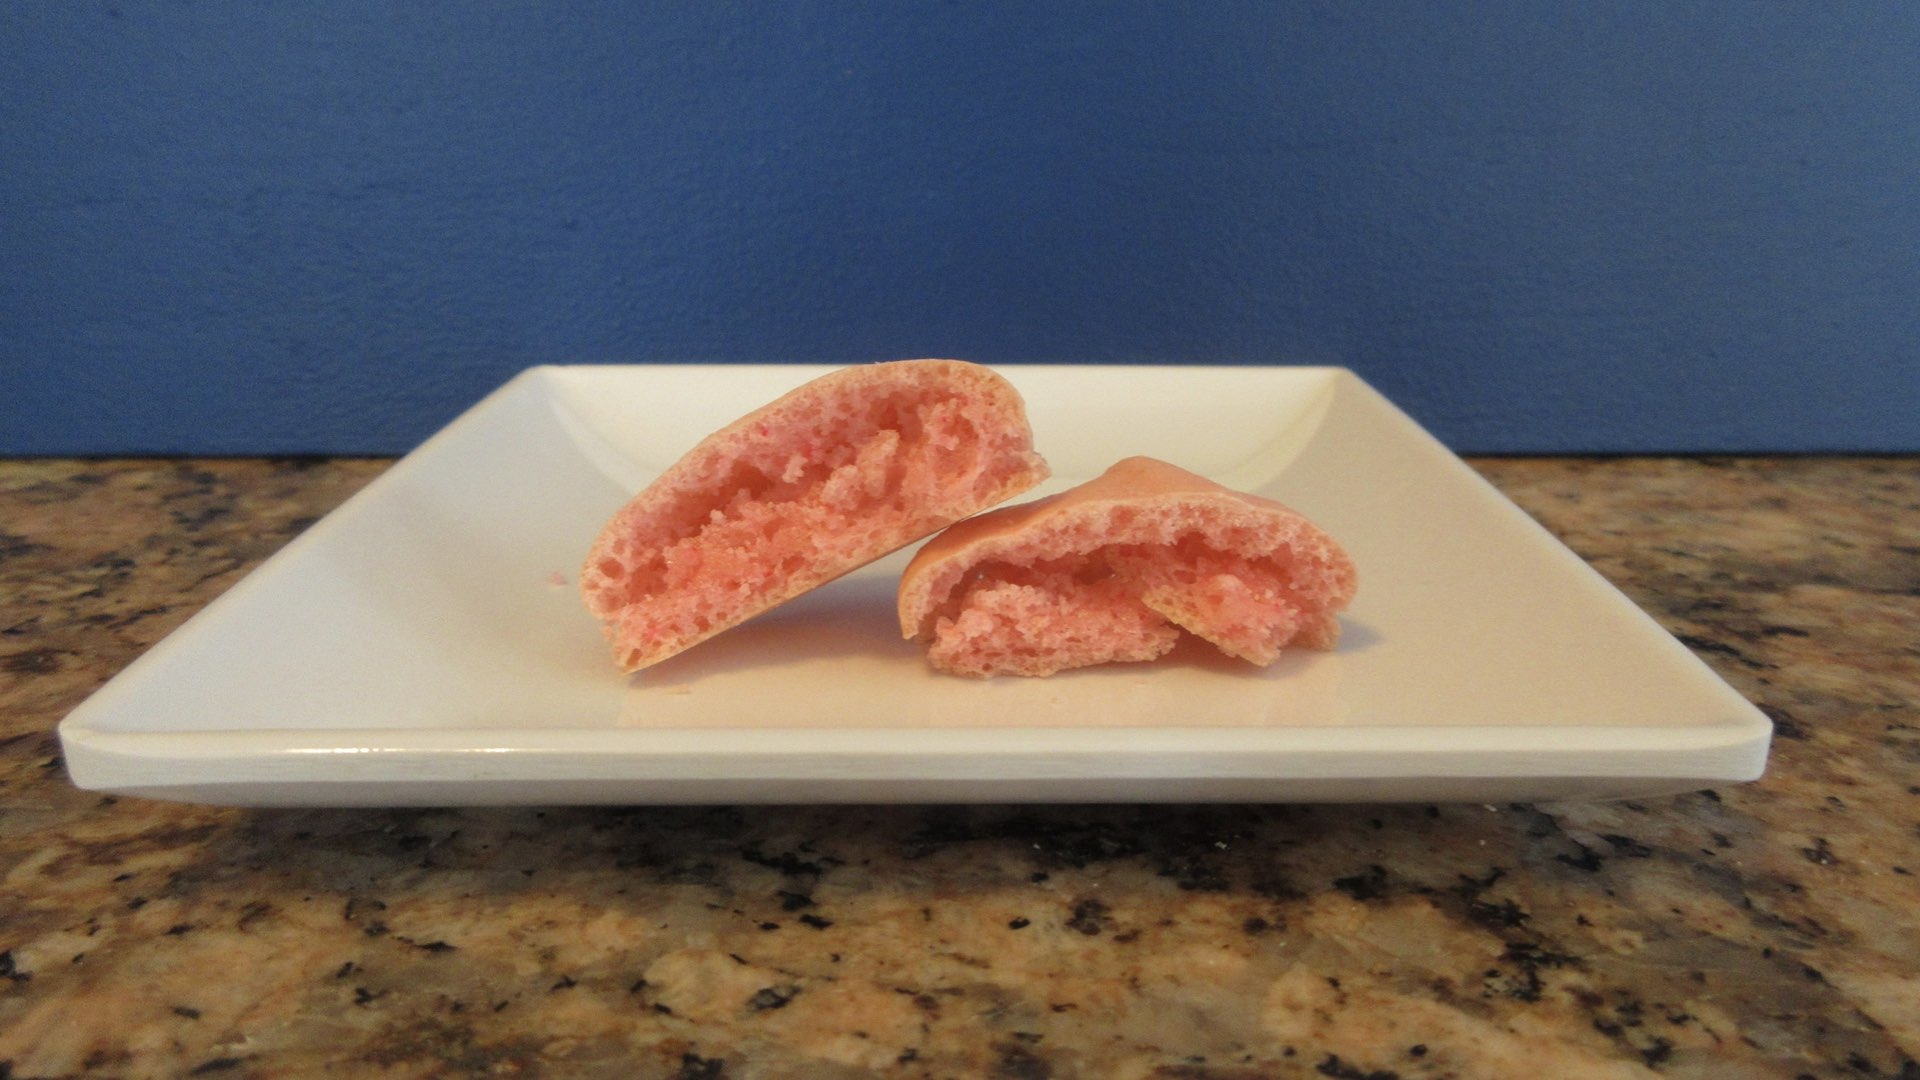
At 250°F or 121.1°C, the shell behaved much better. It was noticeably thicker but still very thin. It shattered, but a little less like glass and a little more like a very thin eggshell. We were pleased with the coloring. We baked these for 32 minutes and I think they needed a bit more time as they were a little gooey, but much better texture.
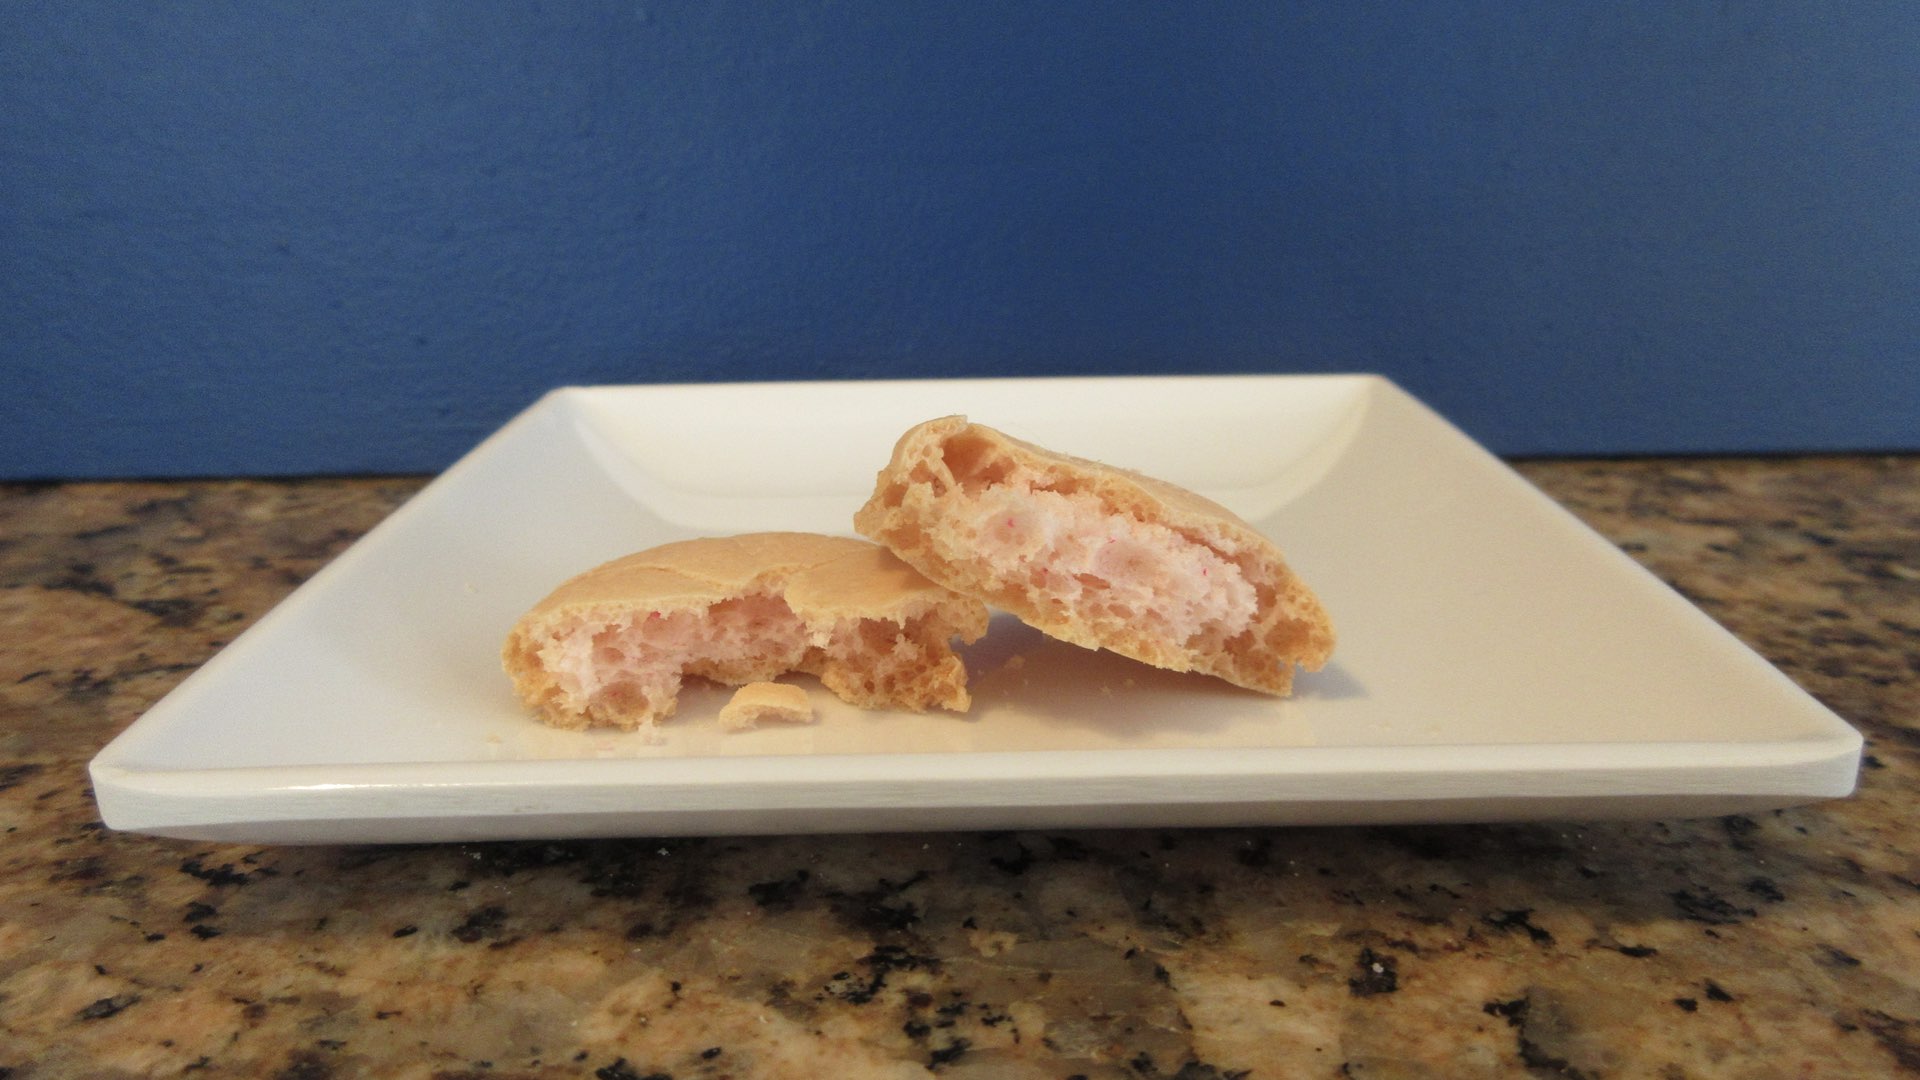
Next, we baked 275°F or 135.0°C. This is where we found things changing dramatically. The food coloring washes out. We used a cheap brand on purpose for the first few experiments as it would be prone to fading out in the heat. We thought it would be a nice addition. A higher quality dye, you’d likely not see any changes or they would be slight. Other than the color loss, the texture became amazing. Baked for 27 minutes, these macarons tasted lovely. They had a perfect shell, a good chew in the center and they collapsed just right. The trade off is the amount of time it took to bake on tray. That’s a lot of time waiting.
We found 300°F or 148.8°C to be the sweet spot. Truthfully, we really like temperatures between 275°F (121.1°C) – 300°F (148.8°C) the best. But since most people do not have the option to select smaller increments, we settled at 300°F because it took less time to bake and most ovens will dial in at this degree. Likewise, this would be 150°C for those with ovens that use that temperature scale. We also settled on this temperature because the macarons are just as delicious, but they bake just right around the 20 minute mark. Now mind you for this experiment we used a silicone mat and parchment on a heavy duty pan. Just parchment, they would be done in less time. So keep that in mind. The color was still washed out, but we expected that. We loved this macaron. Let’s push it up a notch.

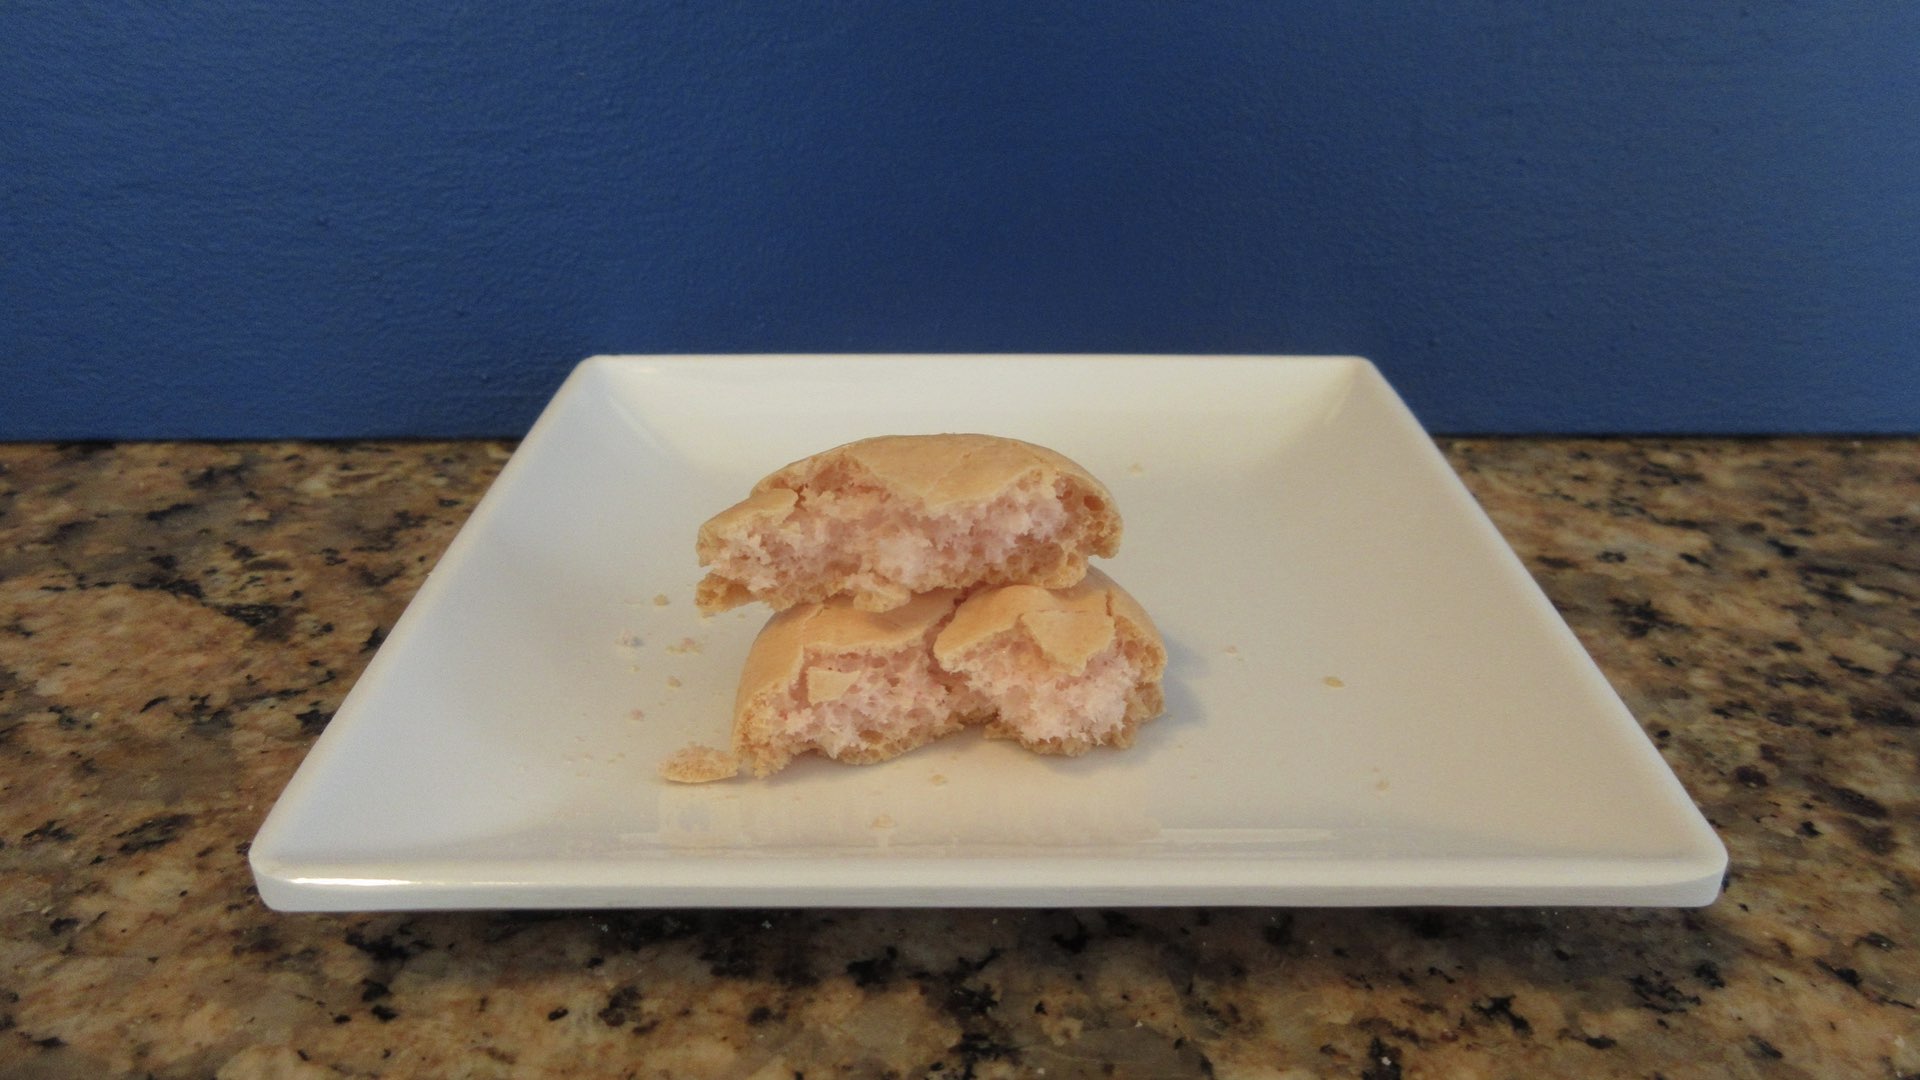
At 325°F or 162.7°C, we still enjoyed this macaron. It took even less time to bake. But the color was washing out a little more and the shell was getting a little browned. Otherwise, it acted and tasted similar. This would be a great temperature to try for many starting out.
We found 350°F or 176.7°C was still very good. The macarons were done by 14 minutes, some were a little overdone that were closest to the heat. The shell was a bit more crunchy and browned but it was not noticeable until you placed one baked at a lower temperature beside it. We really think this could be a viable option for many that like to speed bake.
Unfortunately, when we got to 375°F or 190.6°C, we started seeing unpleasant changes. The food coloring was nearly missing on the shell. The shell was browning deeply and it was becoming a thick crust instead of shell. The macaron was still chewy, but not as pleasant. And you really had to bite down a bit more to break that shell. We were not fans of this temperature.
By the time we reached 400°F or 204.4°C we decided to call it quits. This macaron was borderline unrecognizable in texture and taste. The almond flour was becoming bitter tasting almost burnt. The outside exterior or shell was a peachy brown and very hard. The inside was not even recognizable as a macaron as the chewiness became almost taffy like. We decided it wasn’t worth going higher in temperature as the flavor and texture was so poor that it would be a waste of ingredients to proceed. Perhaps you’d like to try?
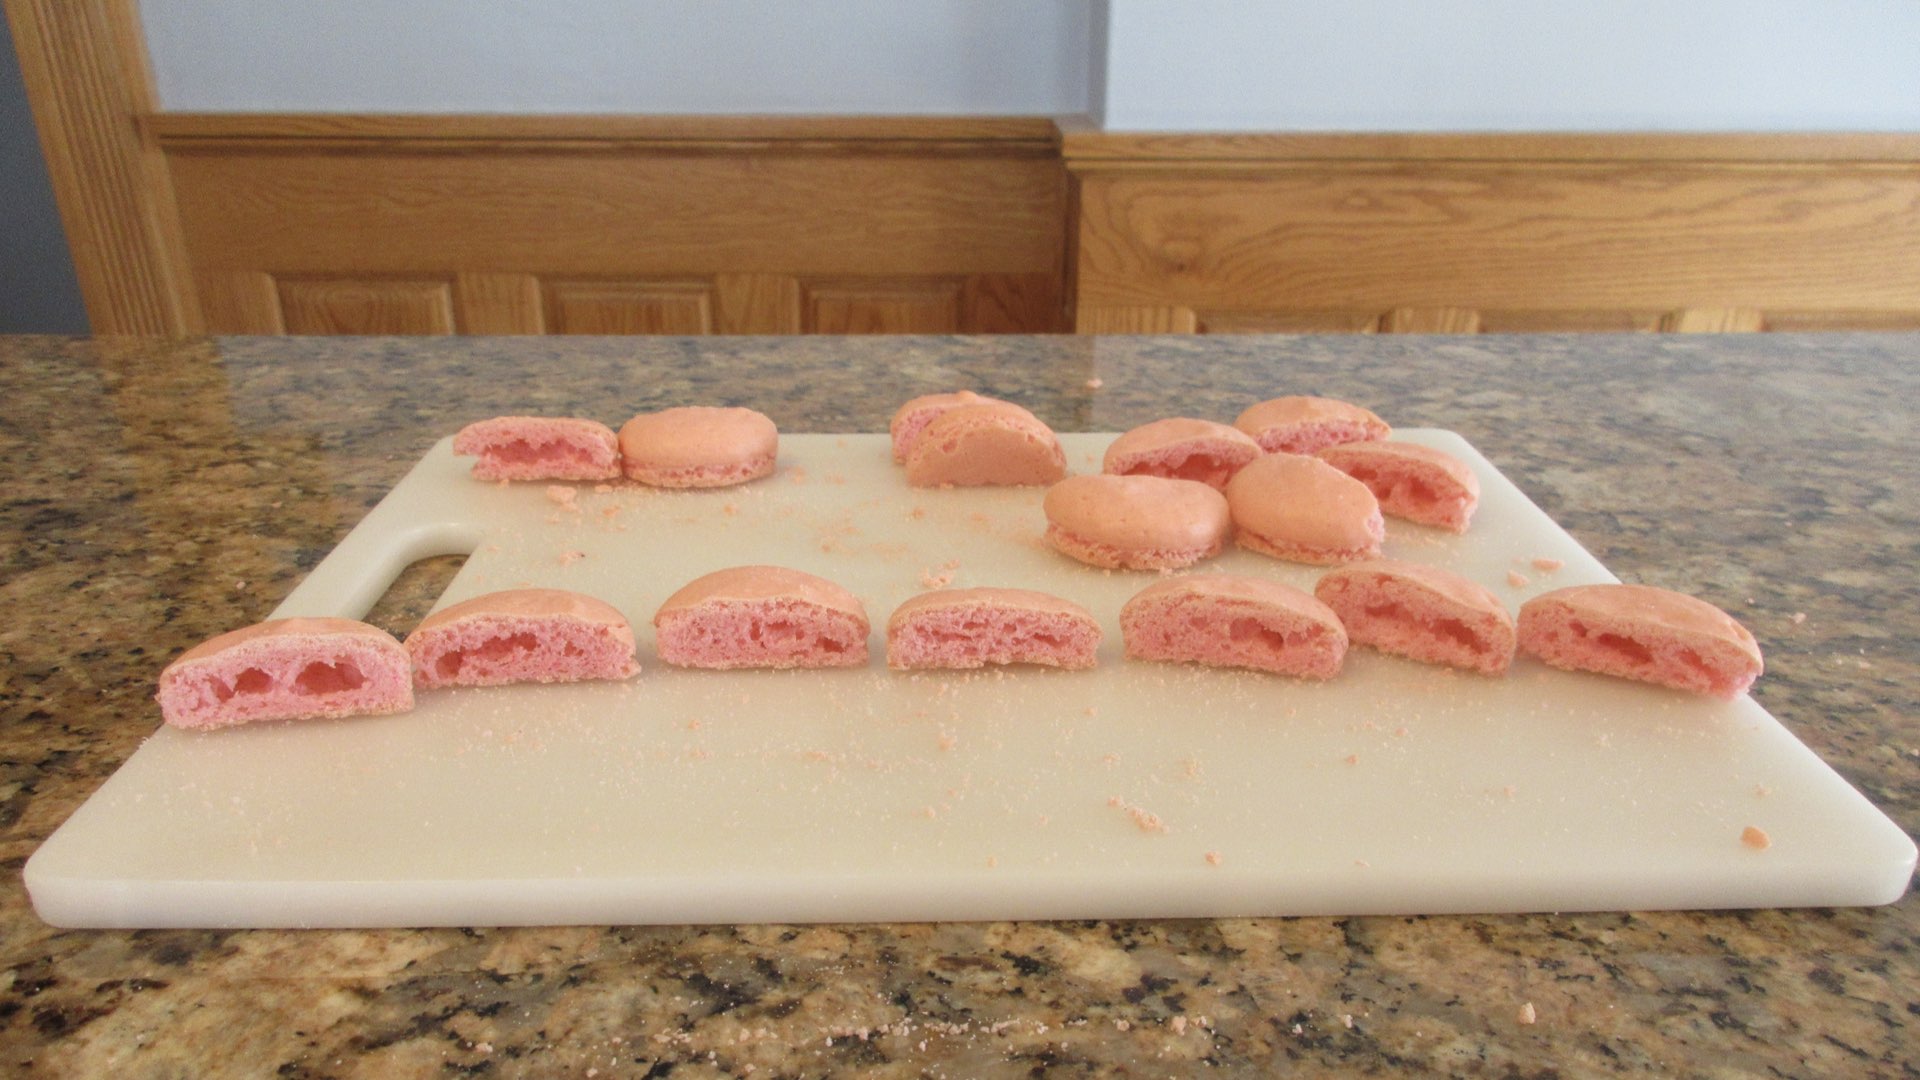
Macarons Baked at Various Positions in the Oven
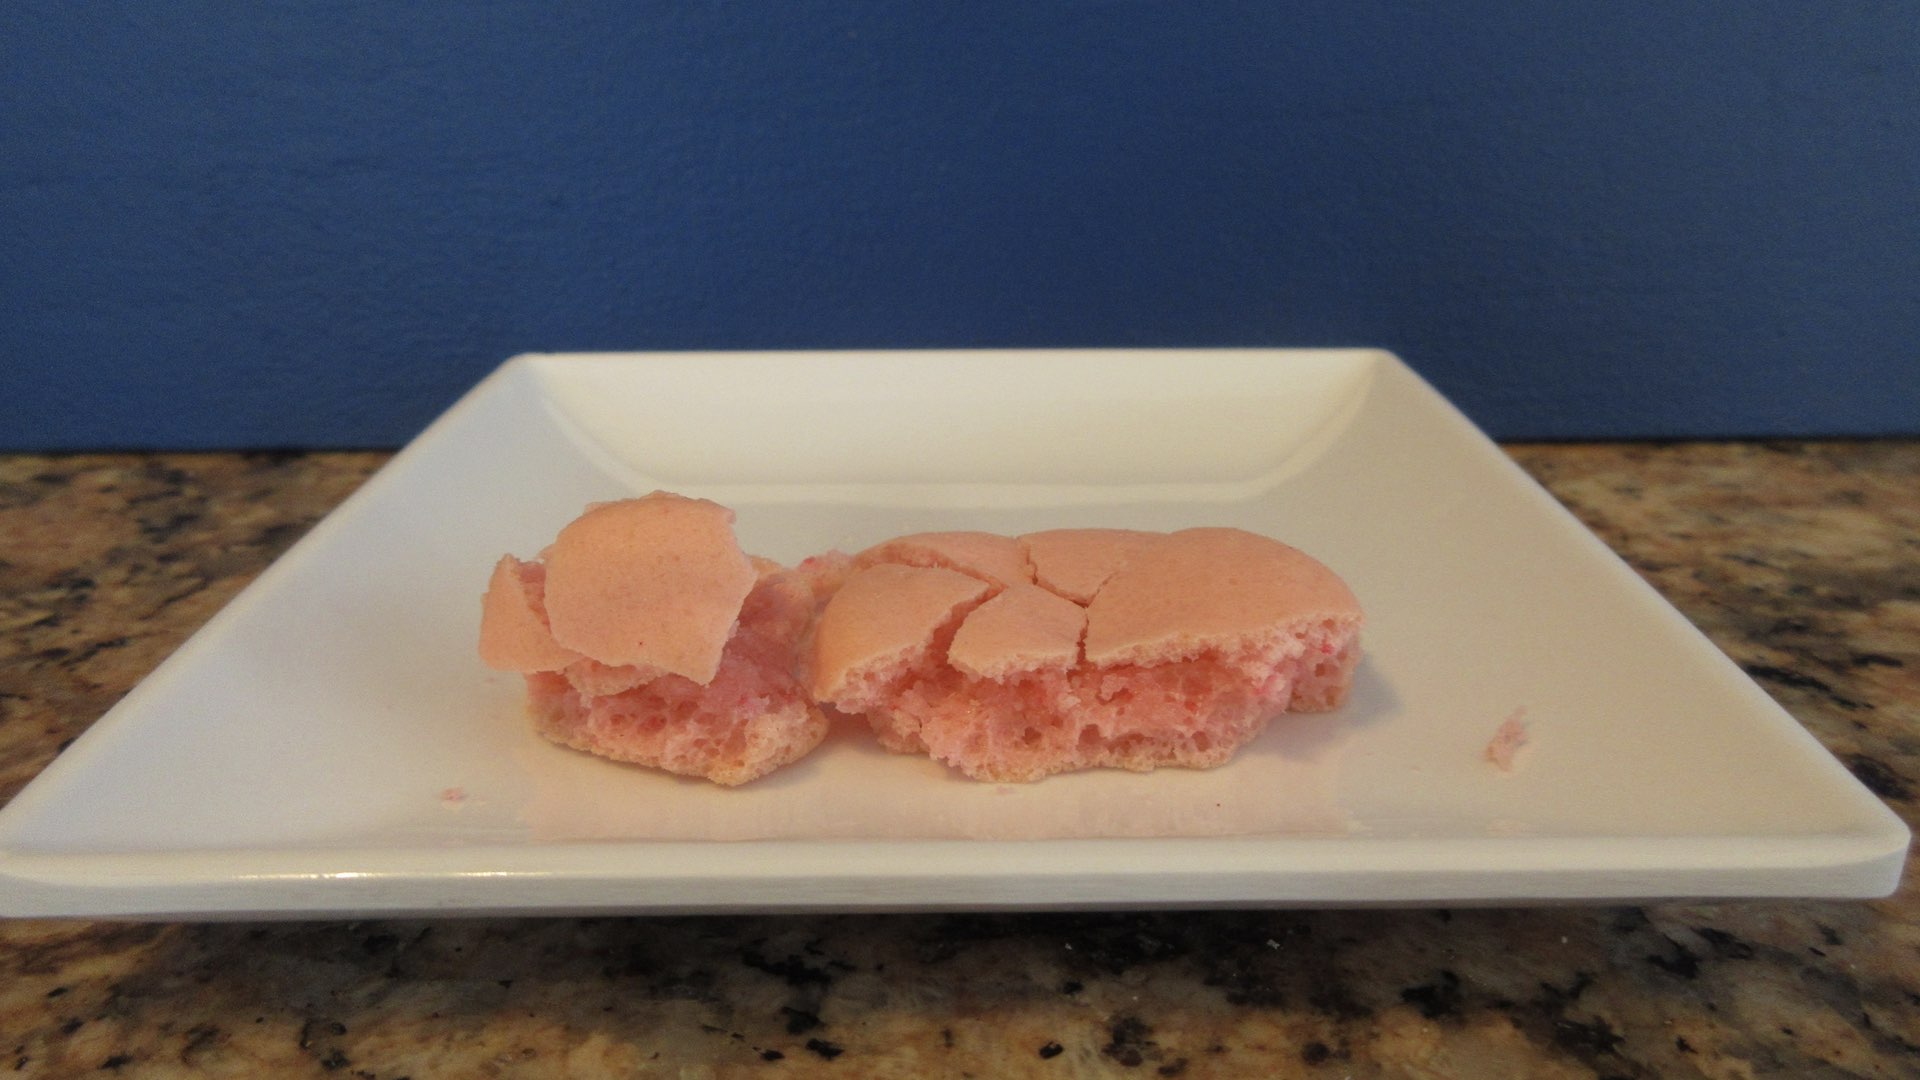
The results were somewhat less surprising. The only main difference was color in relation to position in the oven and it wasn’t really drastic. If you look at the third row below, you’ll see the gradient affect that was happening. The further from the top rack, the more lovely the color. After numerous tests and batches, we really liked the results of the center and position #5 for the best results. The third rack started to show a difference that wasn’t as preferable. The coloring was washed out and the shell was a bit more crisp. But the insides were well baked and it tasted great.
Rack Positions #1, #2 and #6 weren’t as pleasing in comparison. The top and bottom had gaps or hollow sections in the center and the shells weren’t exactly right. They were more brittle and not as pleasing. The macarons in the two positions were a bit too brown and the bottom was a bit thin. They tasted great if you weren’t comparing them to the others. They were also surprisingly a bit hollow where this wasn’t noticed in the middle racks. You can see more detail in the video.
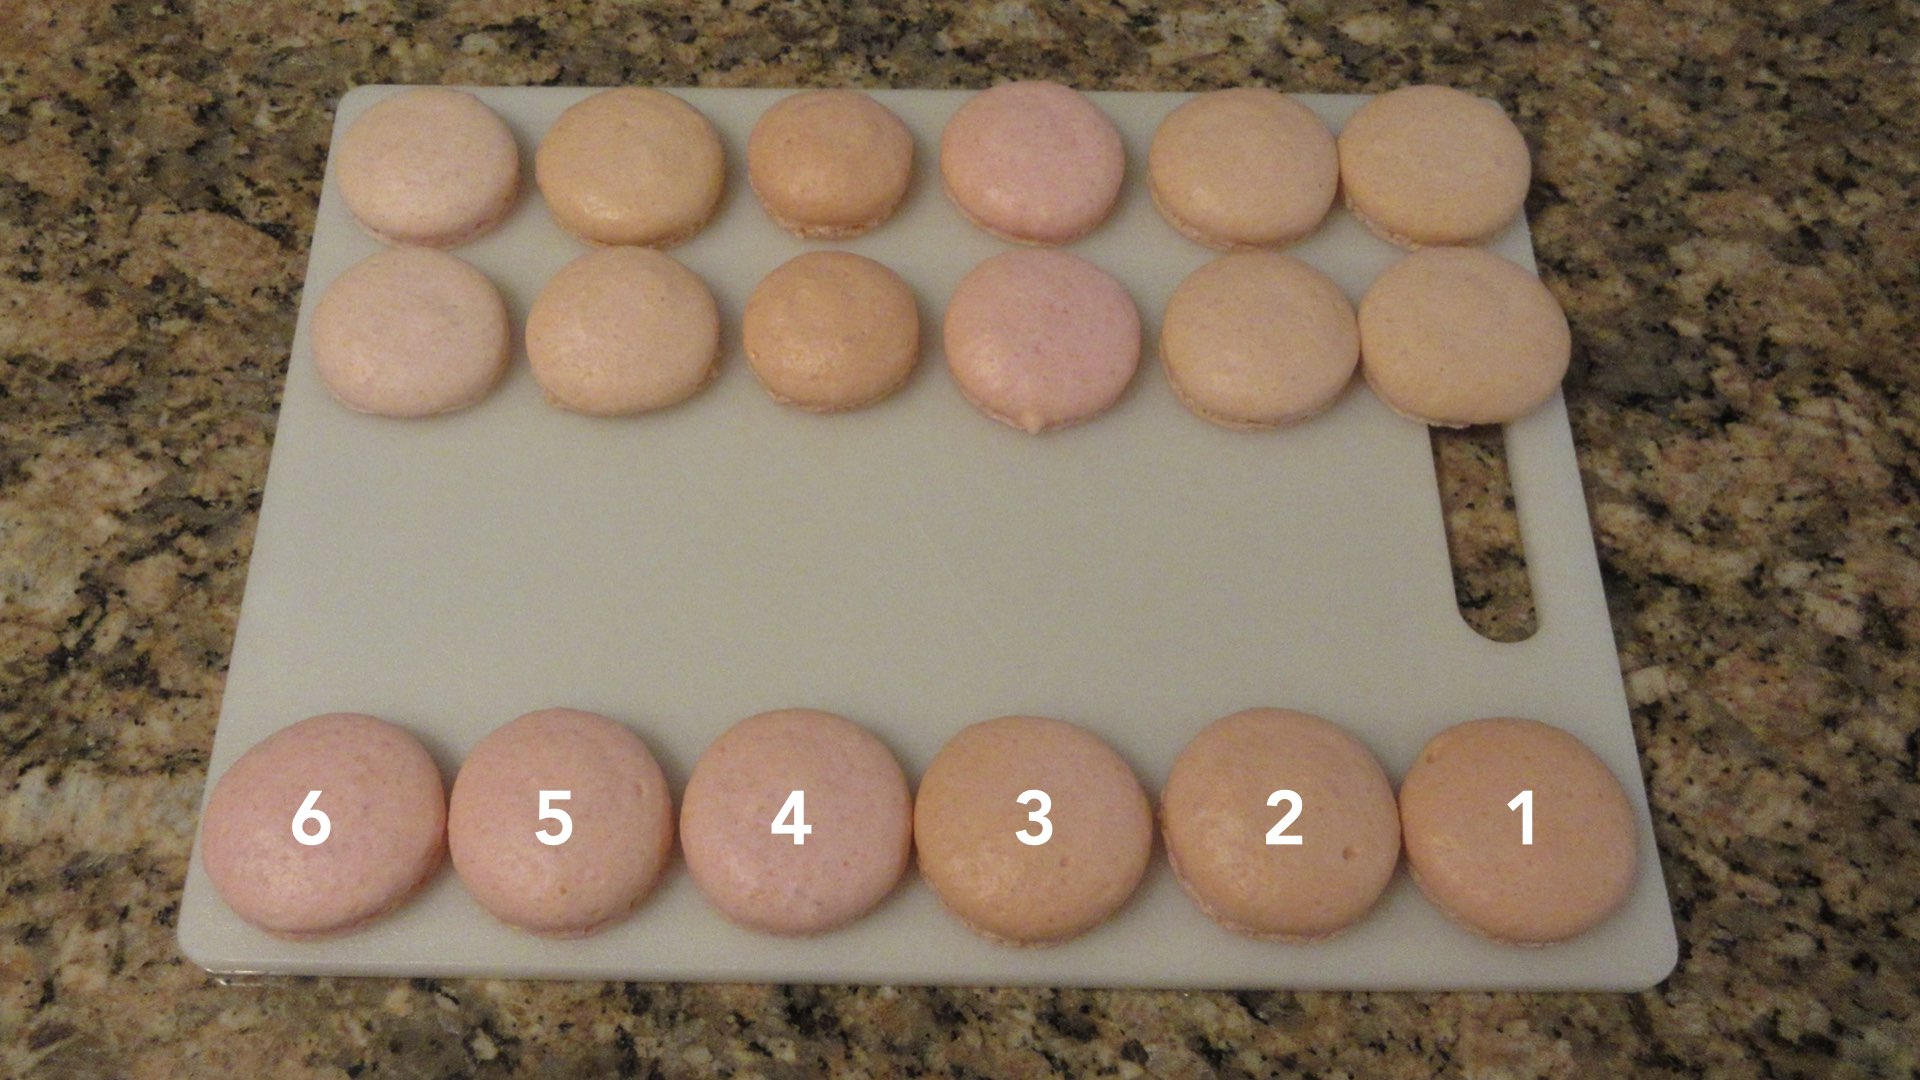
Once they were all broken apart, you really couldn’t tell one from the other if you were a novice, never made a macaron before and just wanted to enjoy a treat. So always keep it in perspective when trying to perfect these cookies. Most of them will taste wonderful to the person receiving them and they aren’t concerned about the nuances.
Macarons Baked after Doing an Oven Dry
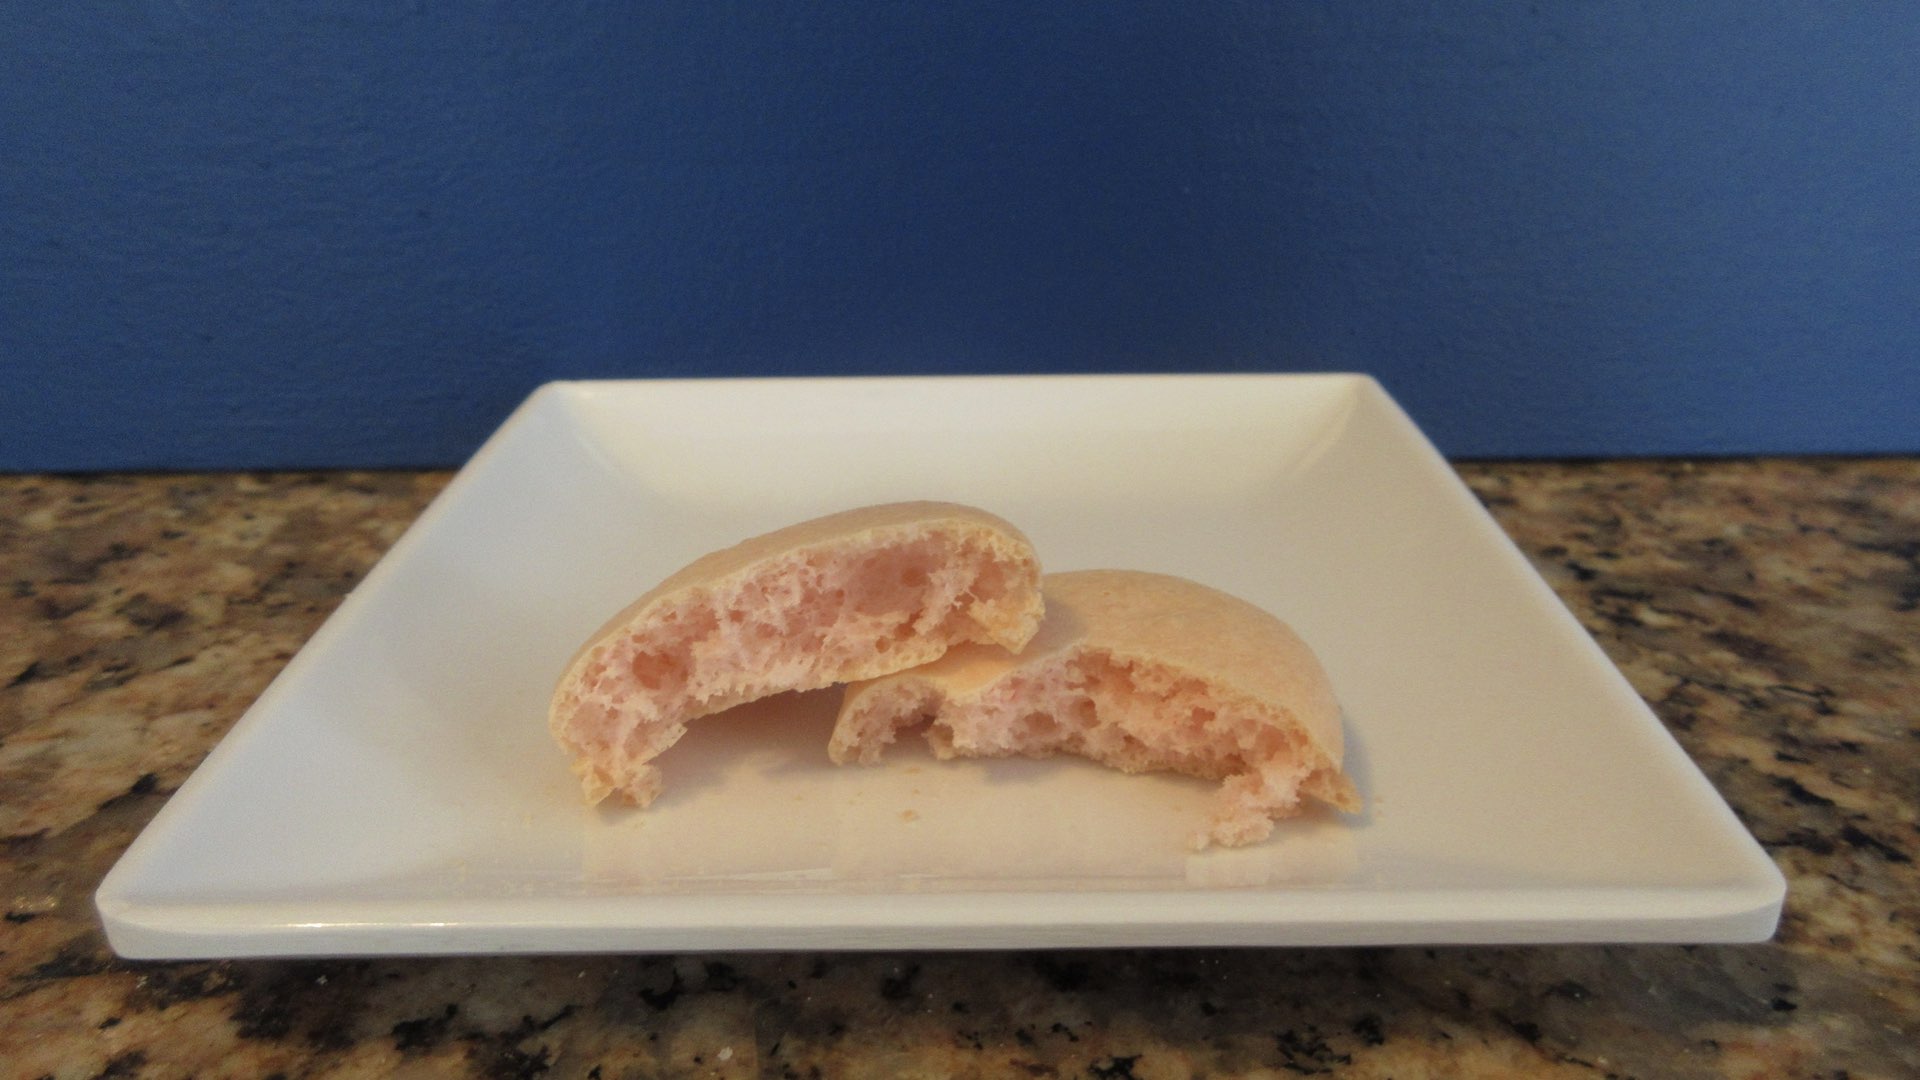
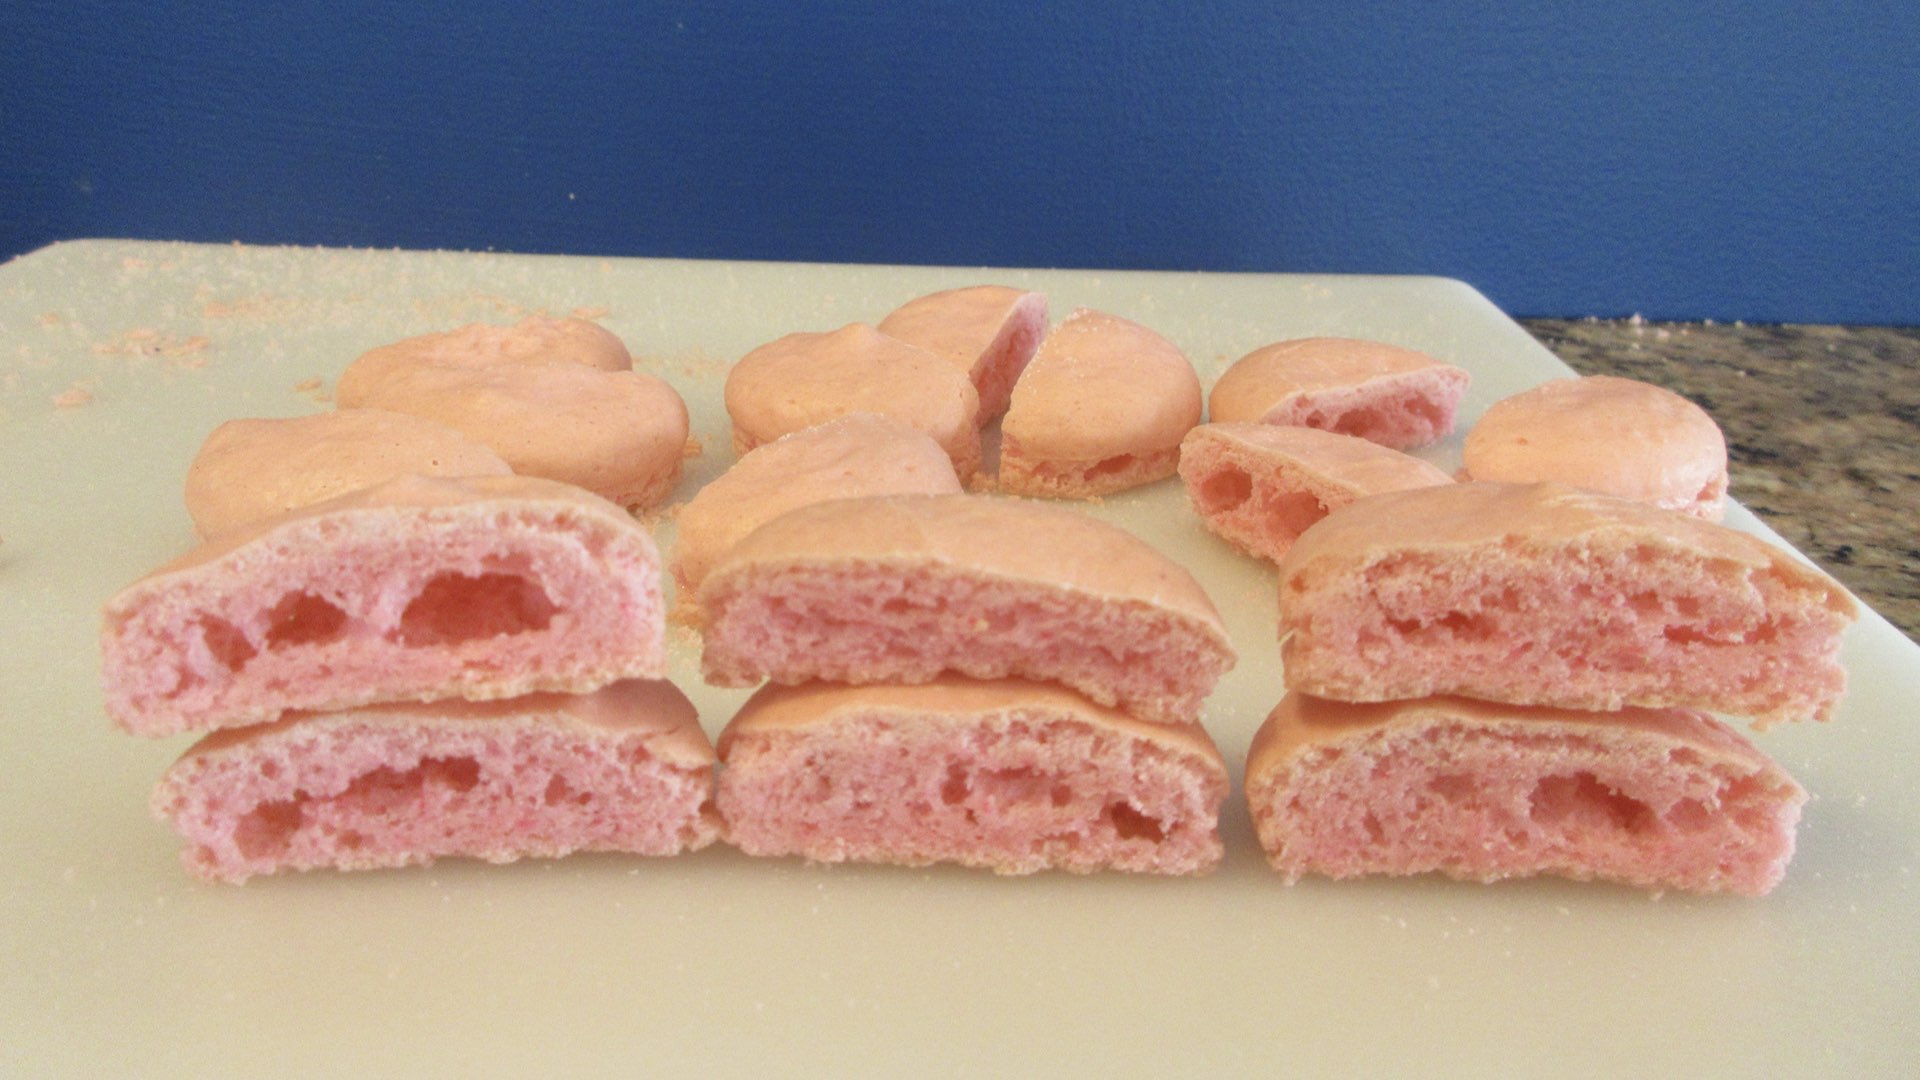
There is a bit of a caveat we want to point out with the last two “experimenting with macarons” trials. We came into these a bit biased and weren’t expecting good results from our months of learning how to bake macarons many years ago. So this could have clouded our judgment. With that being said, the end results were not too shocking from our years of making macarons. The tops were more shiny and the feet looked excellent during the oven drying. They are the ones on the top row.
We wanted to take a photo of the three to compare the coloring of the dye and see if the position of the oven rack had a factor to play. It did! They had the exact same results regardless of the method we used. Oven drying (top row), No rest method (second row) and oven rack position (bottom row) all produced the same shades of macarons in regards to placement. The oven dried didn’t show any more saturation than the others when it came to using cheaper food coloring. Could it with more expensive varieties? Perhaps. That’s for another day.
The insides were somewhat peculiar. The texture was softer/gooey and not chewy like expected. There was some pockets of air in the middle that formed a hollow section. Could this be due to the short baking time and not the method? We think perhaps so. This is where our experiments are limited and not scientific. If money were no option, we’d explore this method further.
Meringues tend to expand and then set when fully baked. If not, they are prone to collapsing and creating air pockets. We saw this in every one of these macarons. So we may try this one again with a longer bake time when we have the money to buy more supplies. In the meantime, I encourage you to explore this option. Let me know your results if you do!

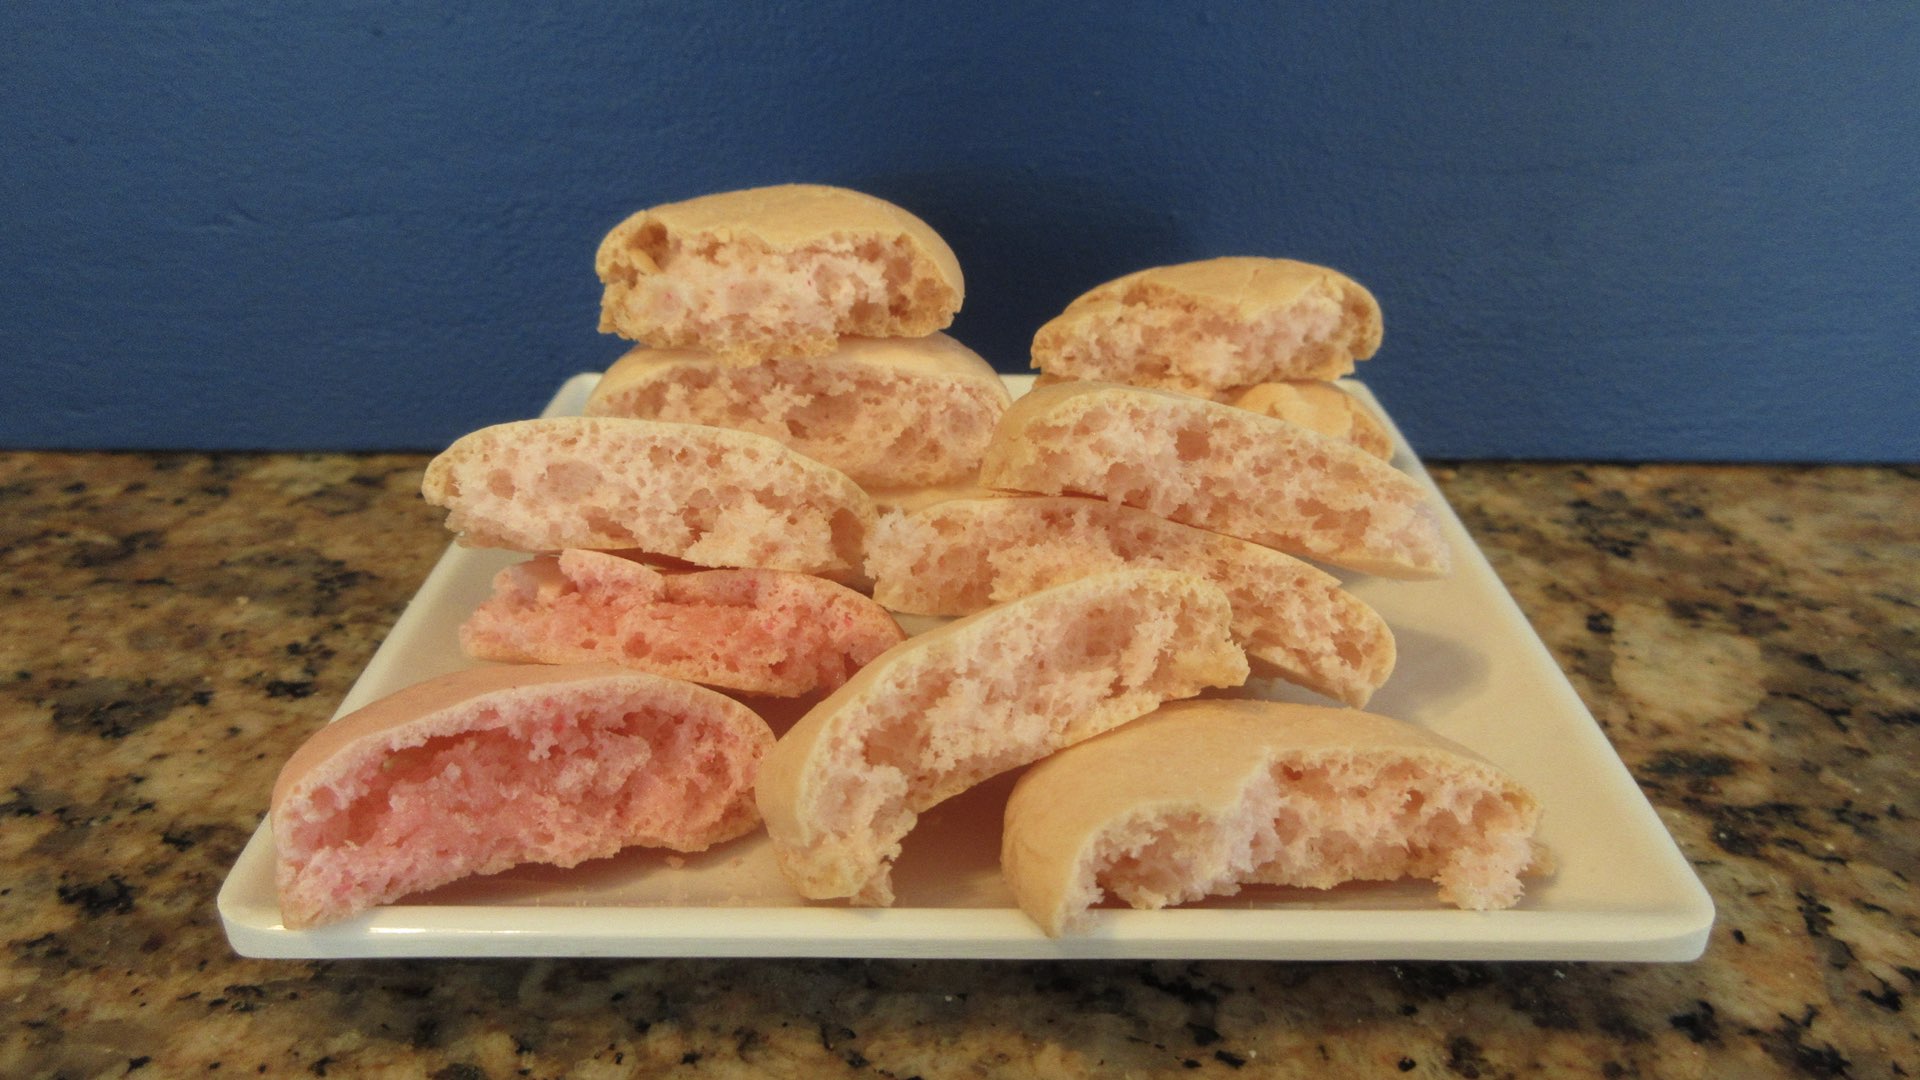
Baked Macarons with the “No Rest Method” Using a Hot Oven
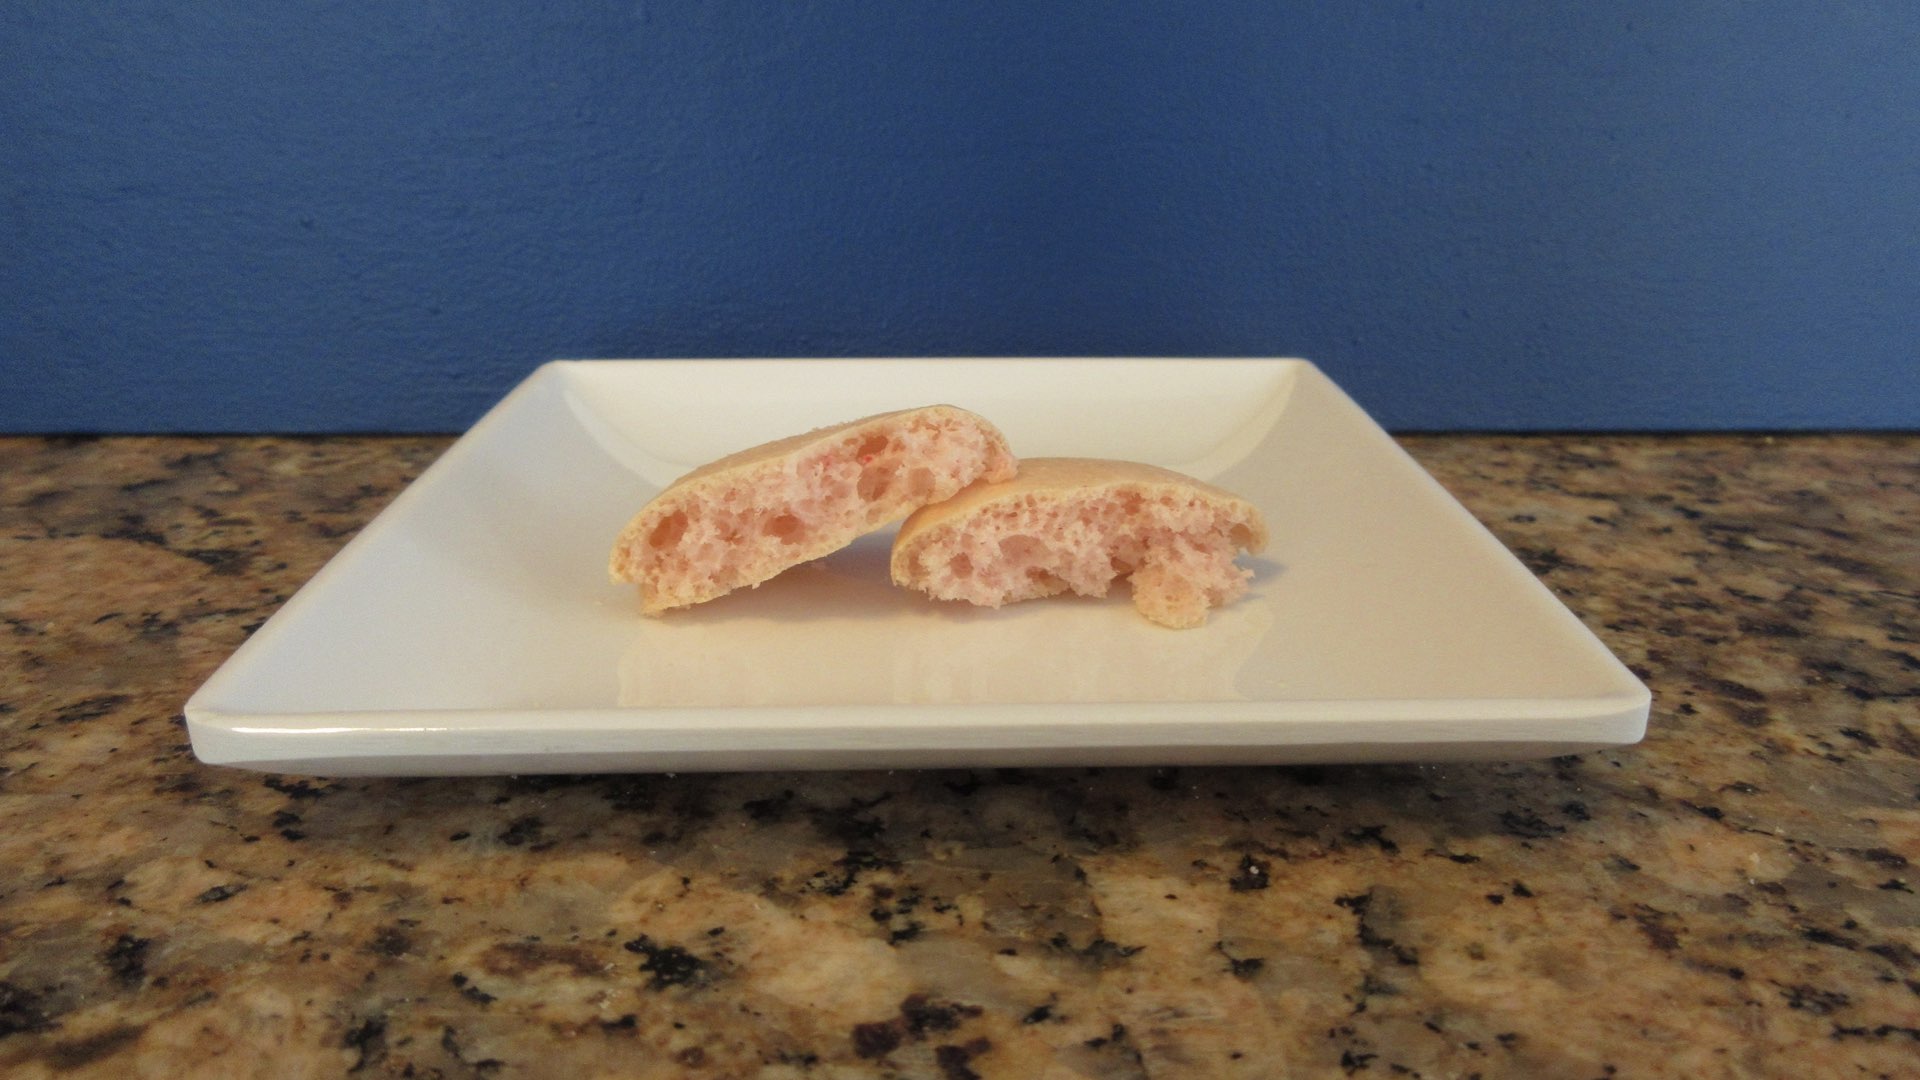
The results were…the same? Yes, you are looking at very similar macarons. In fact, it’s the same photo because I was comparing color differences The second row from the top of the cutting board shows macarons without resting using a hot oven. Mainly, small and lopsided feet. Places where there are no feet at all. The color variation doesn’t surprise us at this point as it’s been consistent with the previous rack positions. The insides were more impressive than the oven dried macarons. The ones in the center position had nice full shells with only a few air pockets here and there. The ones in the top two and bottom positions had similar results to the others. A bit hollow in the center and different textures on the shell and interior. But still pretty tasty! They just didn’t look so pretty.
Macarons Baked Where the Meringue was Whipped at Different Speeds
The results of this experiment was really fun! The higher we cranked that mixer, the more air bubbles we got in the end result. But we also got more height to the macaron and pretty feet. We’ve since decided we may trade off a few air-pockets for a nice perky looking pair of feet. How would you feel about this exchange?
Take a closer look. The turbos had some massive air holes and we definitely want to avoid those higher speeds on our machine, but the medium low speeds didn’t really have the same affect and had some really nice feet. We didn’t mind a few bubbles. We are going to experiment more with this on our own soon.
Final Thoughts
We have decided there are things you can always try that will improve your macaron and general baking skills. We encourage you as a baker to do your own experimenting with macarons. You will learn how to improve your shells, get various results and really learn your oven along the way. It is such a process learning how to perfect these little delicacies. Why not have a little enjoyment along the way? And if you want to have a little fun experimenting with macarons and other recipes, be sure to follow our little community on youtube. We have a great group of individuals over there that just love tinkering around in the kitchen, creating recipes and sharing new techniques and ideas.
0 Comments