
Learning How to Macaronage Can Be Easy!
Learning how to macaronage is one of the hardest parts of creating the excellent macaron. After finding a great macaron recipe you may still be struggling with the macaronage stage. We have created this tutorial at the request of a viewer to help beginners understand the process just a little more. We hope it helps you! Feel free to ask questions if you are still struggling as we want you to be successful in conquering the “world’s most difficult cookie.”
What does it mean to macaronage? Would you believe me if I told you the word macaronage is nothing more than a made up word to explain combining the meringue with dry ingredients? What if we did as the French and simply said “plier” (pronounced plea yay) which translates to fold? Wouldn’t it be much easier to understand if we said “Fold in the dry ingredients into the meringue. Then deflate some of the batter until it becomes shiny, ribbons off the spatula and is self leveling?”
If you’ve ever made an angel food cake, you want to keep in all the air possible that you created with your meringue. This allows the cake to expand, become airy and stand tall. However, when you macaronage, you want to deflate some of that air, but not all of it. You want to deflate just enough so the shells don’t puff up and crack in the middle. Instead, you want a full, smooth and shiny shell that cracks along the bottom edge and creates a ruffle or “feet.” You don’t want to deflate the meringue so much that it becomes liquid, puddles out onto the baking tray and results in an empty shell. It’s a little complicated sounding, isn’t it? It is. But don’t worry, once you learn how, it’s like riding a bike. You never fully forget!
How long does it take to take to macaronage? This depends. If you are a pro? A minute or so. But if you are new? Take your time, especially when you start seeing the batter turning from a matte finish to shiny. Prepare to set aside a good solid 15 minutes for this process.
Step-By-Step Instructions
Let’s go over the steps on how to macaronage one at a time. Some of this you may have heard before, but we don’t know that. So we are going to speak as if this is new to you. We will go over the details with some written tips and photographs along the way.
Step 1: Start with a Good Meringue
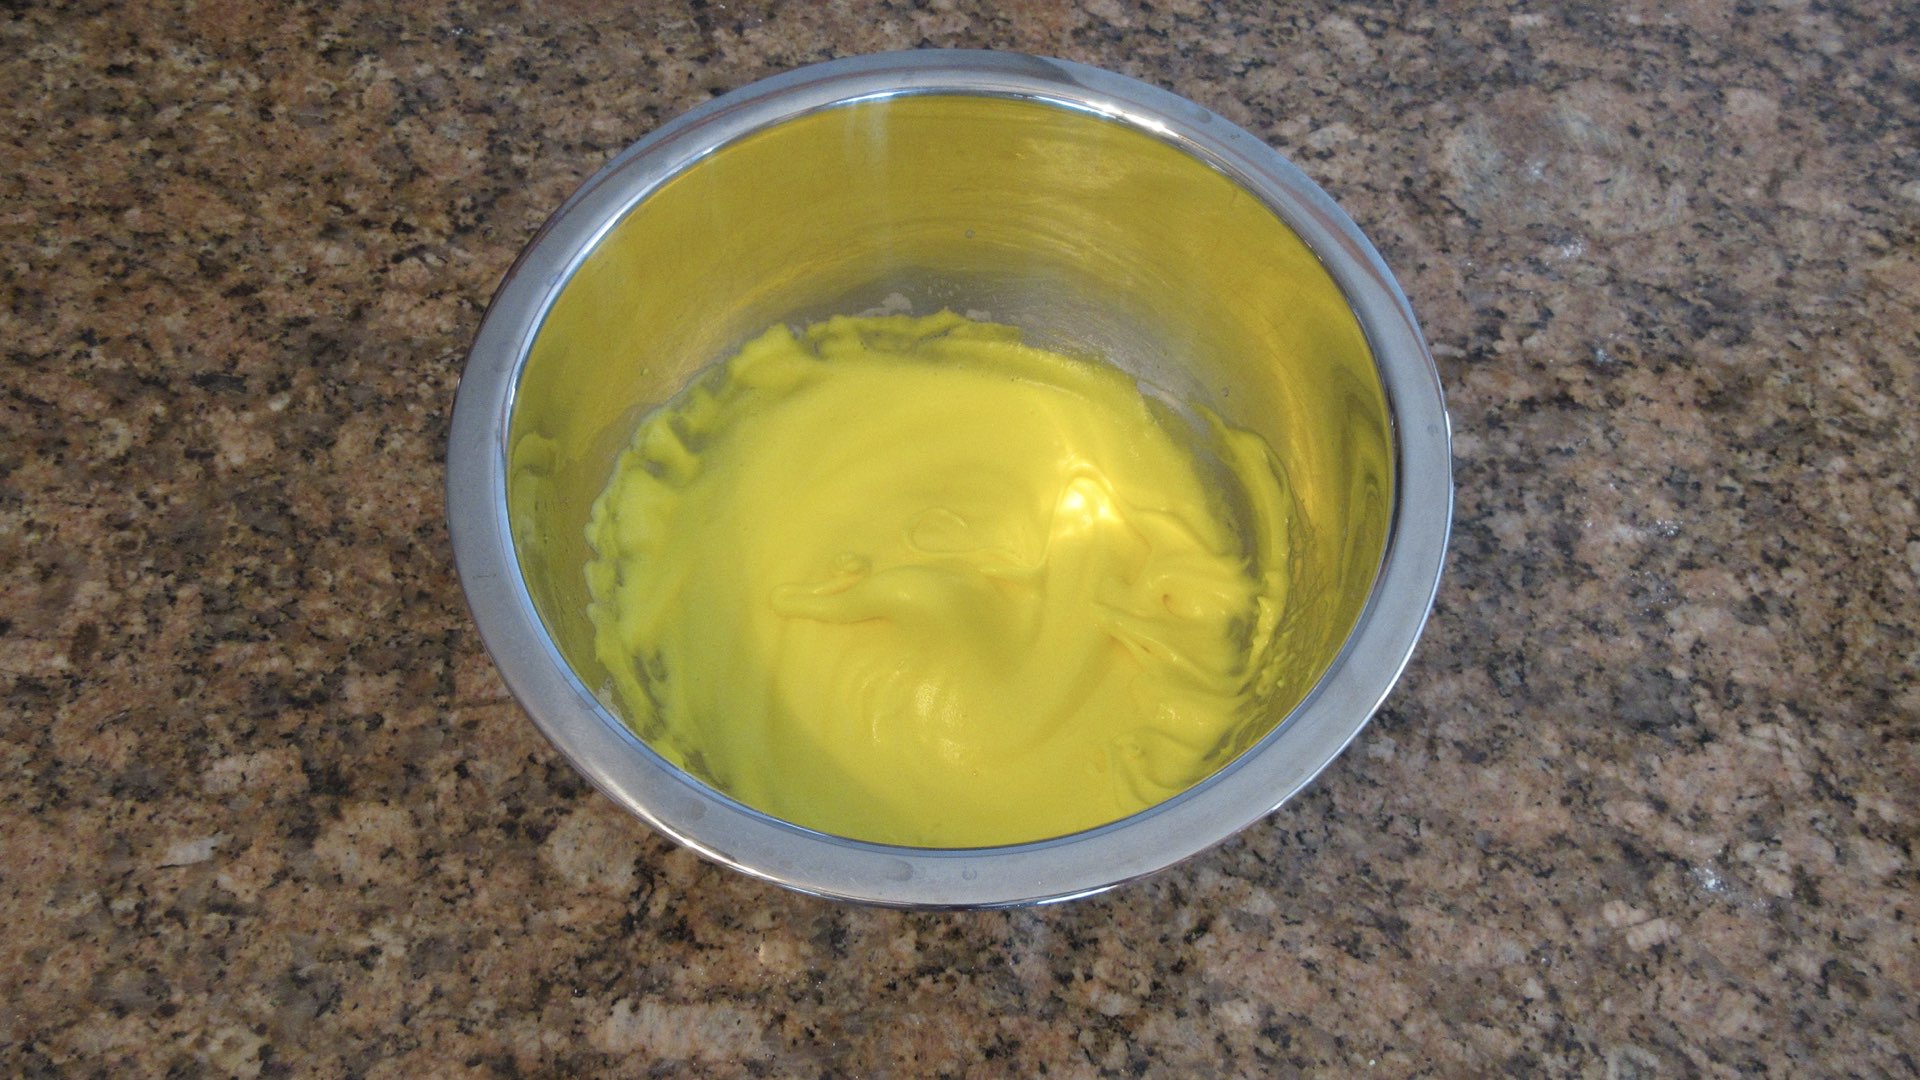
Your macarons should always start with a good solid meringue. We recommend a soft peak that curls back into the batter. We have found over the years of making macarons that a softer meringue works great for our recipe. You can read more about our process here. But essentially, softer french meringues will “grow” in the oven and expand, filling out the shell. A soft meringue can fill in small little errors along the way. Stiff meringues are at their full potential, they don’t really expand in the oven but rather “set” or even collapse. Deflate the batter a little too much and you are for certain ending up with hollow shells and very sad macarons.
Always beat your meringue at a lower speed to avoid gaps. Yes, this takes longer but a slowly whipped meringue will result in tighter structure and less air pockets in your batter. Beating at a high speed leads to an unstable meringue which can cause the meringue to collapse or gap as it it rises in the oven. This is important when using the french meringue method and but isn’t so vital when you use heated meringues. Heated meringues are full of copious amounts of sugar. Both the heat and excess sugar makes a sturdy meringue. But they also make an incredibly cloy macaron. They are often too sweet to enjoy without a very tart filling. That’s one of the reasons why we prefer the classic method that uses a more delicate french meringue.
Step 2: Sift that Powdered Sugar and Almond Flour – A Lot
Always, always take the time to sift your powdered sugar and almond flour together. Several times if possible. It will break up the clumps and really combine the almond flour and sugar together. This helps the macaronage process go smoothly. This is especially important in humid climates as both almond flour and powdered sugar will absorb the moisture in the air. This actions causes clumps to form quickly.
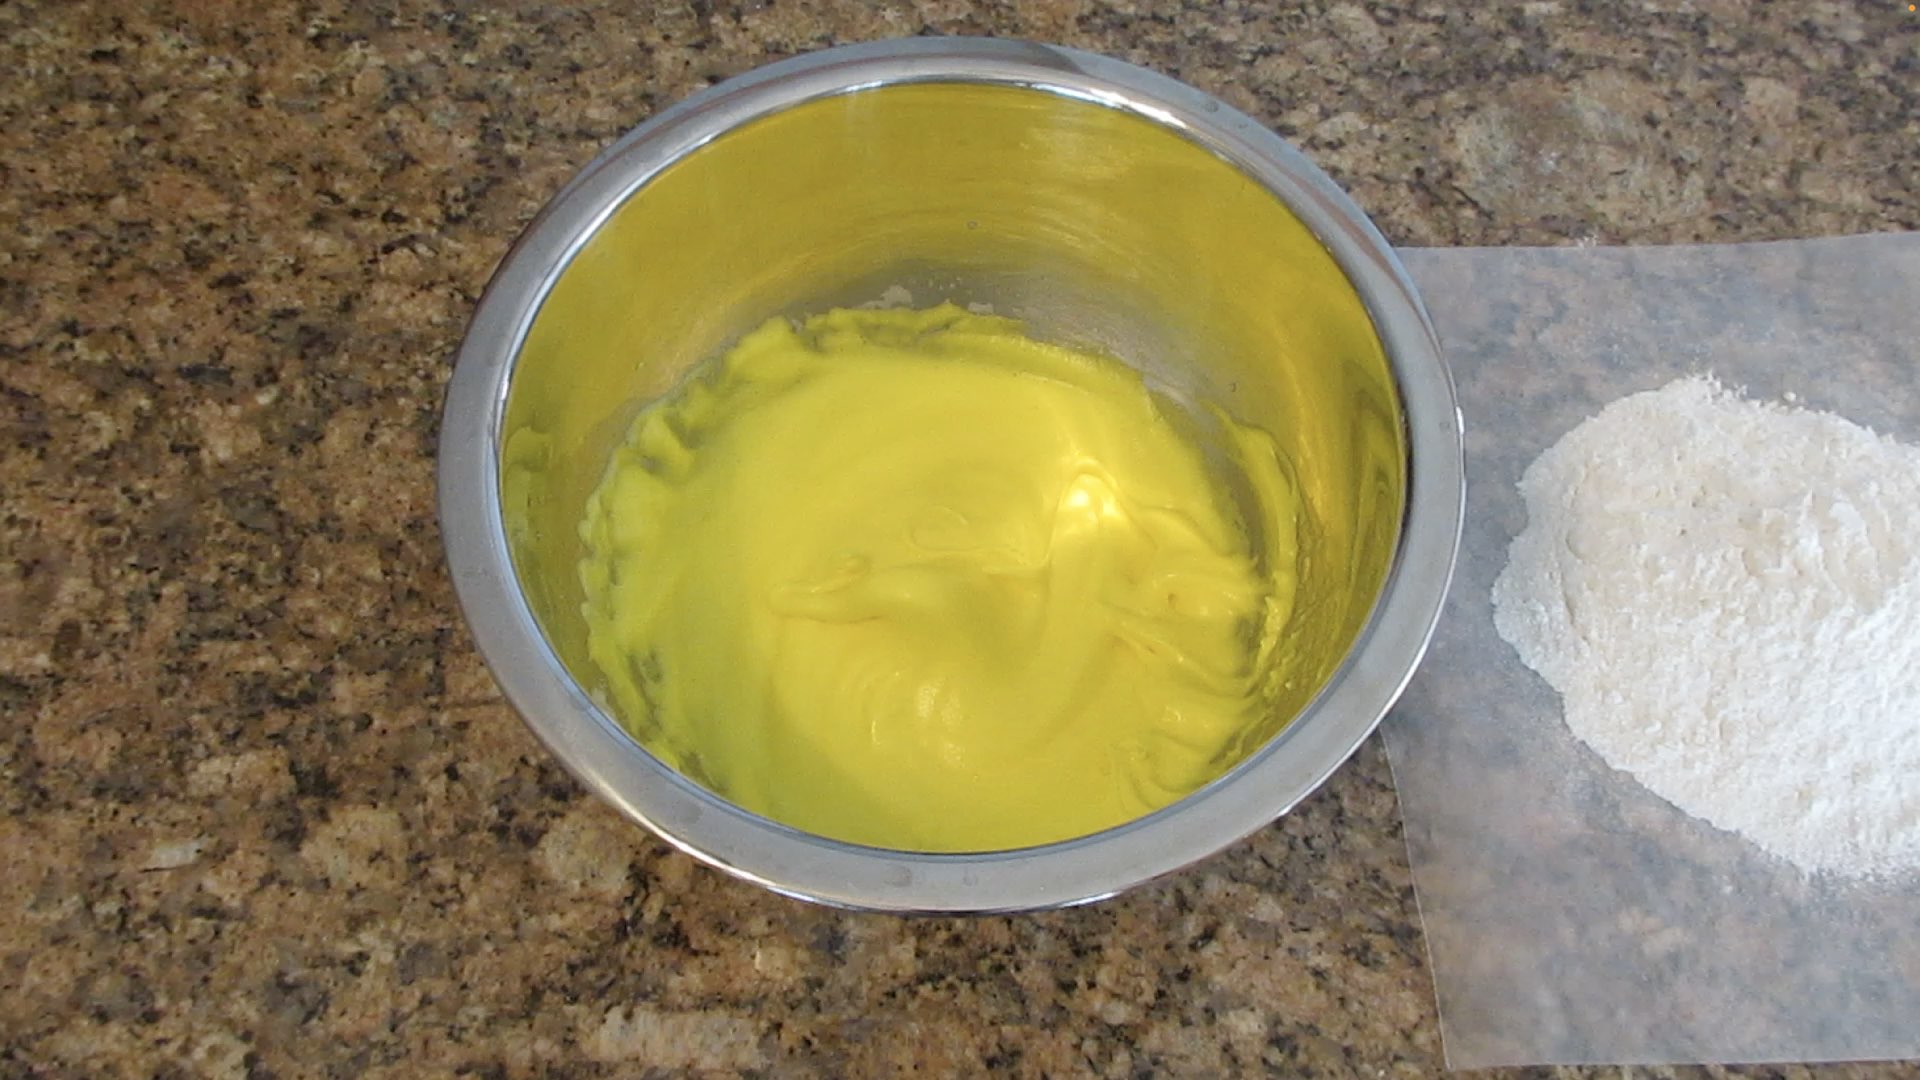
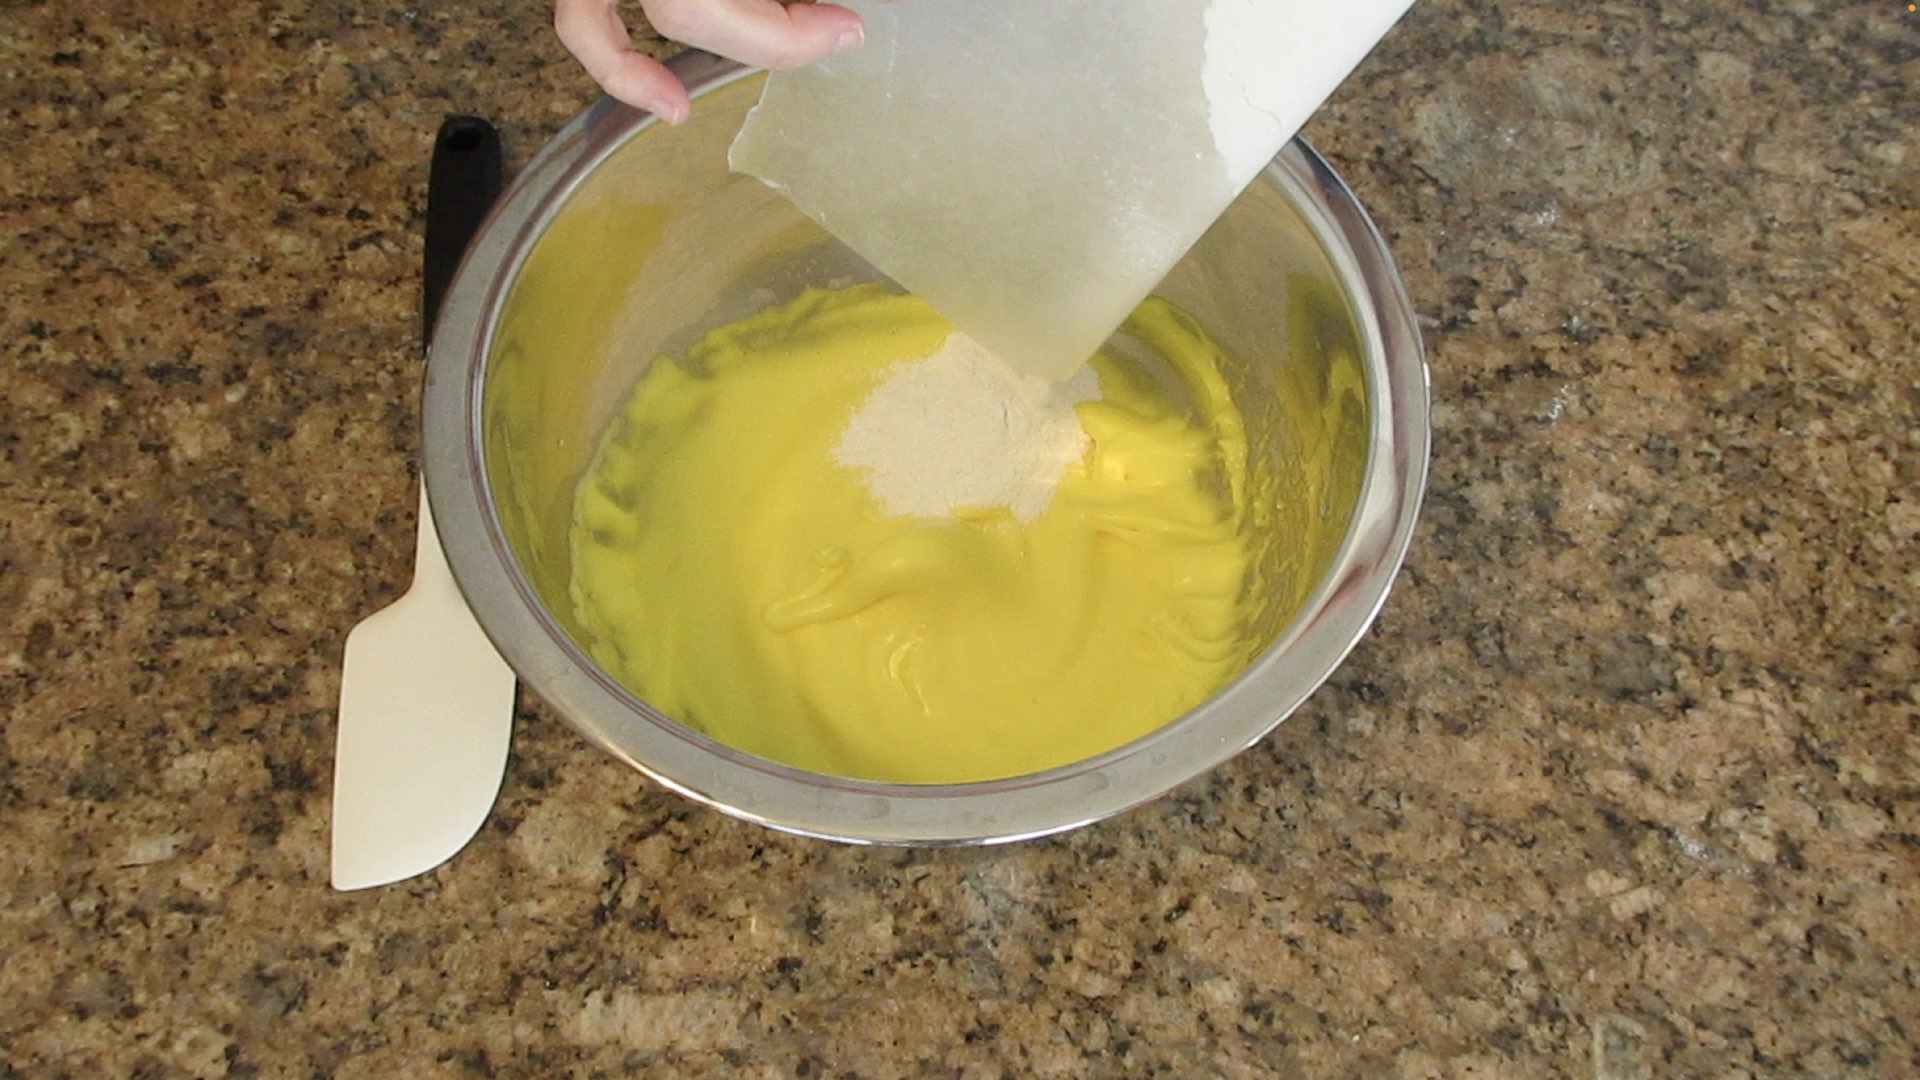
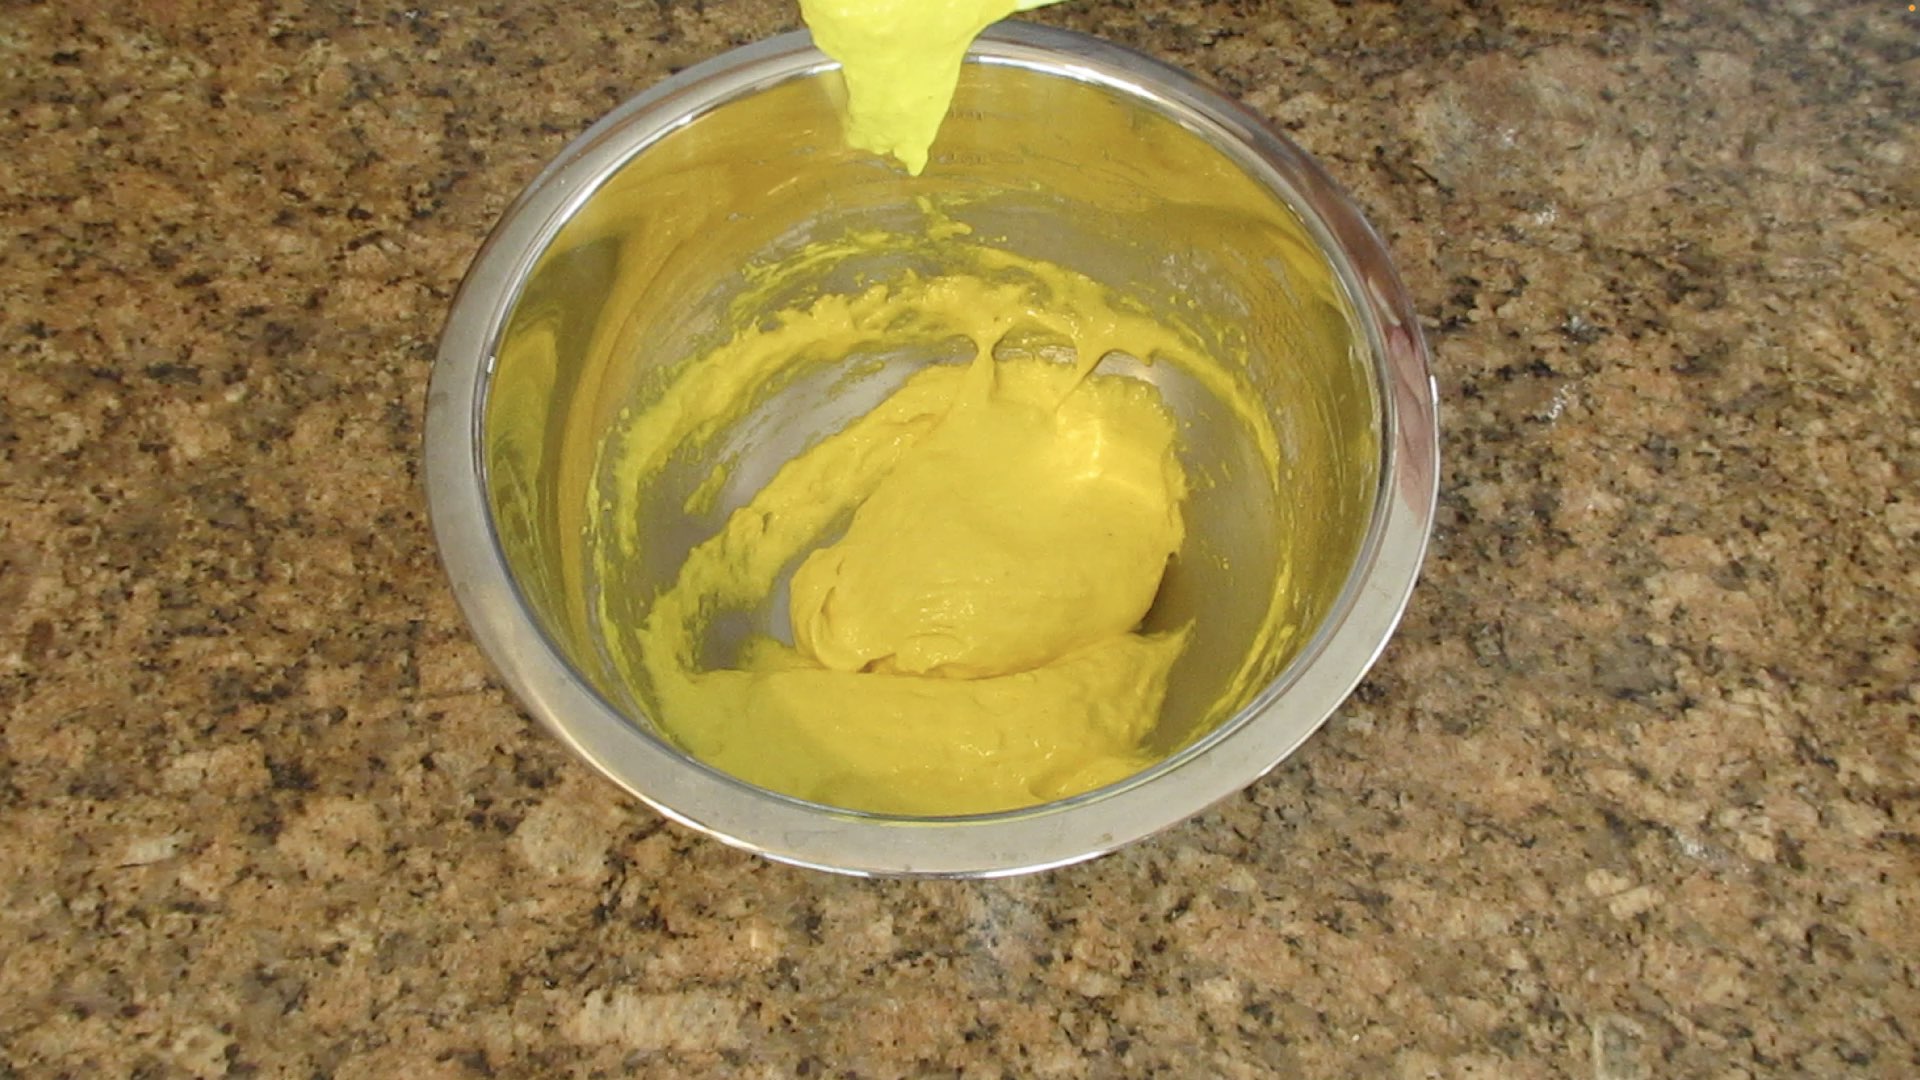
After sifting, we add the dry ingredients to the meringue. For smaller amounts of dry ingredients, (2 1/2 cups or 300 grams or less) we like to add it all at once. For larger amounts, we split it into half, thirds or even quarters to avoid deflating the meringue too quickly. This will take practice on your part to determine what suits you best.
Step 3: Begin to Macaronage or Fold the Batter
To macaronage, start by scraping around the outside of the bowl and then cutting the spatula through the middle. Scrape along the bottom of the bowl and flip the meringue upside down on occasion to reveal any dry ingredients not yet combined. From time to time, scrape the excess batter off your spatula to make the folding process easier and to avoid deflating too much air. Continue to fold gently until all the almond flour and powdered sugar is absorbed into the meringue.
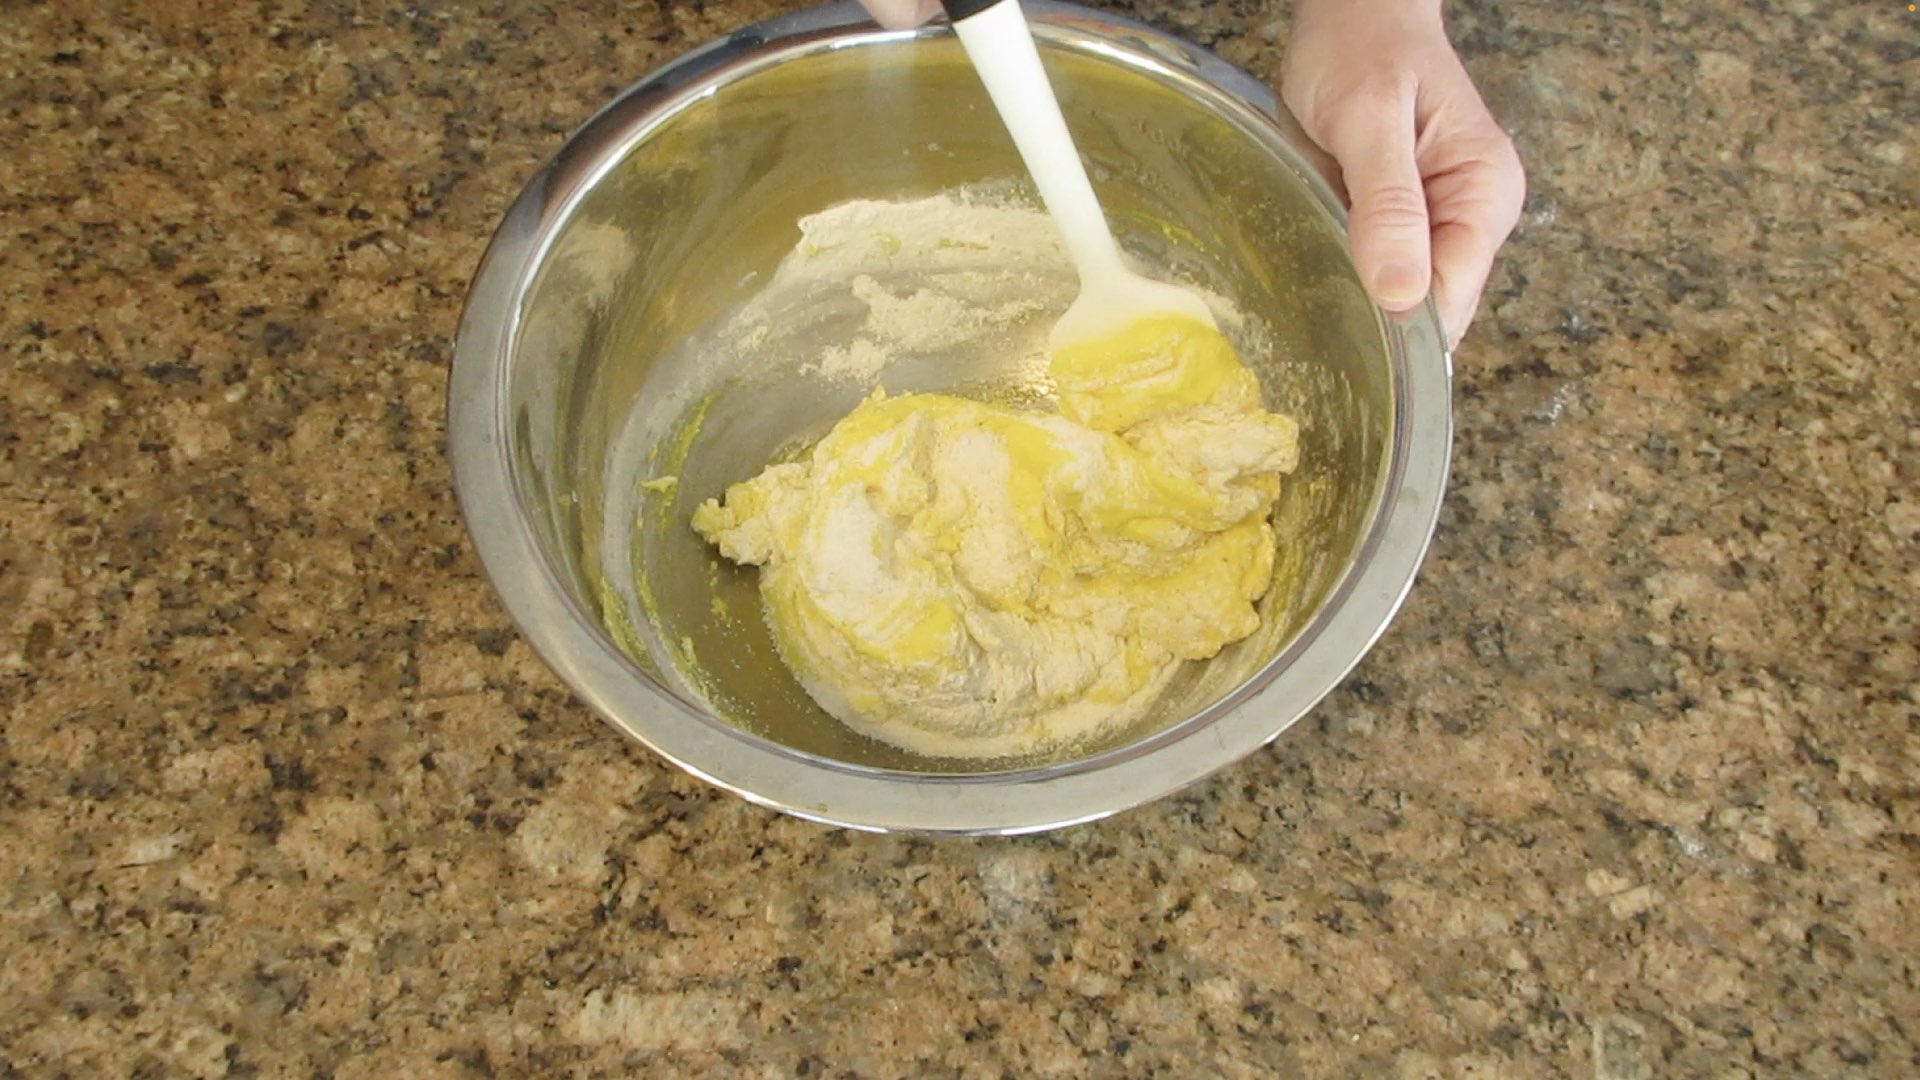
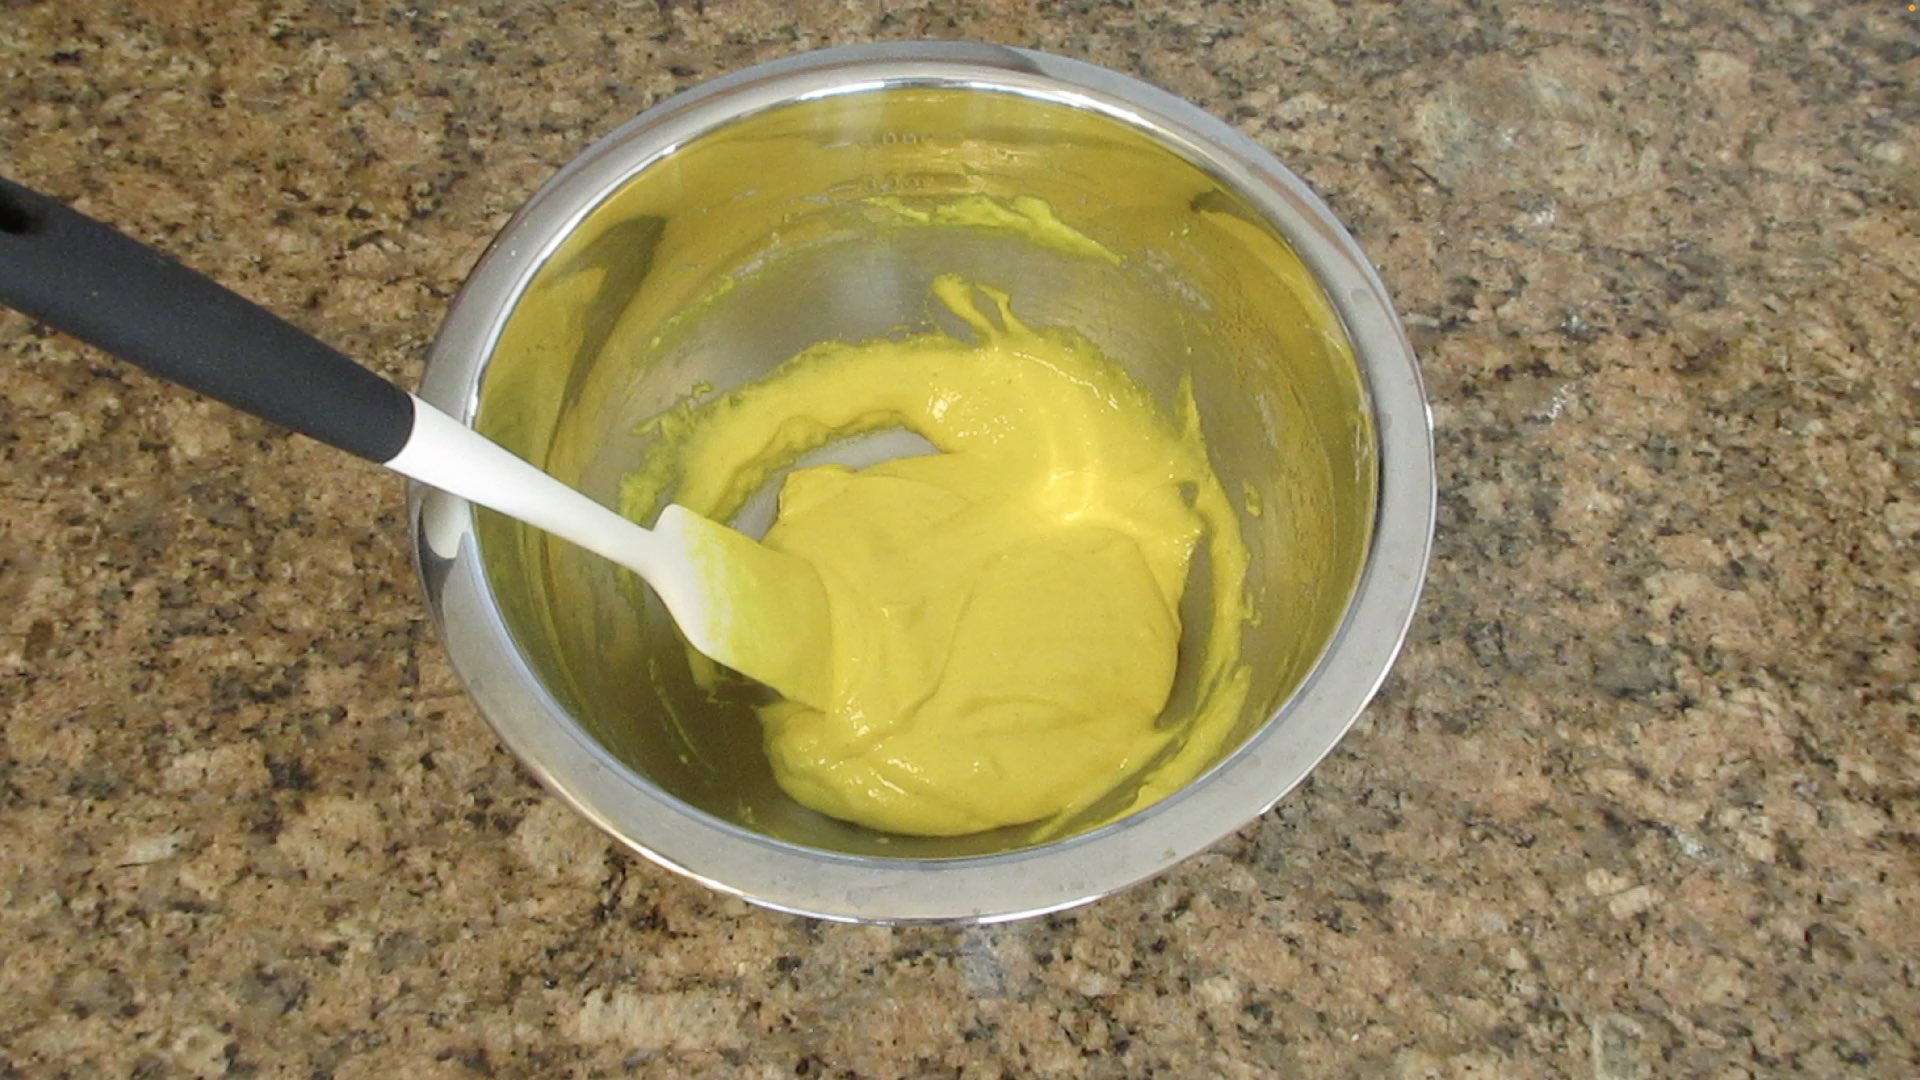
At this stage, the batter will be quite thick. If you lift your spatula, the batter will either cling tightly, or some will drop off in a lump or drip down into a v shape but still want to stay with the spatula. If any drops onto the batter, it stays there and doesn’t sink into the mixture. The mixture also stays put and isn’t fluid. At this stage we want to deflate some of the air in the meringue.
First, you scrape along the outside, then you cut through the middle as before. However, as you pull the batter along the middle, you press it up against the side wall with a little pressure to deflate some of the air. You repeat this process over and over until the batter turns shiny, levels in on itself and is smooth.
But let’s really slow this down a little and look after just a few turns or even just one turn. As beginners to the world of macarons, I recommend the slow and steady technique. With each and every fold, take time to observe the batter. Does it move or is it staying in place? It should start flowing like soft serve ice cream and then lava when it’s ready. If it’s speedily moving like hot syrup, you have deflated too much air.
Lift the spatula. Does the batter cling to it? Drop off in a clump? Drip slowly? Ribbon off? Or slip off? You want it to ribbon off gracefully, but still cling a little in the end.
Observe the batter that came off the spatula. Is it sitting on top and not moving? What if is it slowly moving, but not leveling off? Is the batter leveling? Is it quickly leveling off, flowing fast and looking like melted ice cream? You want it to slowly level or even just be slightly above level and settle with a tap or two on the bottom of the bowl. If you are piping shapes? You want it to be even more resistant to settling.
I strongly recommend deflating some batter with one fold, lifting the spatula, observing the batter that falls off and just watch the batter in the bowl for 30 seconds. Look for signs that it is ready. The batter should be slowly moving and settling into the bowl, the batter that came off your spatula should be shiny and ribbon off slowly but freely and it should start to settle in nicely and level off or nearly level off.
Some will tell you to make the letter 8 with your batter or it should sink in quickly. Please don’t do this! By the time you transfer it into your piping bag the batter is now too deflated and you will end up with thin hollow shells that are full of broken promises and dreams. Don’t make yourself sad. When it comes to the process of making macarons, a slightly under-mixed macaron is very lovely to look at, has the right texture and taste. Under-mixed macarons should be your goal as a beginner. That way you get to enjoy what they are supposed to taste like and you can work your way up to perfecting the right amount of turns needed for you to have the best looking macaron.
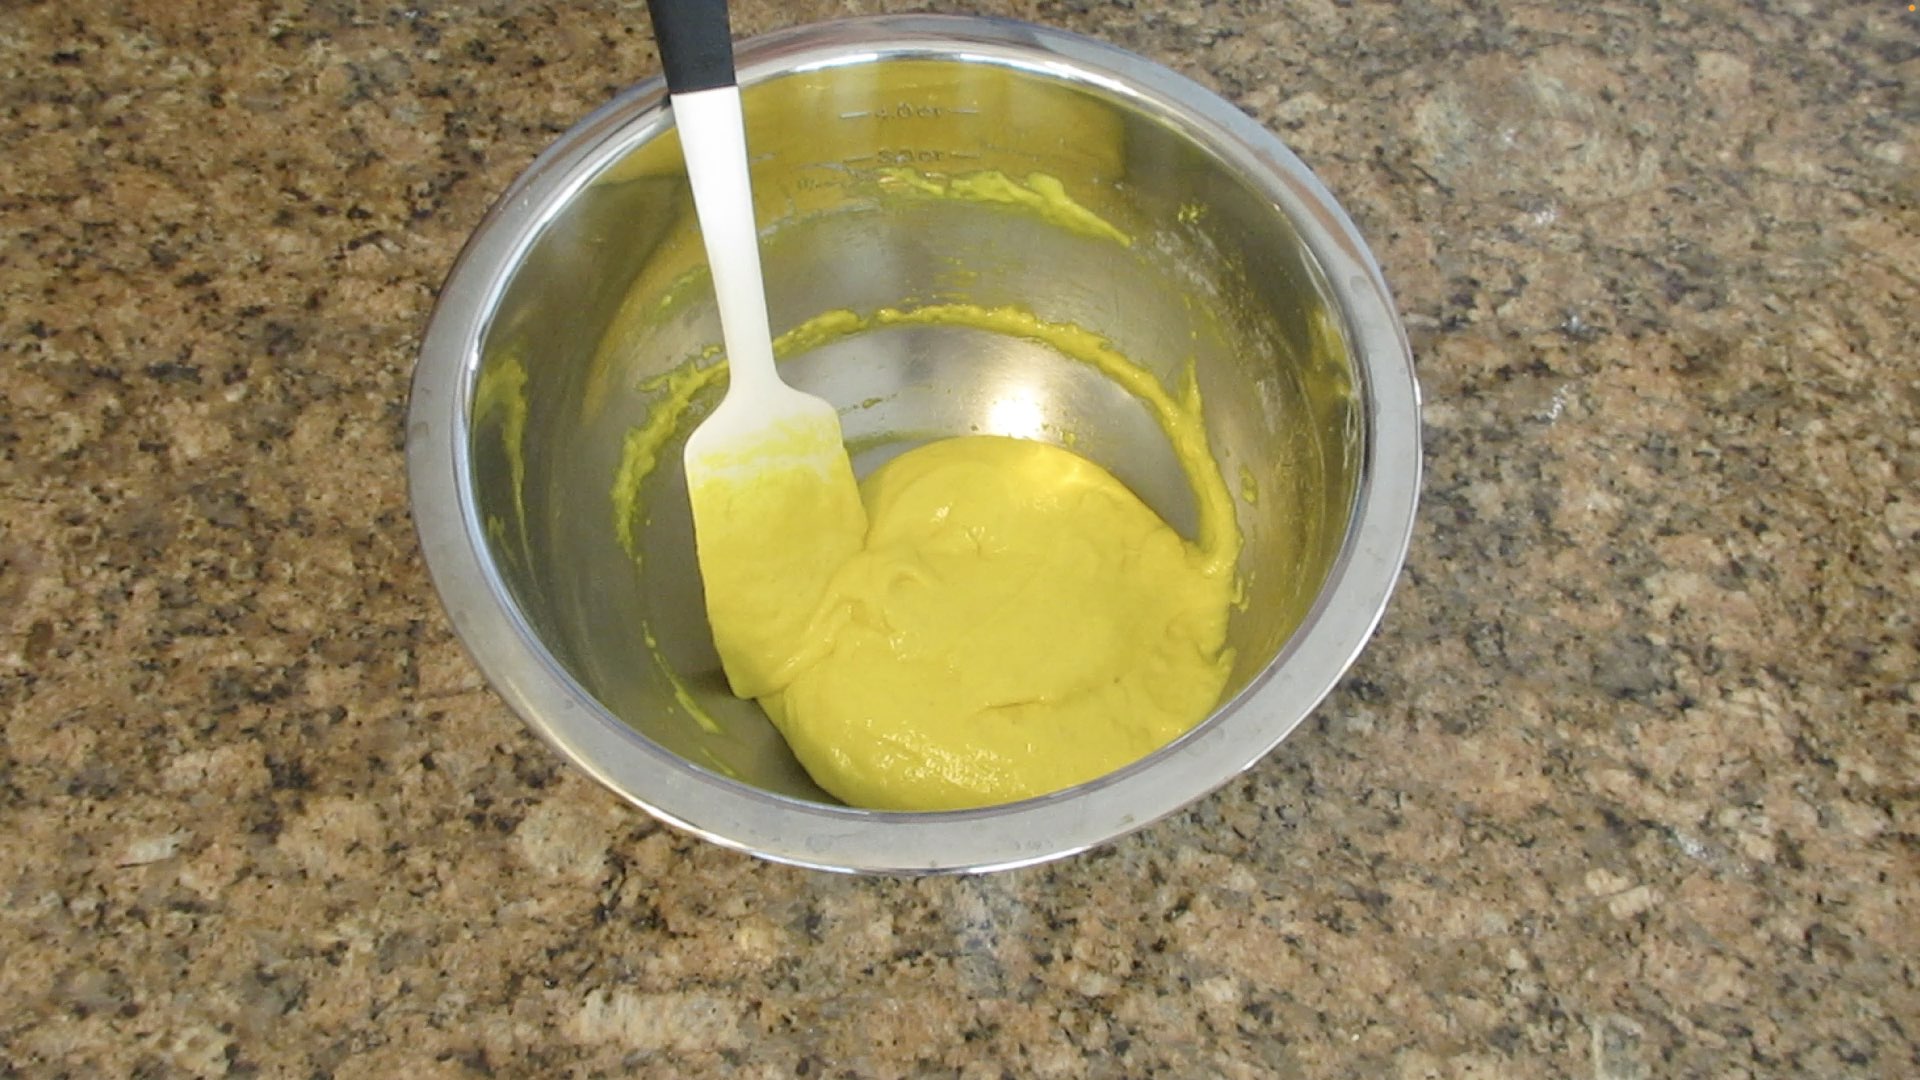
Let’s look at the following picture. The batter should start to become more shiny as you fold. With each fold, lift your spatula. See if it will ribbon off. If it does, watch what happens to the mixture. Count to thirty. Does it sink at all back into the batter or does it stay on top? What if you tap the bottom of the bowl? If it still stays on top, Fold another turn. Notice the lines are still there and quite pronounced. This is the perfect time to stop if you want to make shapes like hearts, bears or bunnies. But if you want to make a traditional macaron, give just one more turn and observe.
At one point, the batter will start to really flow smoothly off your spatula. And almost all the batter will absorb into the mixture with just faint lines staying around after you count to thirty. This is where I recommend you stop. By the time you transfer the batter to your piping bag, and begin piping onto your baking tray, the batter will deflate more. If you fold just one more time, you risk deflating it too much.
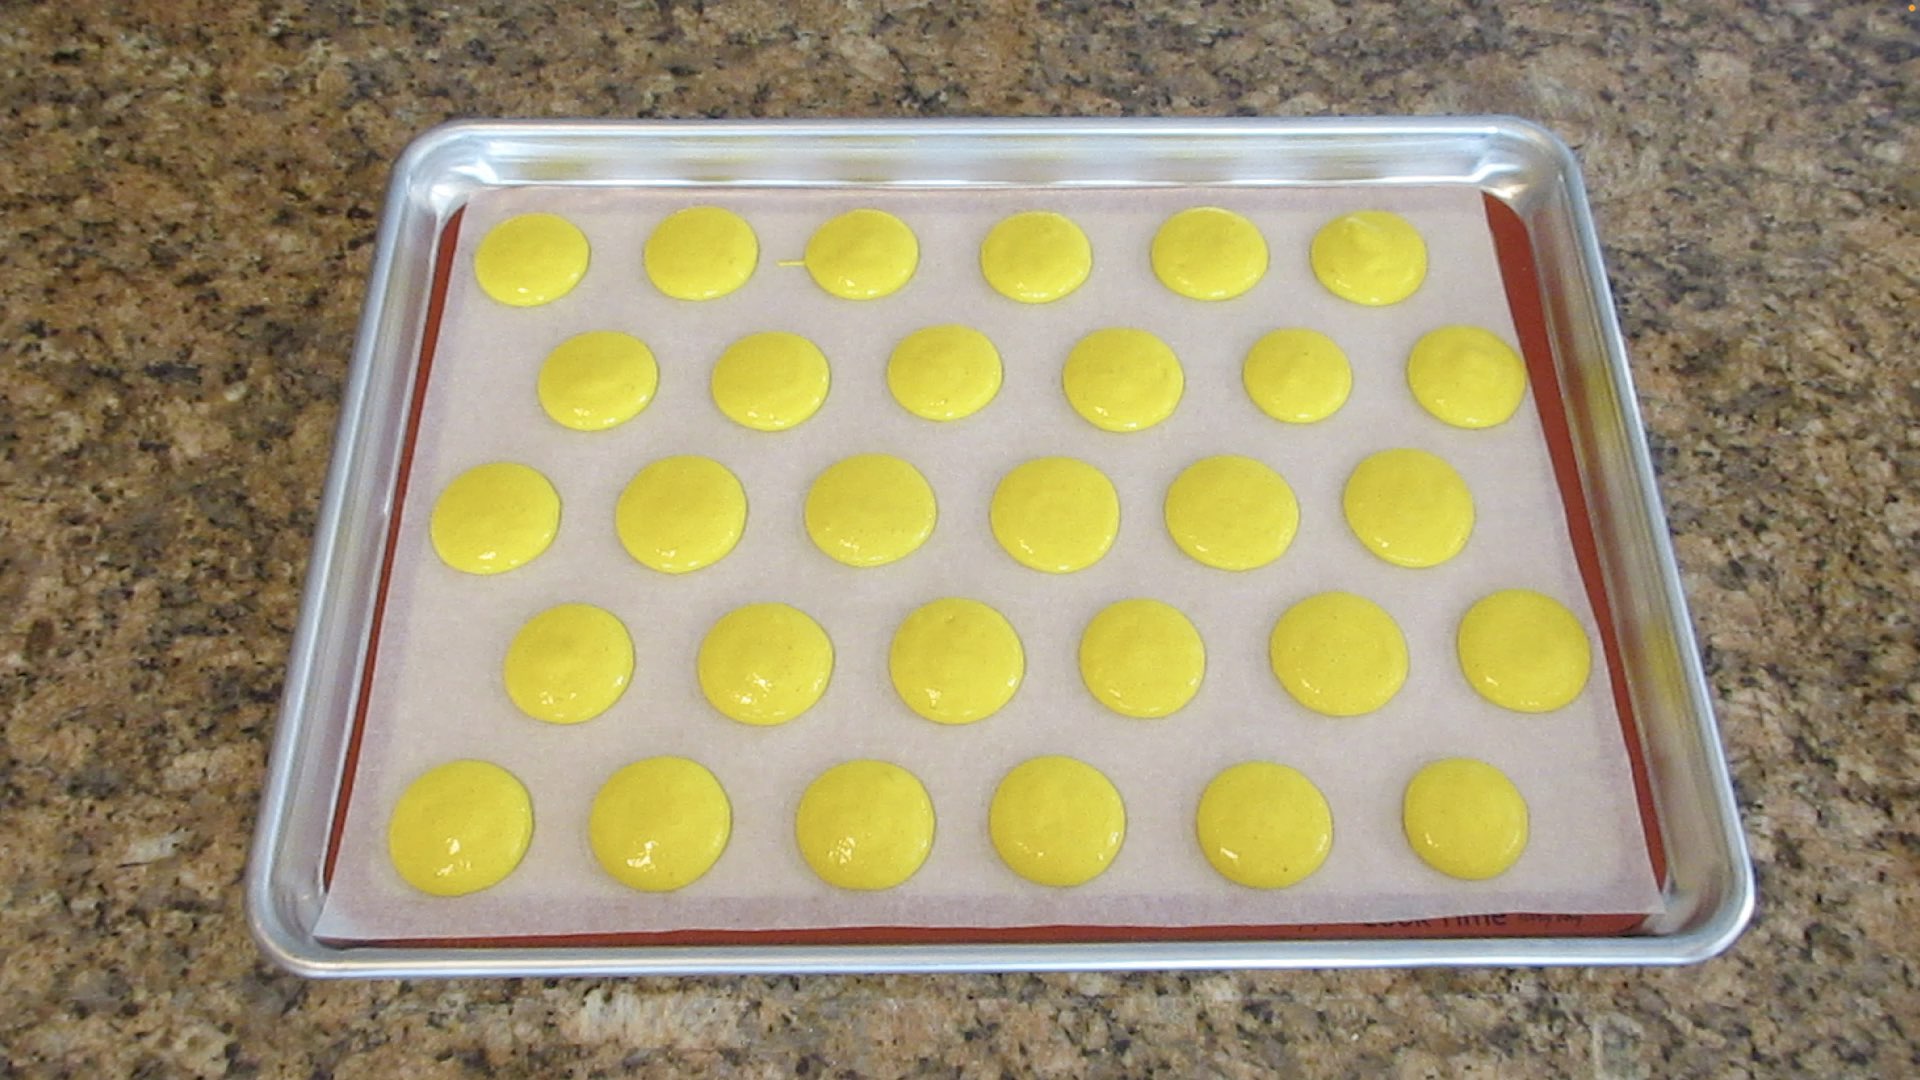
Step 4: Pipe the Macarons
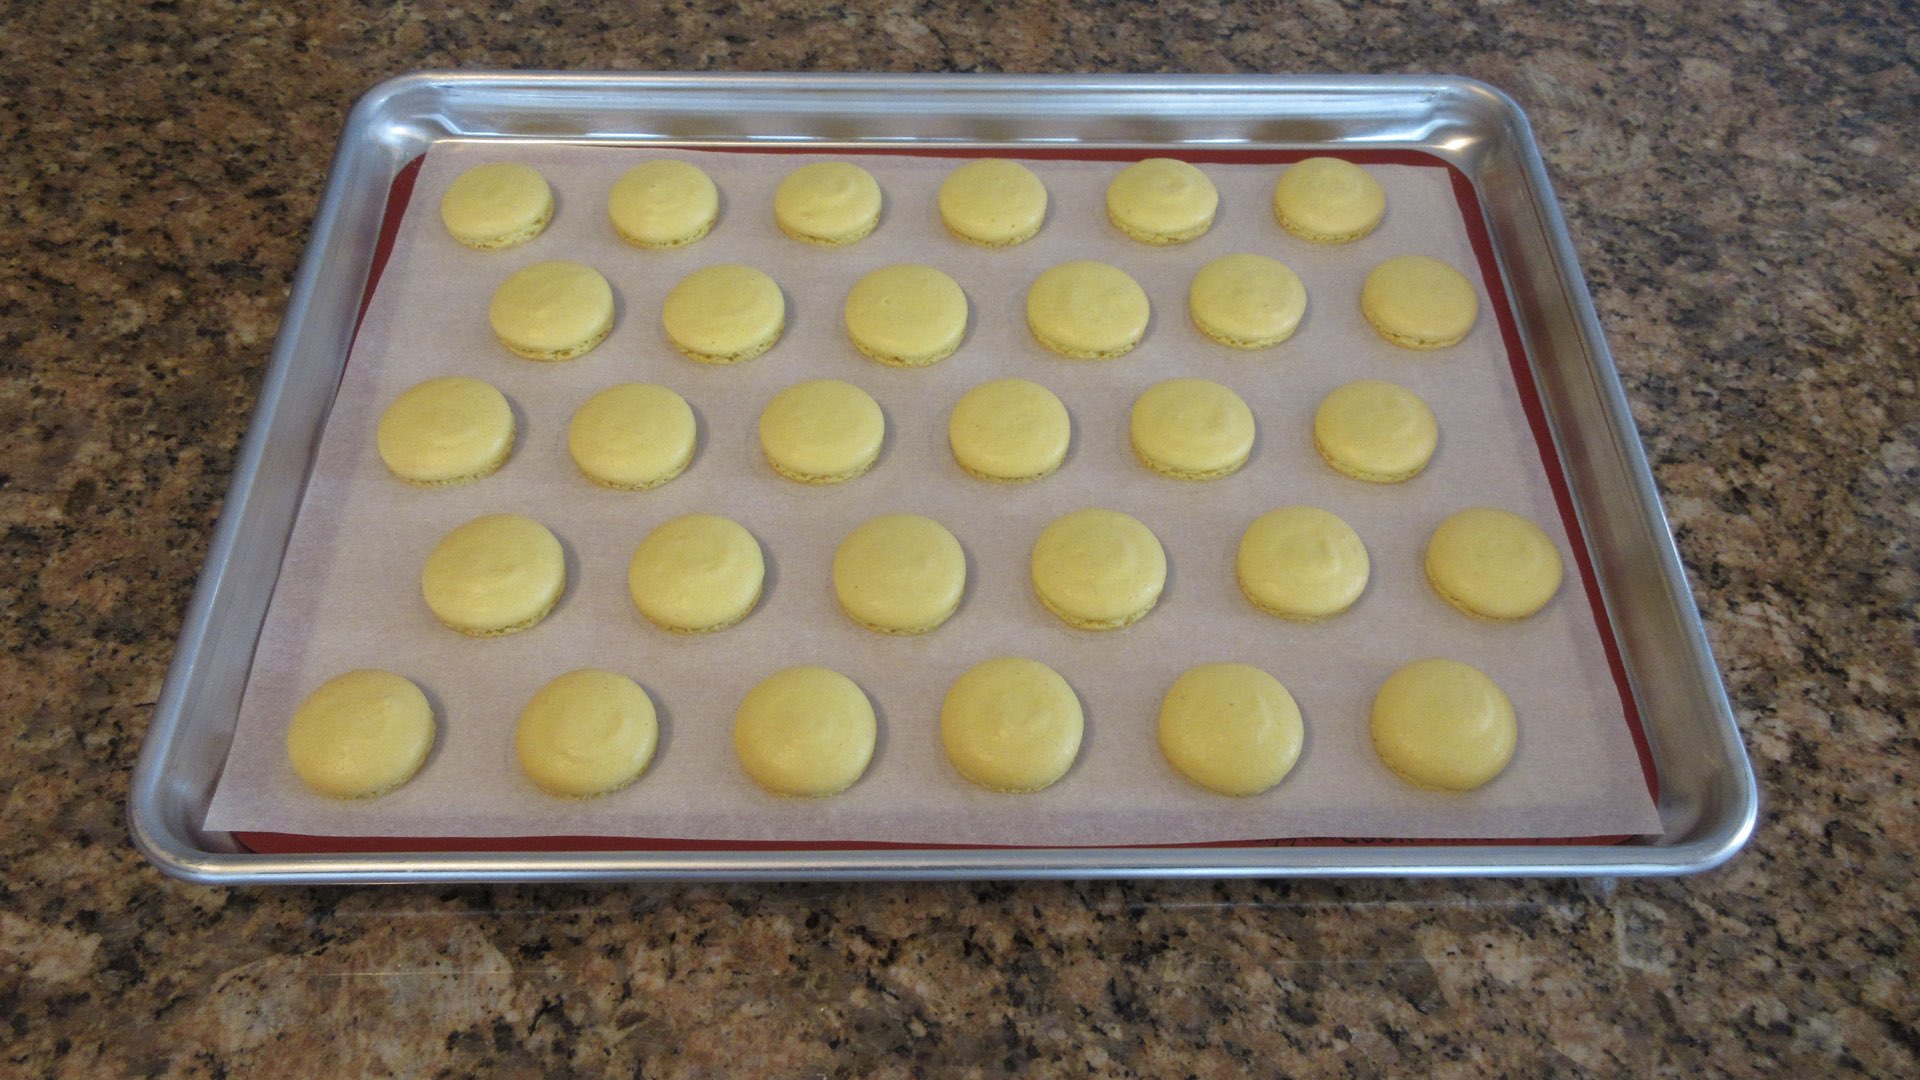
If all went well, as you pipe, the batter will slowly settle into itself. If you are new to piping, use a smaller nozzle for better control. One that is 1/4″ or 6mm will work beautifully. Apply steady and even pressure until you have the desired size. Release the pressure, lift up or swirl quickly and move to the next area. If the batter immediately flattens, you went too far. Expect some hollow shells and next time, fold just a little less. The batter should ideally sink or level slowly. By the time you finish piping five or six macarons, you should see the first one settling nicely. If not, you can always tap the tray and fold the batter a little more next time. It’s always better to under-mix than over-mix. Under-mixed macarons are usually nice and full. Over-mixed are empty shells that aren’t very tasty.

By the time you finish piping, the batter should settle so nicely, you don’t need to tap the tray. In fact, doing so could collapse many french meringues. Tapping is best for heated meringues or under-mixed ones where you see very pronounced peaks on your batter. Let them rest quite a while prior to baking. If you are new, leave them a solid 90 minutes before turning on your oven. Then bake and rotate halfway through for even browning if you don’t have convection.
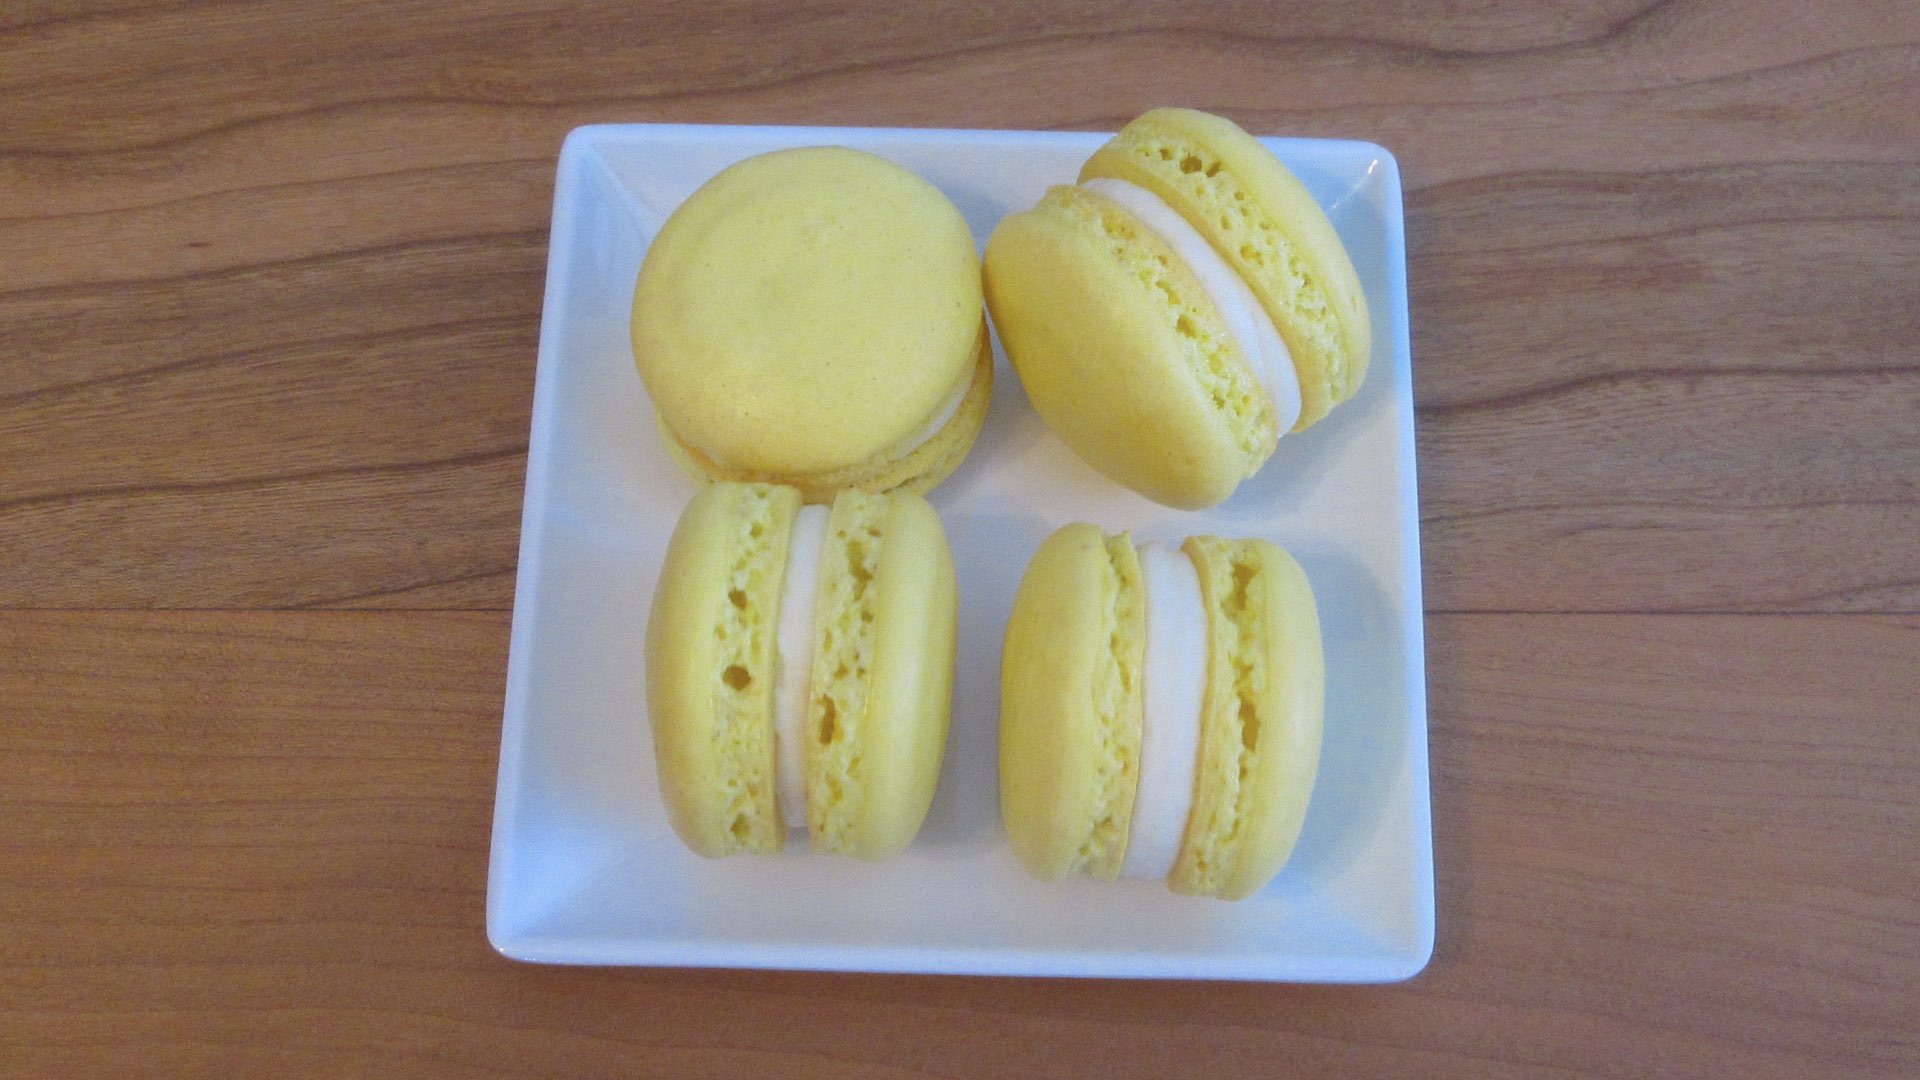
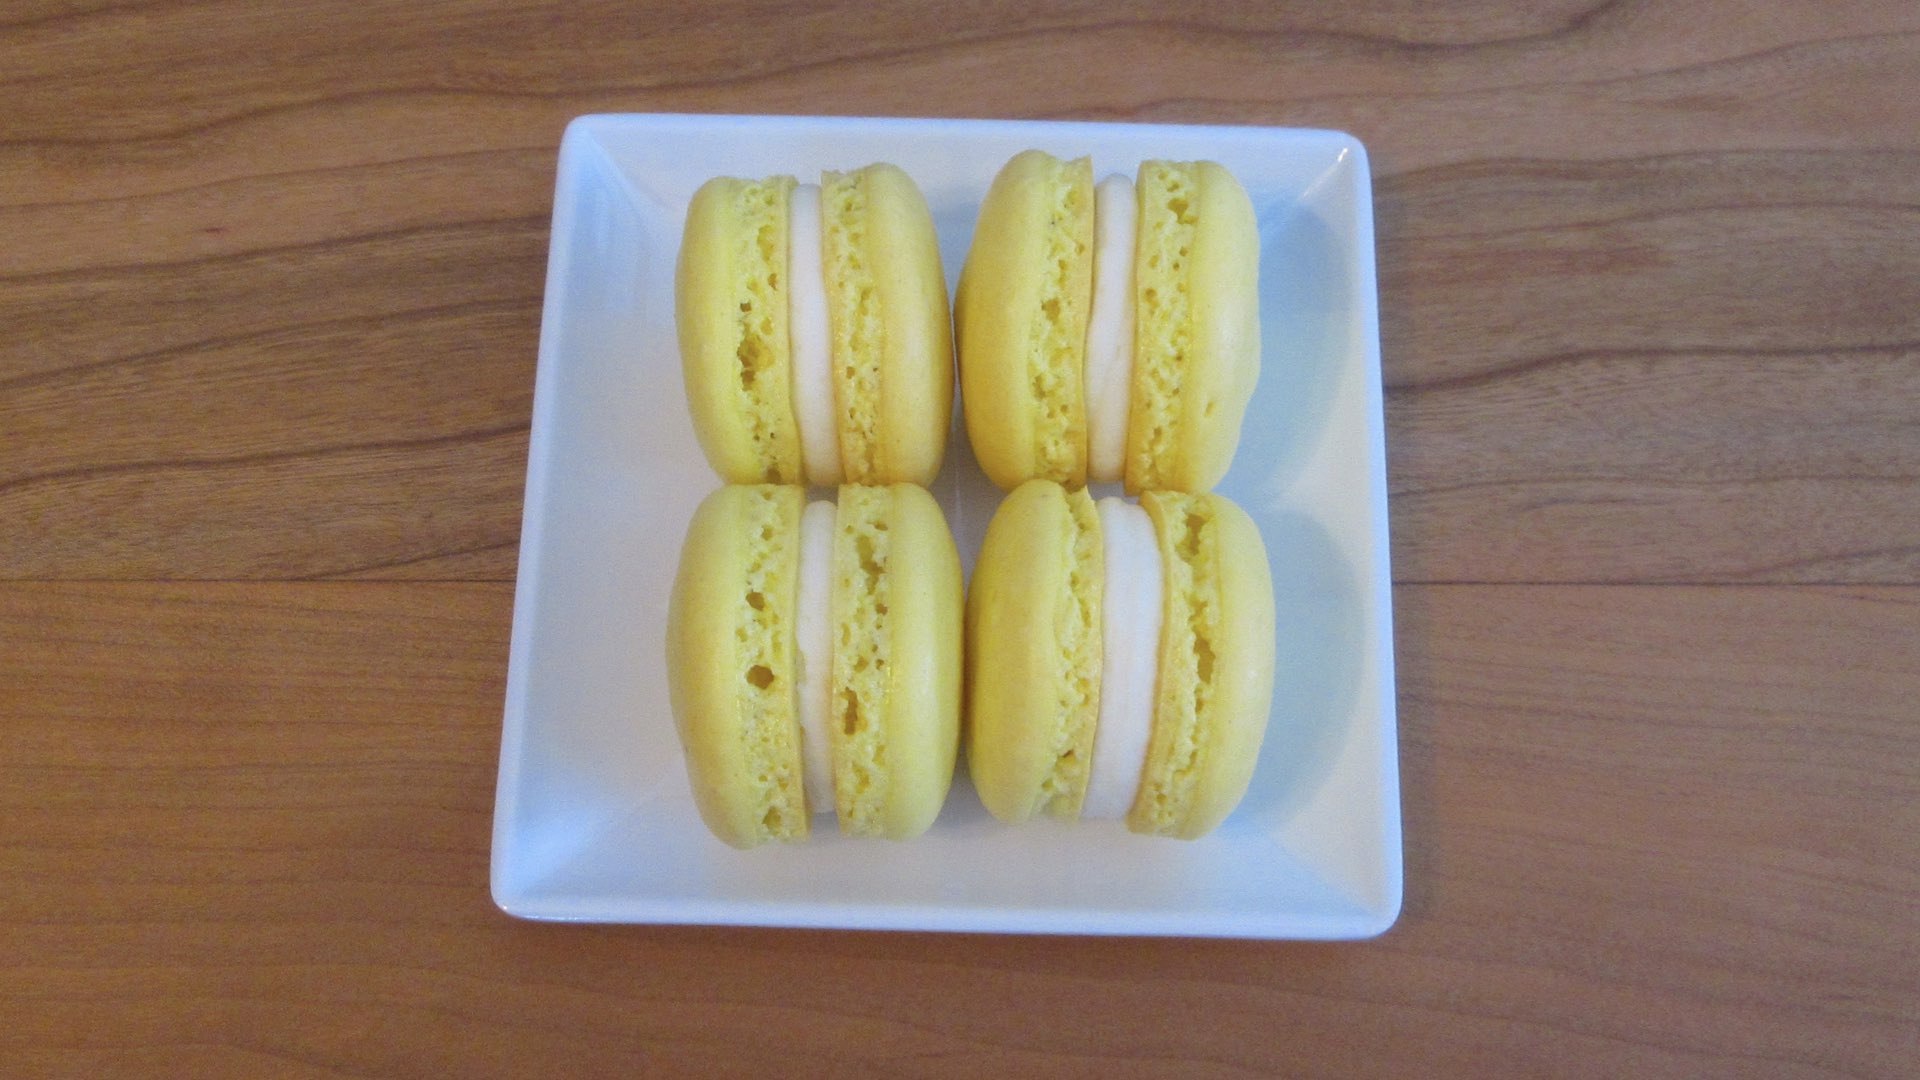
If all goes well, you’ll have a nice collection of macarons. When it comes to having a lip on your pan like ours does, it is not uncommon for the feet to be a little lopsided or smaller along the edge. This is due to poor air circulation. Having a convection oven or using a flat baking sheet will prevent this from happening. If they are lopsided on one or all of the rims, eat them anyway! In the future, you can avoid piping in those areas and use another tray for the excess batter. In the meantime, don’t be surprised if it happens to you.
That’s all there is to macaronage. If you need help learning how to macaronage, please don’t hesitate to reach out. We love helping you troubleshoot this finicky little confection. In the meantime, happy baking!
Substitutions and Tips
Here are some common substitutions and tips when learning how to macaronage.
- Use a smaller nozzle for better control as mentioned above. I like to use a 1/4″ or 6 mm round tip.
- For every 50 grams of almond flour, you can swap it out for 20 grams of wheat flour while you practice. This will save you money as you learn how to macaronage. For example, if the recipe calls for 50 grams of almond flour, use 20 grams of all-purpose or plain flour and 30 grams of almond flour. This will help you learn the process without breaking the bank.
- Use less food coloring or none at all until you learn how to make a good quality macaron. Many food colorings can break the meringue or make it unstable, especially liquid ones.
- Try adding 1/2 tsp (2.5mL) of white vinegar or lemon juice to the egg whites to further stabilize them.
- Use room temperature egg whites. They whip up more quickly and are more stable than cold eggs whites.
- If any egg yolk or fat gets into your egg white, discard and use another egg. Although it will eventually whip up, the meringue will be very prone to collapsing in the folding stage.
- Beat your egg whites on a low speed, it will make the meringue more sturdy and there will be less air pockets will be in your finished macarons.
- You can use a skewer or toothpick to prick any air-bubbles after piping the macarons. This is not necessary as it is only cosmetic.
- Have fun learning how to macaronage. Take your time and enjoy the process of mastering the “world’s most difficult cookie.”
0 Comments