
A Little Background on this Recipe
The following recipe is for ONE single layer of Prosphora or Orthodox Holy Bread. Please ask your priest how many loaves he needs and simply multiply the quantities by the amounts below. Many people do not have the ability or time to make several loaves and this makes it easier for the average church member to help contribute. It’s also easier to learn how to make holy bread when you are focusing on one loaf and not kneading and shaping several pounds of dough.
There are many variations and this is just one of them. This is because of the various branches of the church, differing opinions, cultures and beliefs. What is right for one parish may be incorrect for another. Members should always follow the instructions from their particular congregation. This is how I was taught to make the bread over 2 decades ago by the priest’s wife. This is a demonstration meant for the congregation in which I was taught in order to pass down the recipe. When learning how to make Holy Bread, it is always wise to ask a fellow member of your particular church for guidance as traditions and techniques may vary slightly.
To make Prosphora or Orthodox Holy Bread (singular is prosphoron), you should be in good standing with the church and do so humbly and in prayer. This should be an honor to make and done with reverence.
If this is the first time making the Holy Bread, speak to your priest and ask for guidance. Sometimes the priest will want you to be up to date on your confession. Many times, it is offered with a list of both the living and dead to be prayed over during service. Make this bread with humility and prayerfully. Many like to begin and end making the bread with a simple prayer. The Lord’s Prayer is an excellent one to choose.
It’s a very easy bread to make by hand or by mixer. The ingredients should only contain: Flour, Water, Leaven (yeast) and Salt. In some churches, salt is not in the recipe since it could be too expensive centuries ago. However, salt gives structure to yeast breads and ensures an even crumb, so use it today. Do NOT add rose water, oil or sugar. Not only are these considered vanity additions, they will over time, damage the delicate metals of the diskos and chalice.
How to Knead and Rise the Dough
You have two choices. You can knead the dough by hand or use a machine. Some will tell you the dough must always be made by hand but this will limit the ability for some members to be able to make holy bread. As long as your priest doesn’t object, feel free to use that stand mixer or Cuisinart. If using a machine, add water, yeast, flour and salt directly to the bowl and mix for 8 – 12 minutes or until the dough is soft and stretches easily without tearing. You’ll want to look at the user manual for the appropriate speed for mixing dough.
In order to make the bread by hand, follow these simple steps outlined in the photos below. Take your time and say the prayers recommended by your priest. It is recommended you make the bread when you are not distracted and can devote the time.
Step 1: Make the Dough
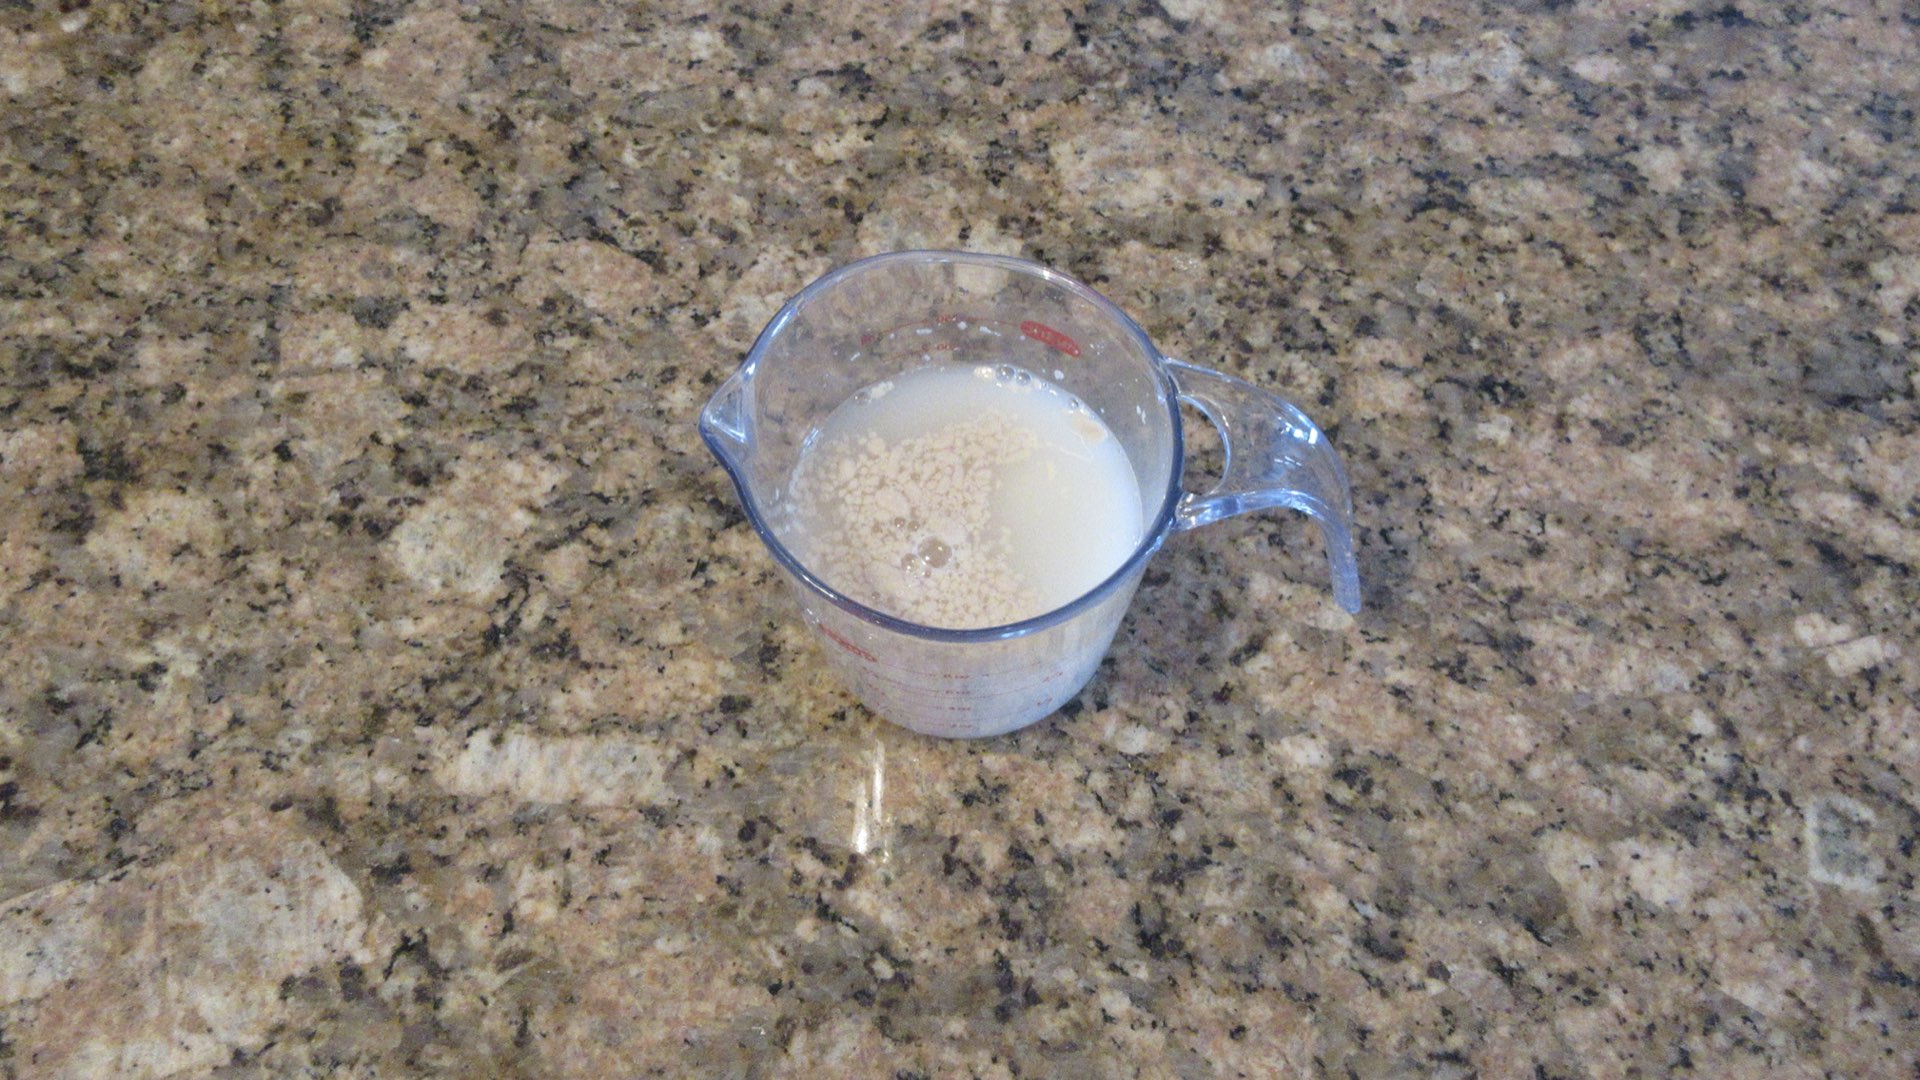
Add yeast to lukewarm water and stir to hydrate.
In a large bowl, add salt to flour.
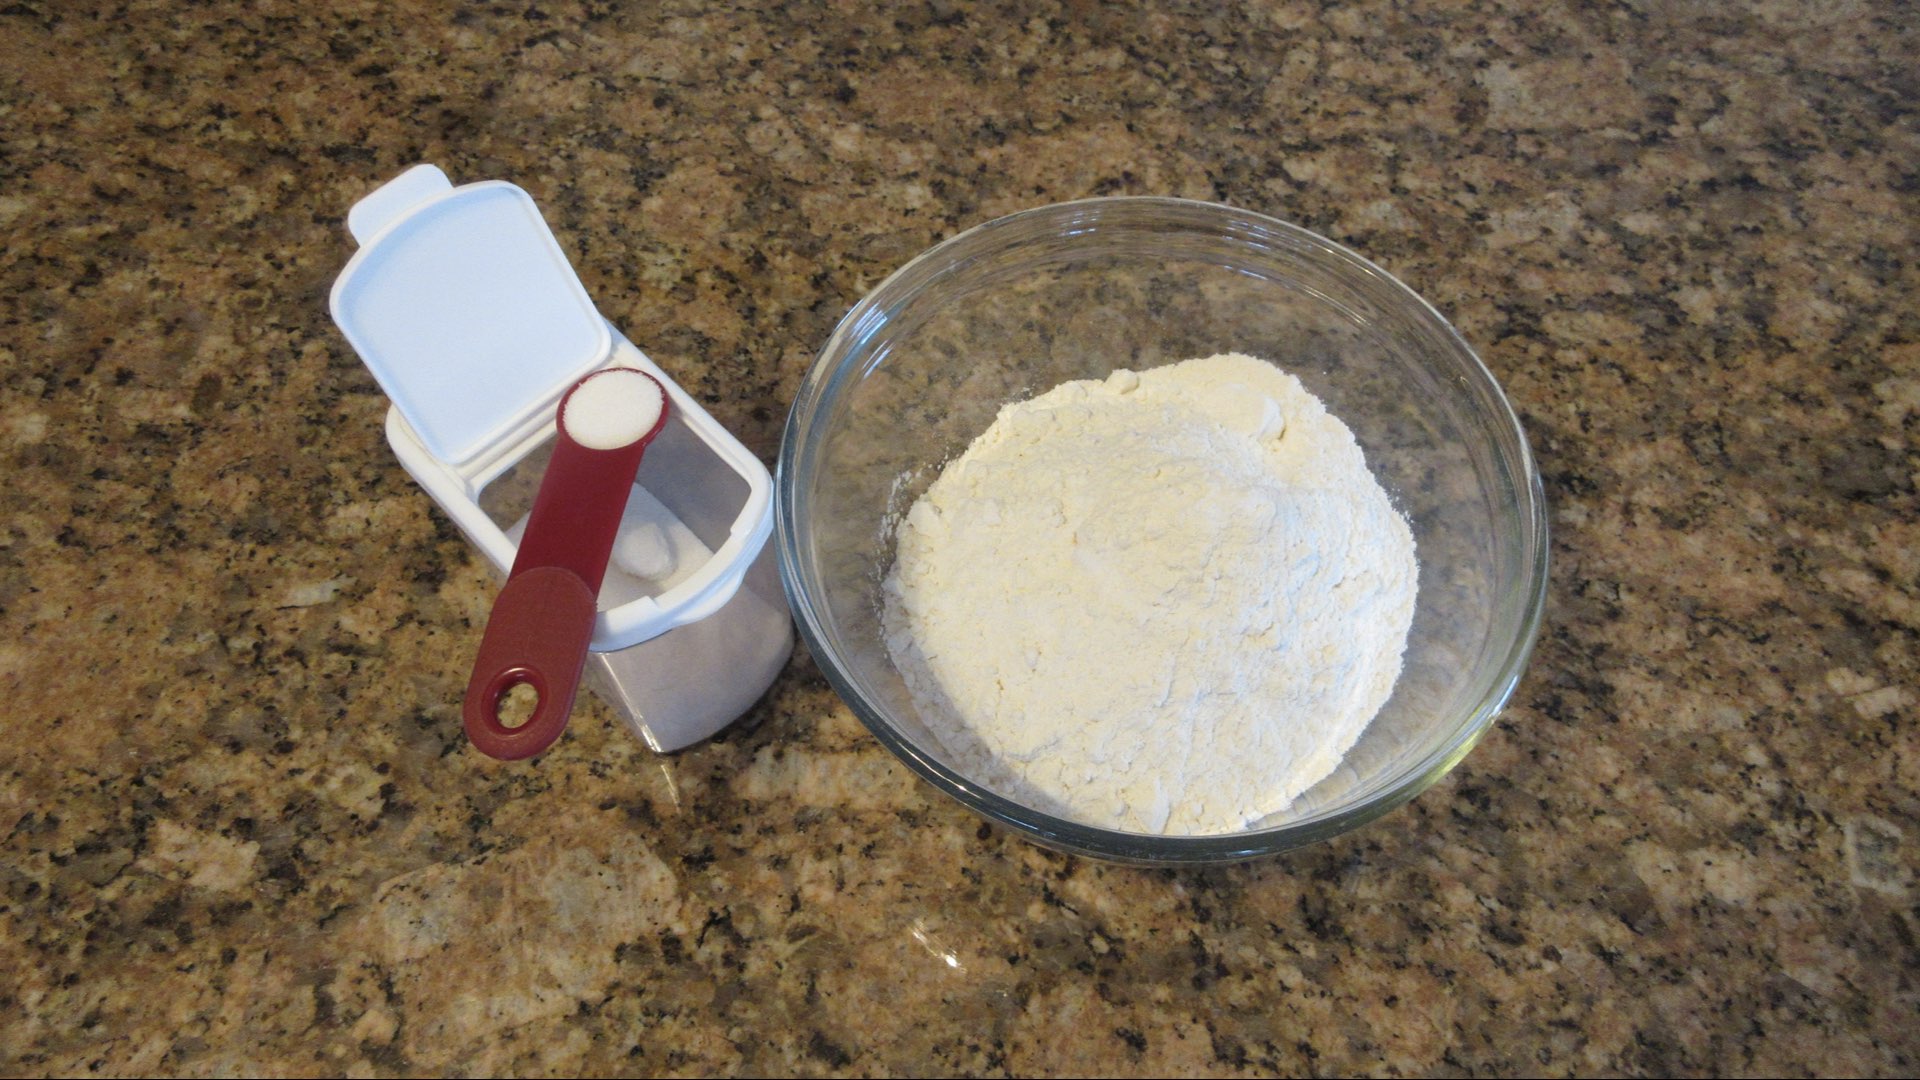
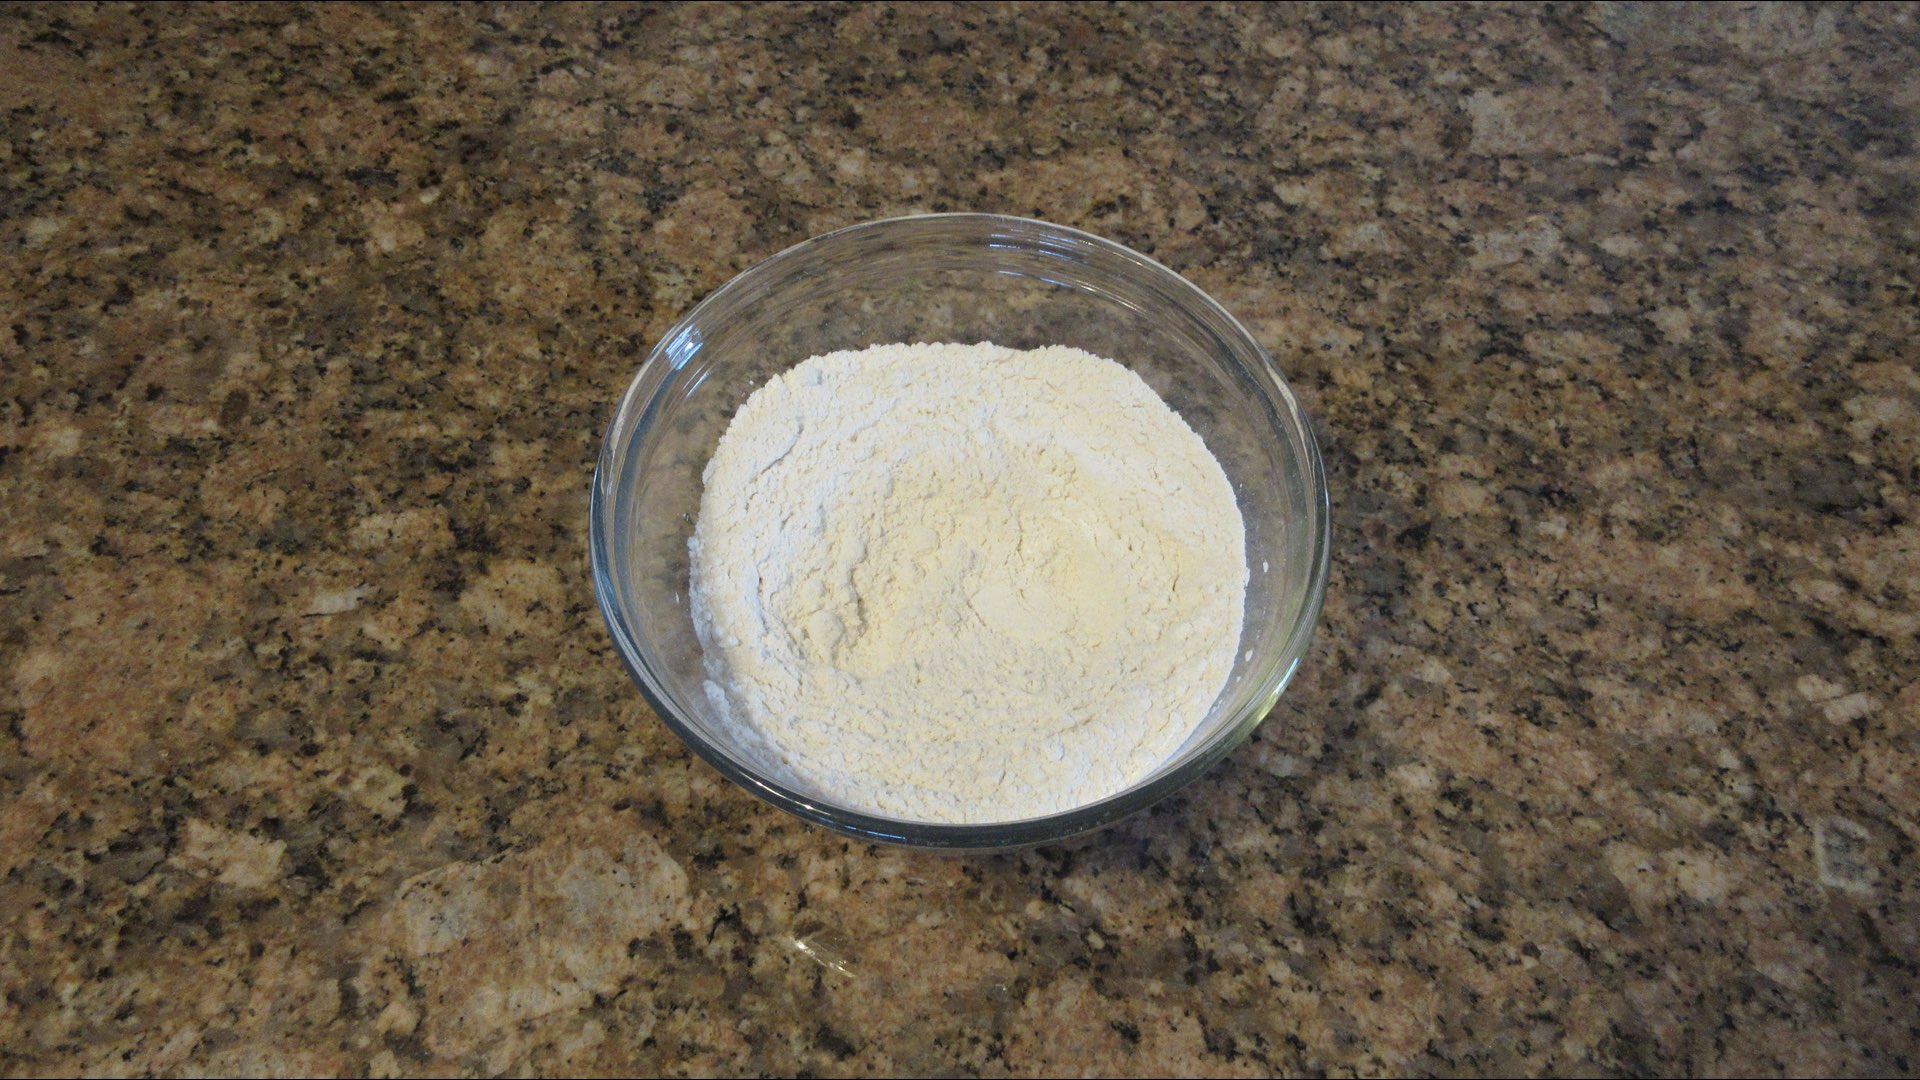
Mix the salt throughly with the flour.
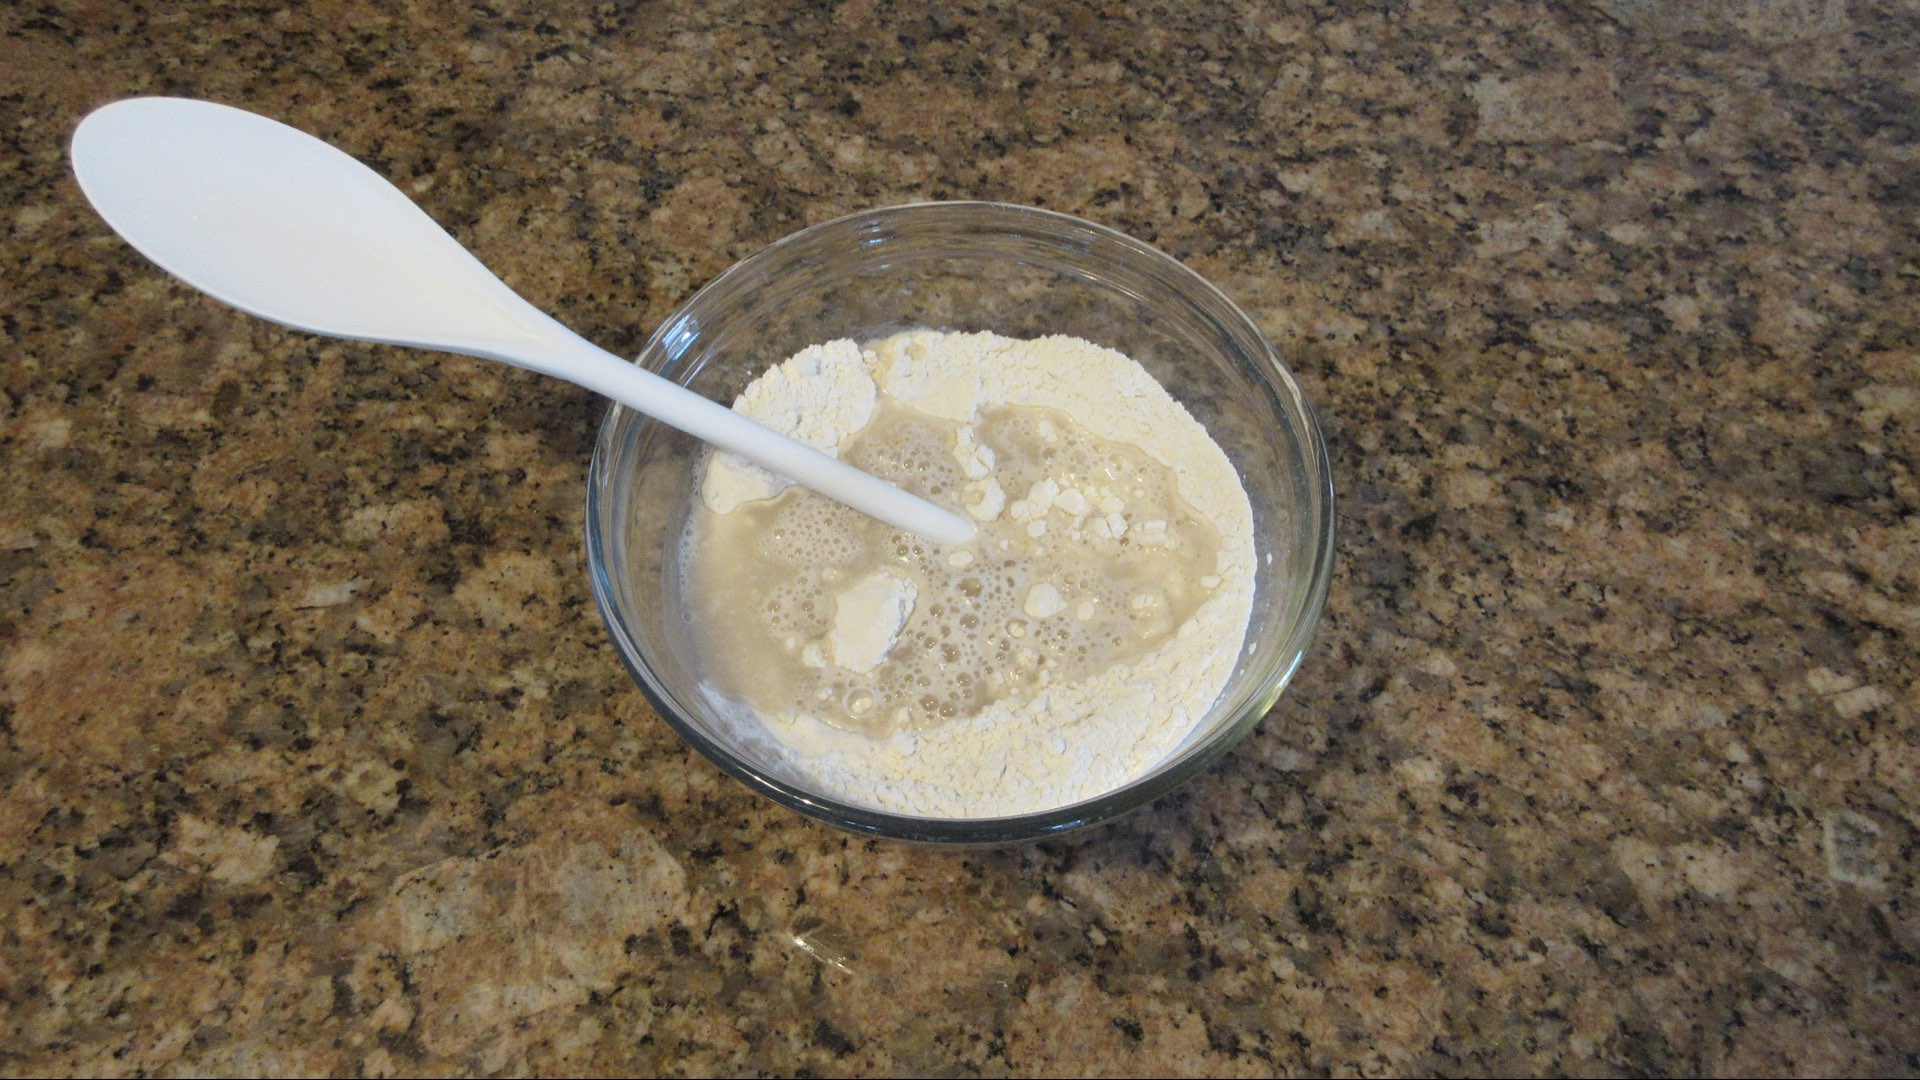
Next, add the water and yeast mixture.

Stir with the back of a spoon 20 -30 times until you get a shaggy dough.
Turn the shaggy dough onto a clean work surface.
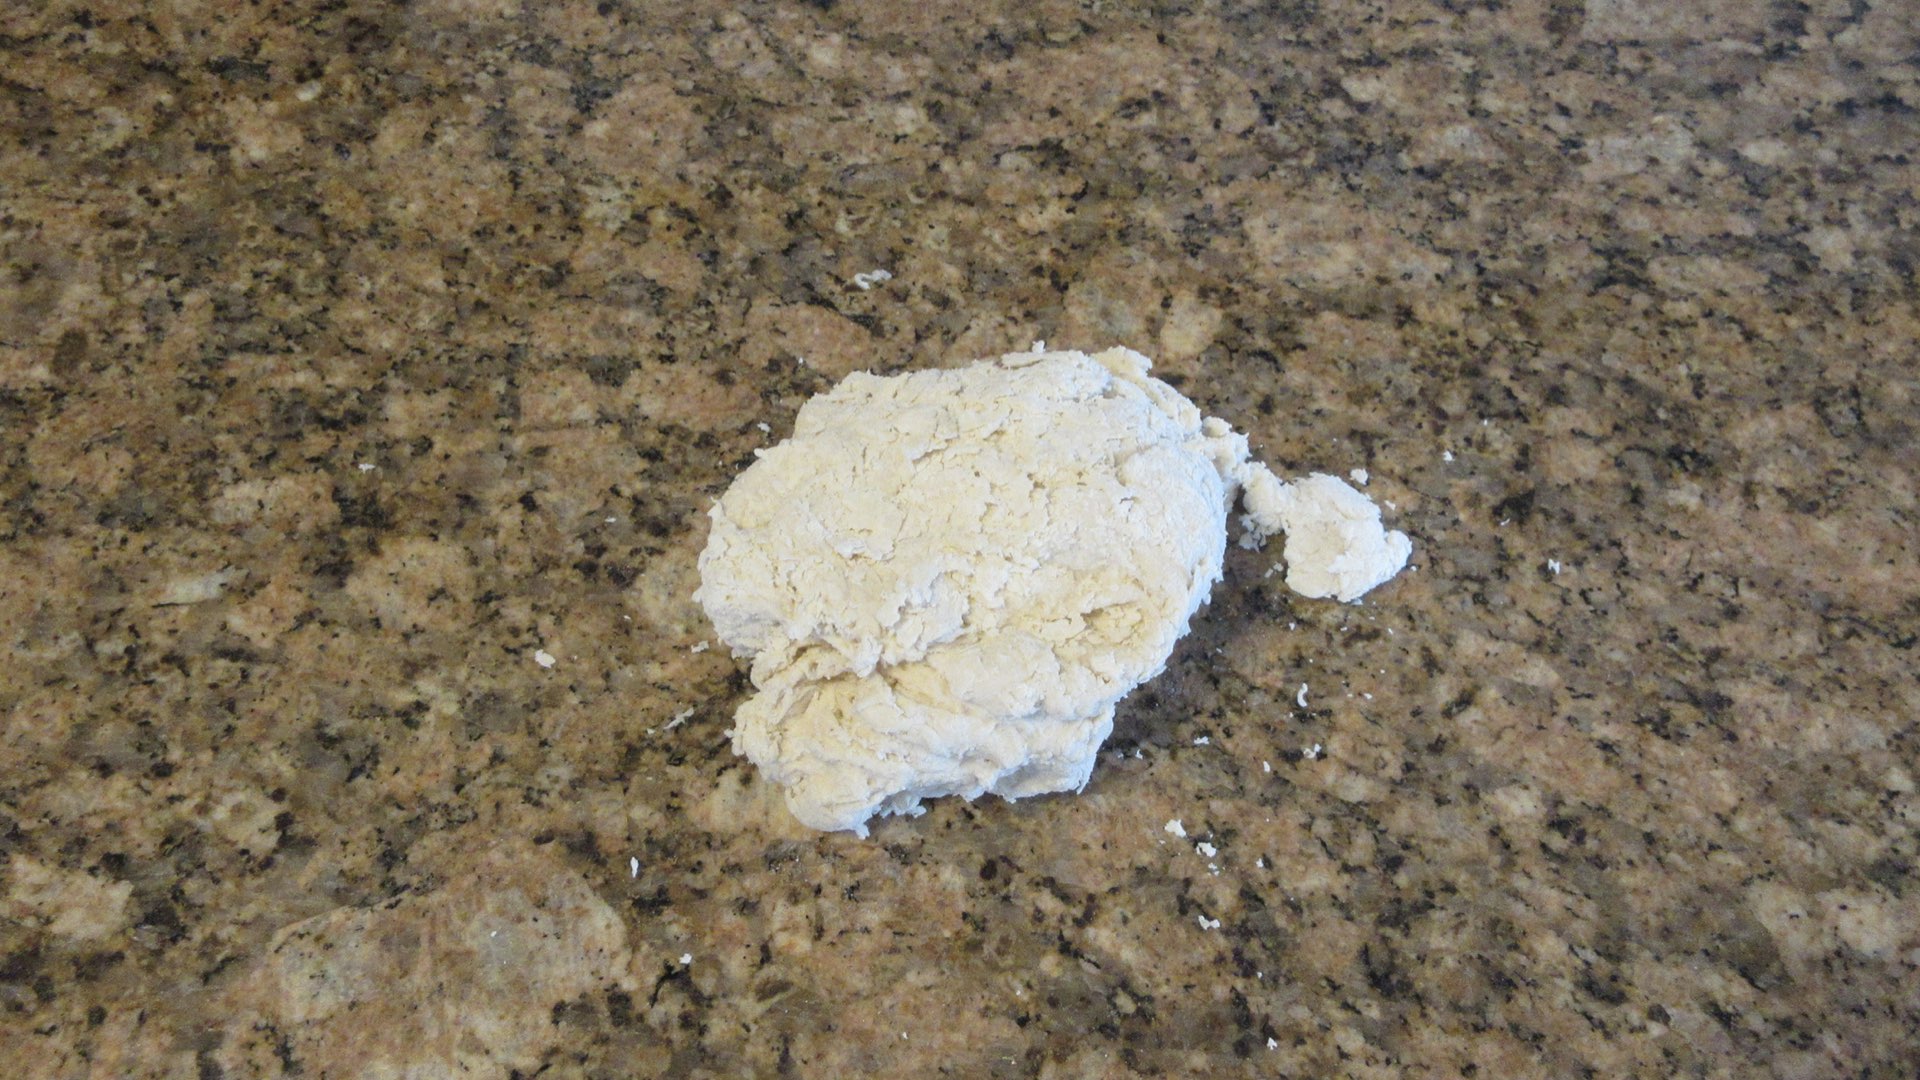
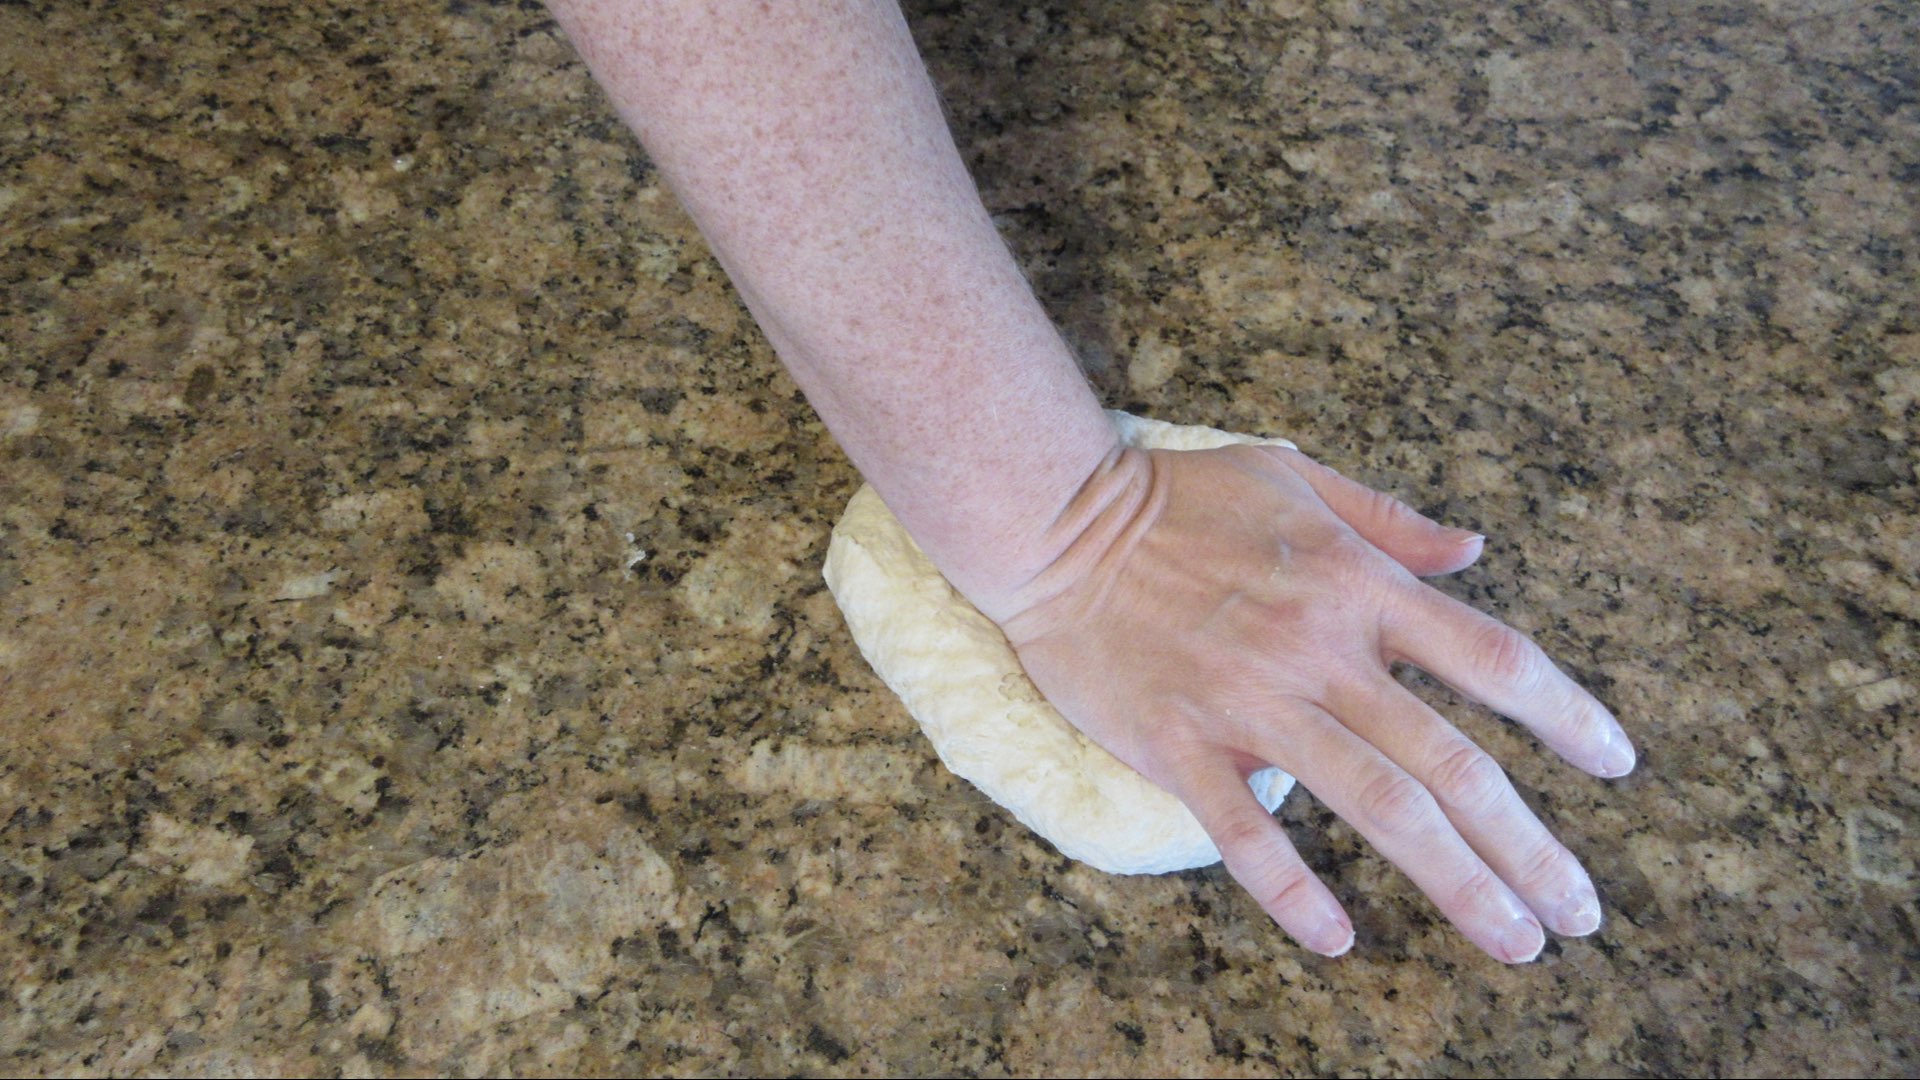
Knead 8-10 minutes. To knead, press the dough away from you with the palm of your hand, fold the dough in half and press again. Repeat until the dough stretches easily without tearing.
Step 2: Rest the Dough
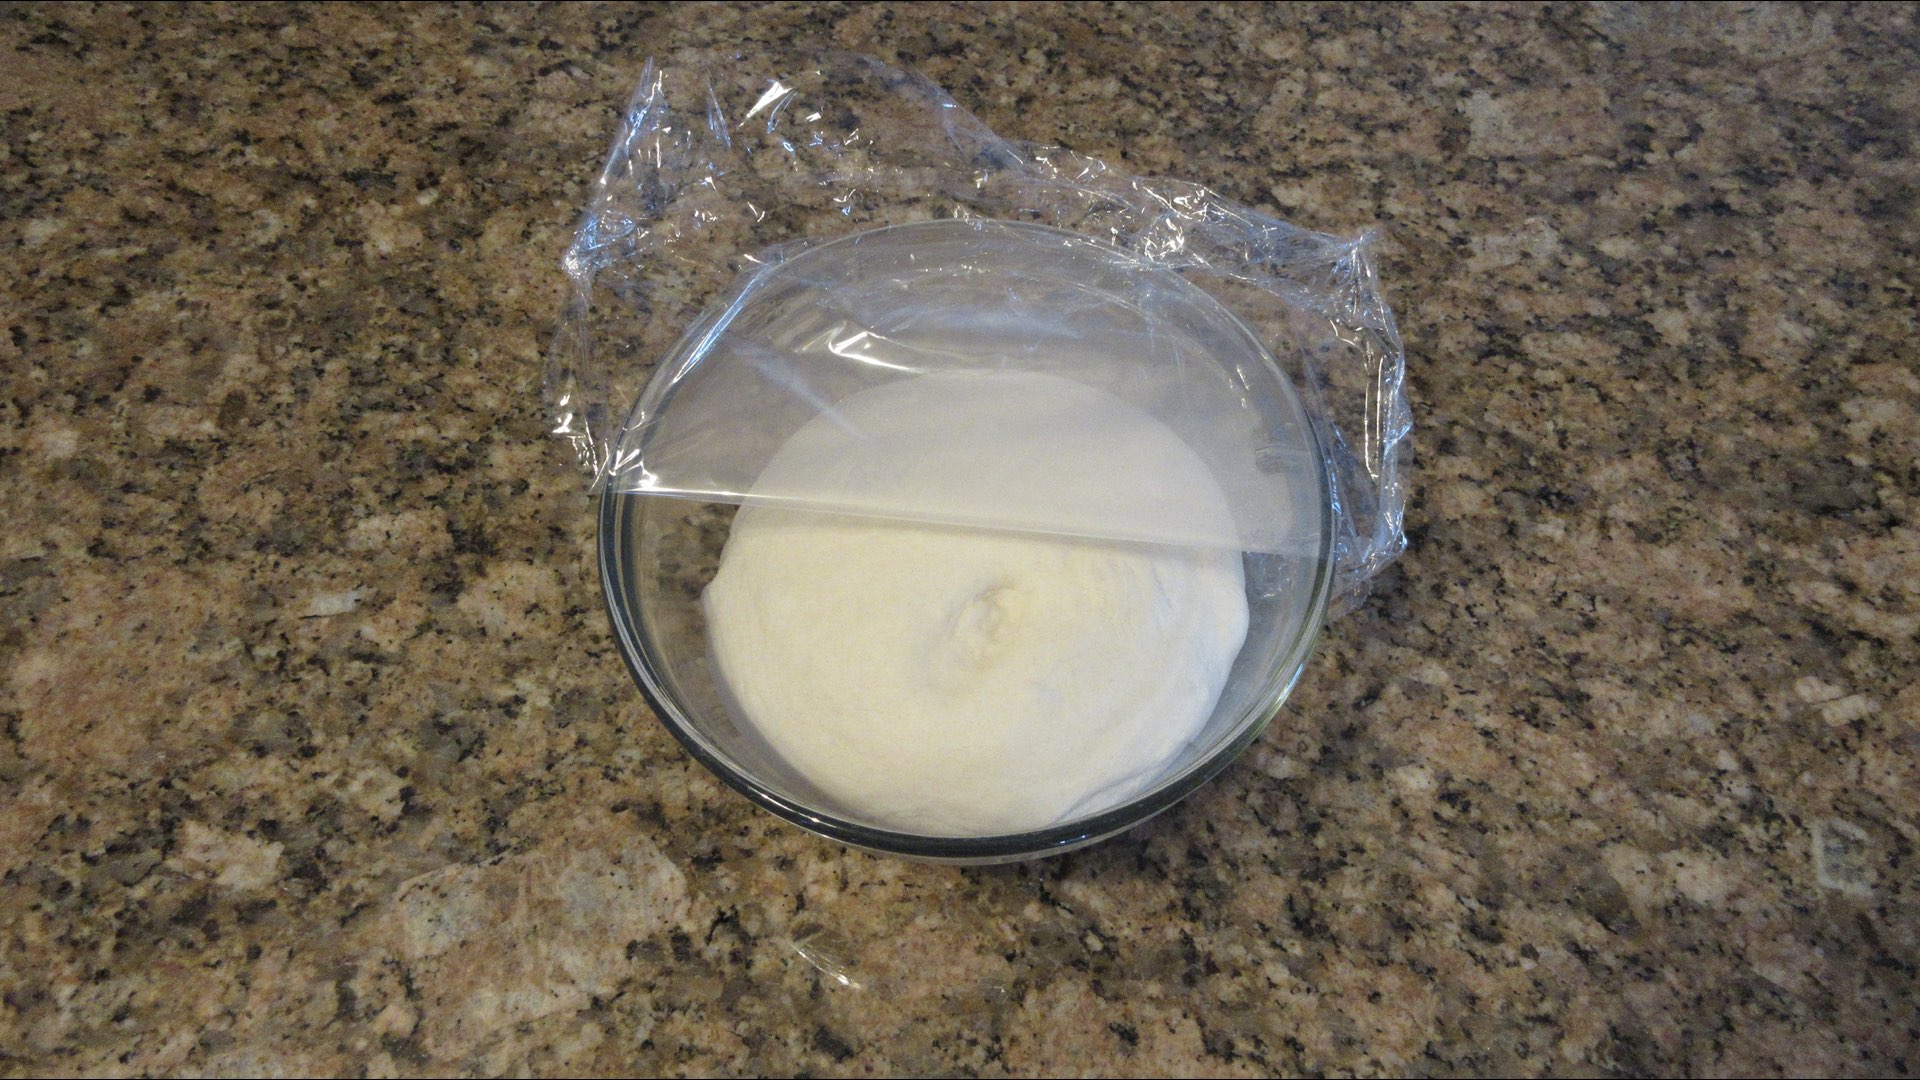
Place dough in a clean bowl and cover. Do not grease the bowl.
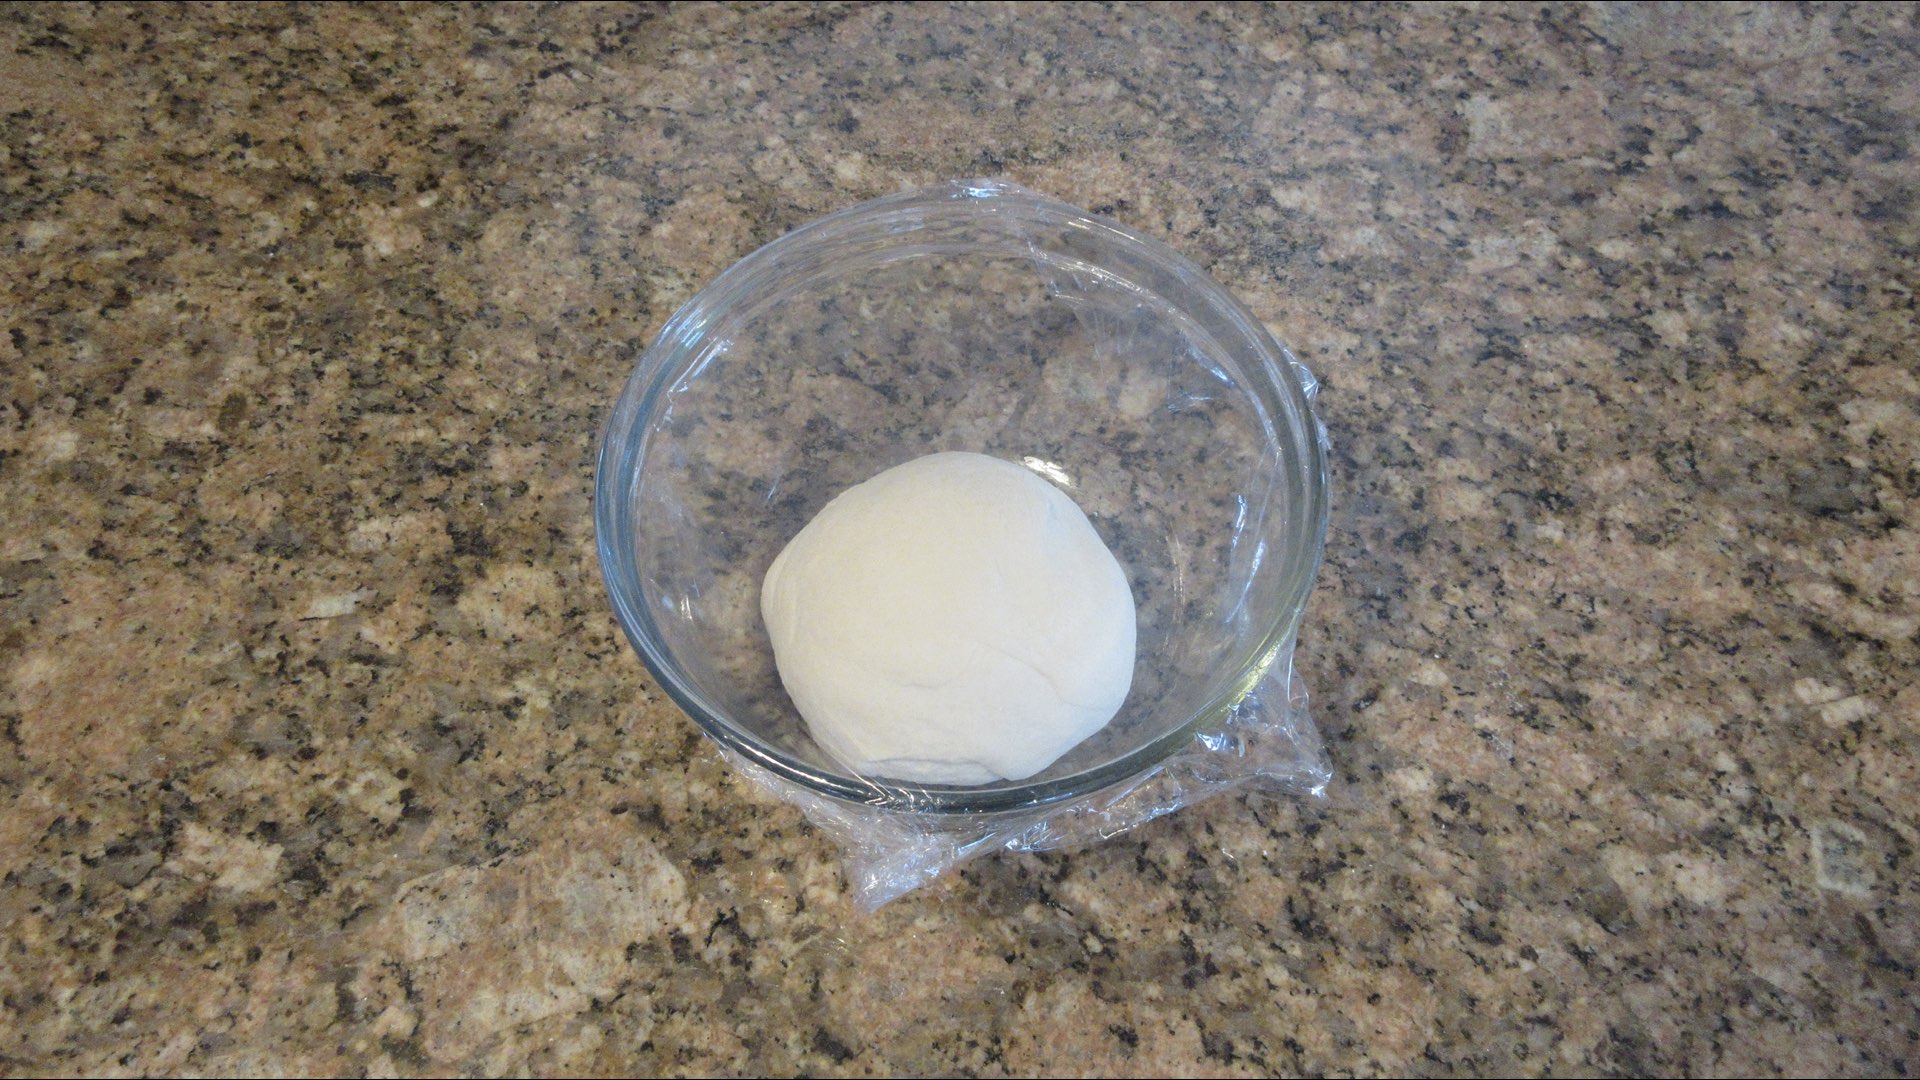
Let the dough rest until it doubles in size. This can take 1 – 3 hours depending on the temperature in your home.
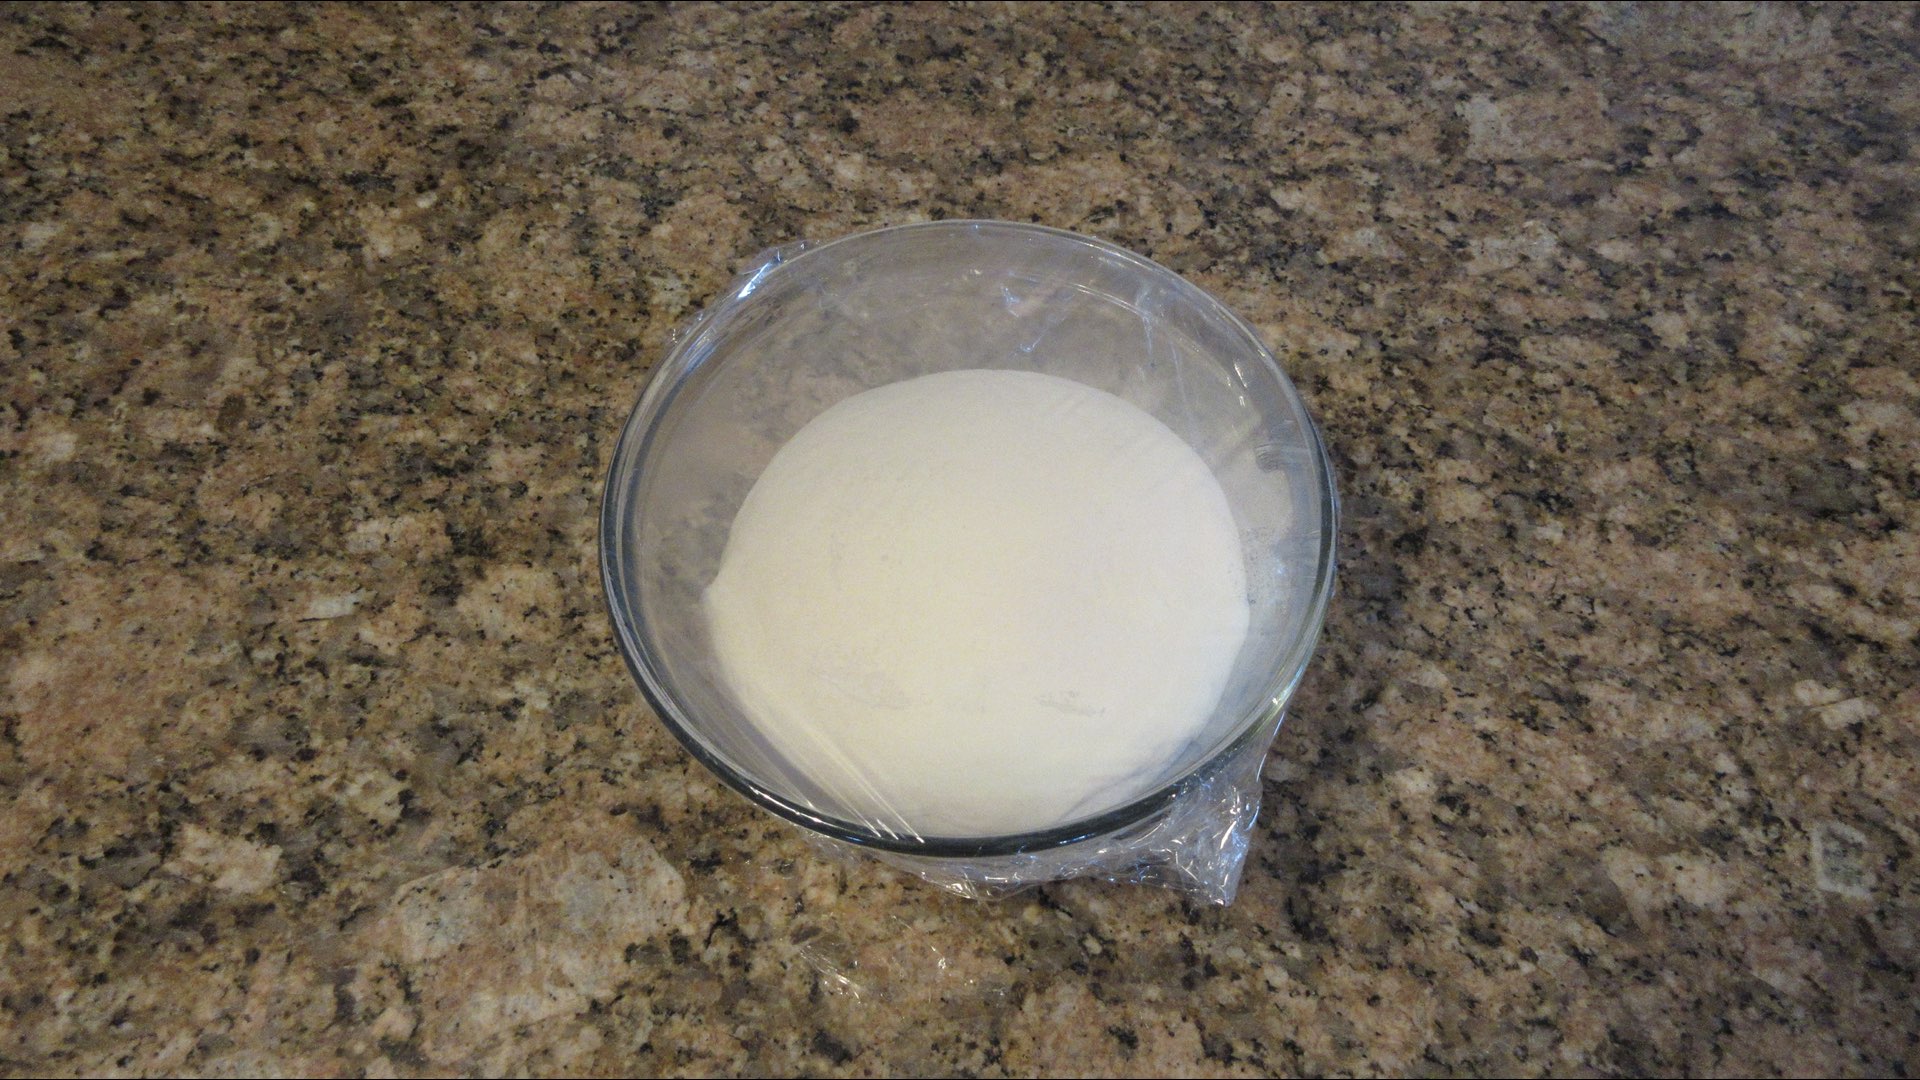
It is ready when you can press a finger in the dough and it doesn’t immediately bounce back or complete collapses under the pressure.
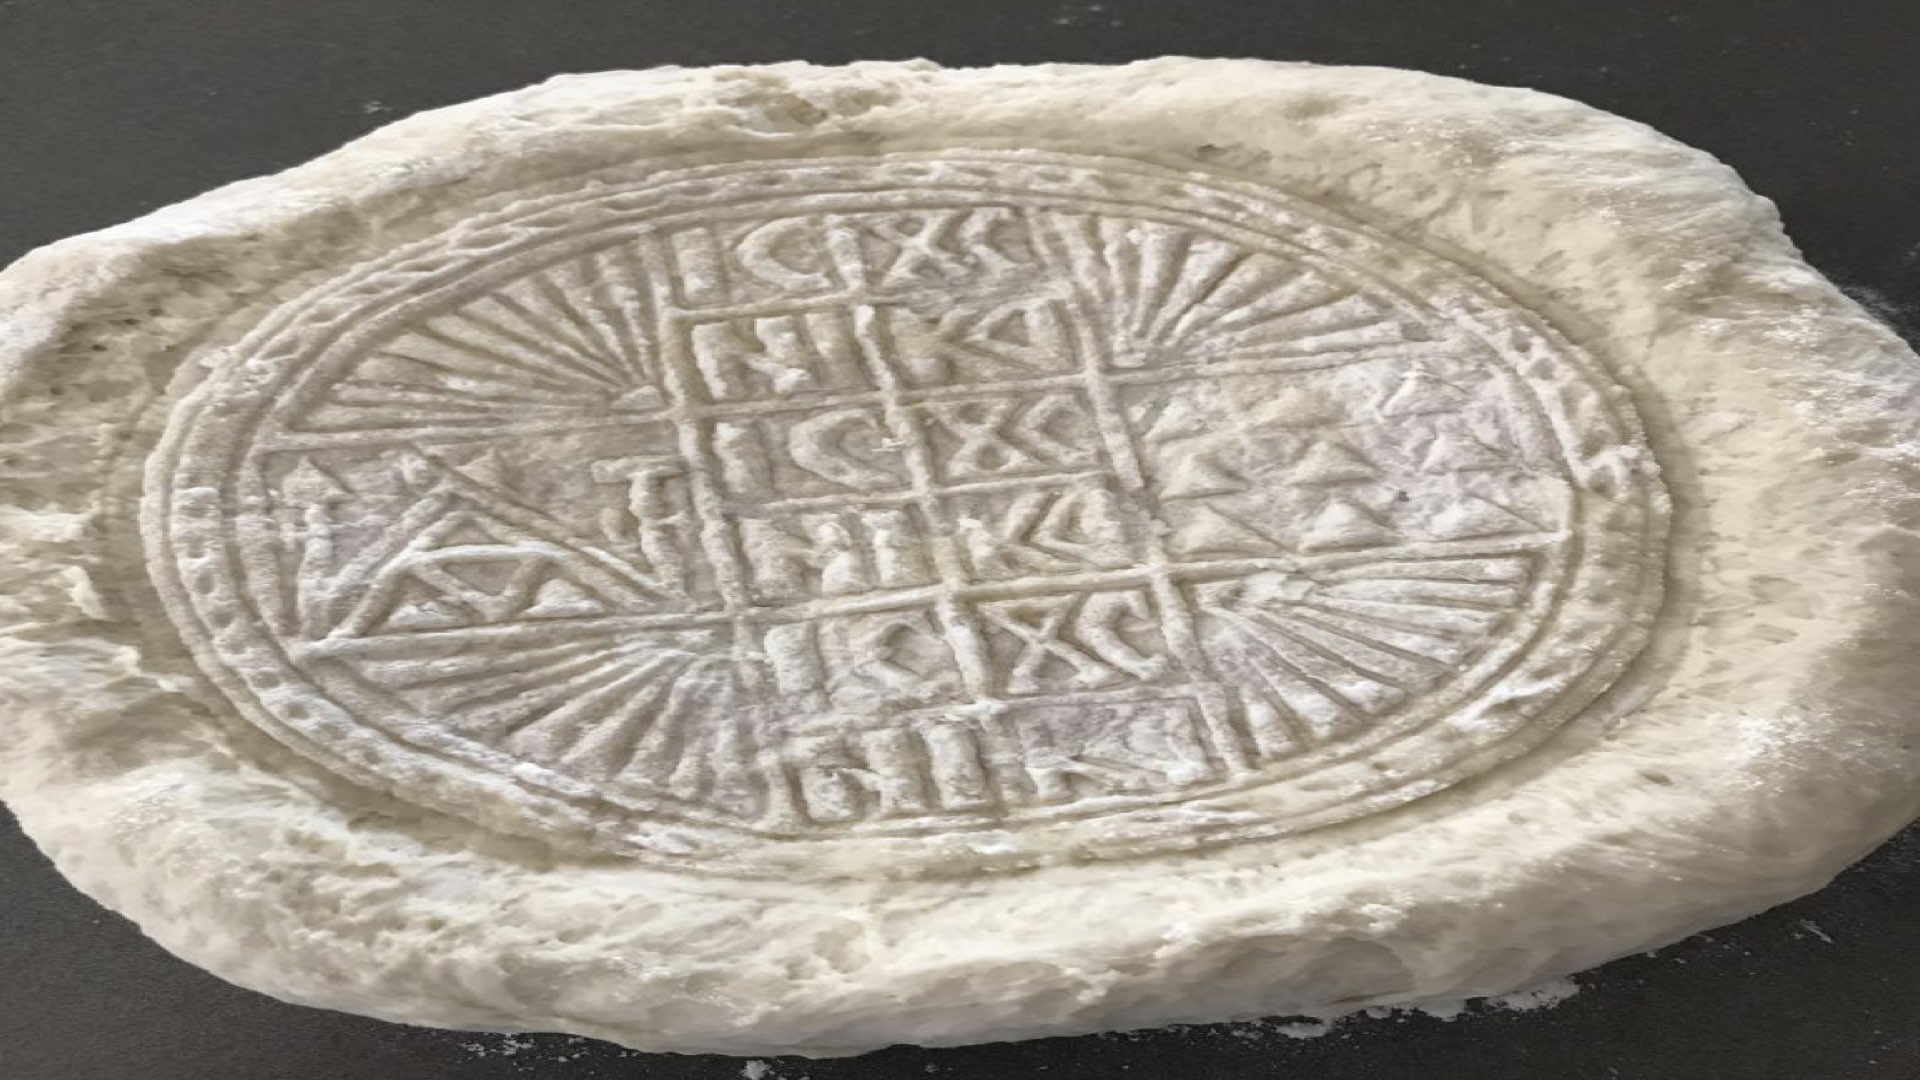
Step 3: Shape and Stamp the Dough
This is for the single style loaf. Some churches make two loaves, one placed one on top of another and baked together to form a single loaf. This double-loaf represents the two natures of Christ: human and divine. You will need to double the recipe above if you are making this style and follow the directions according to your church. There is no right or wrong way, it’s simply which tradition your church follows. This tutorial was created to help my dear mother learn how to make Orthodox Holy Bread for the congregation she attends. However, others have benefited along the way.
When shaping the dough, many tell you to roll it into a ball. This is not recommended as it can cause the bread to split while it is baking. It could result in a seal that isn’t usable and you’ll have to start over. You will be able to see some fine examples of this problem in the troubleshooting guide below.
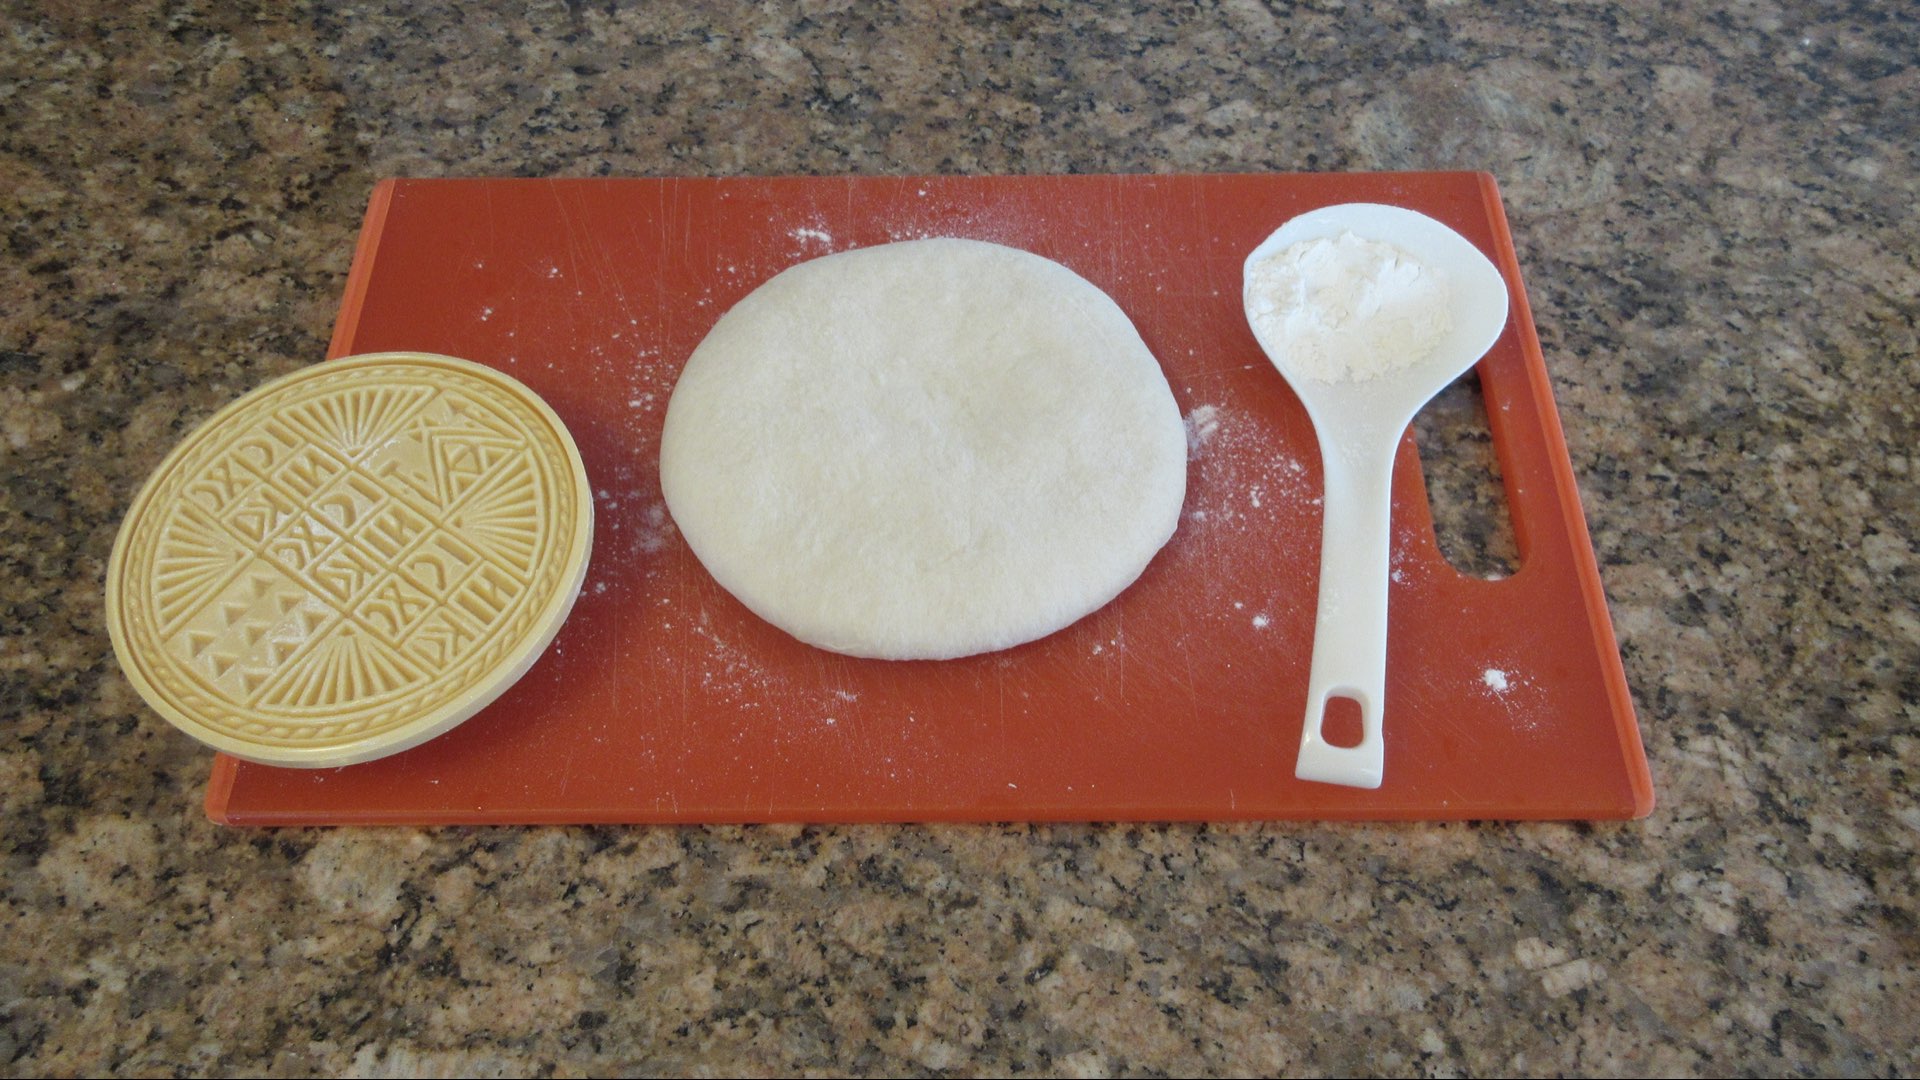
Instead, you want to flatten the dough into a round disc much like you would start out making pizza. You can even use a rolling pin if it’s helpful for you to get the shape right. But your hands should be just fine in the shaping process. Follow the steps pictured below:
Flour a clean surface and remove the dough from the bowl.
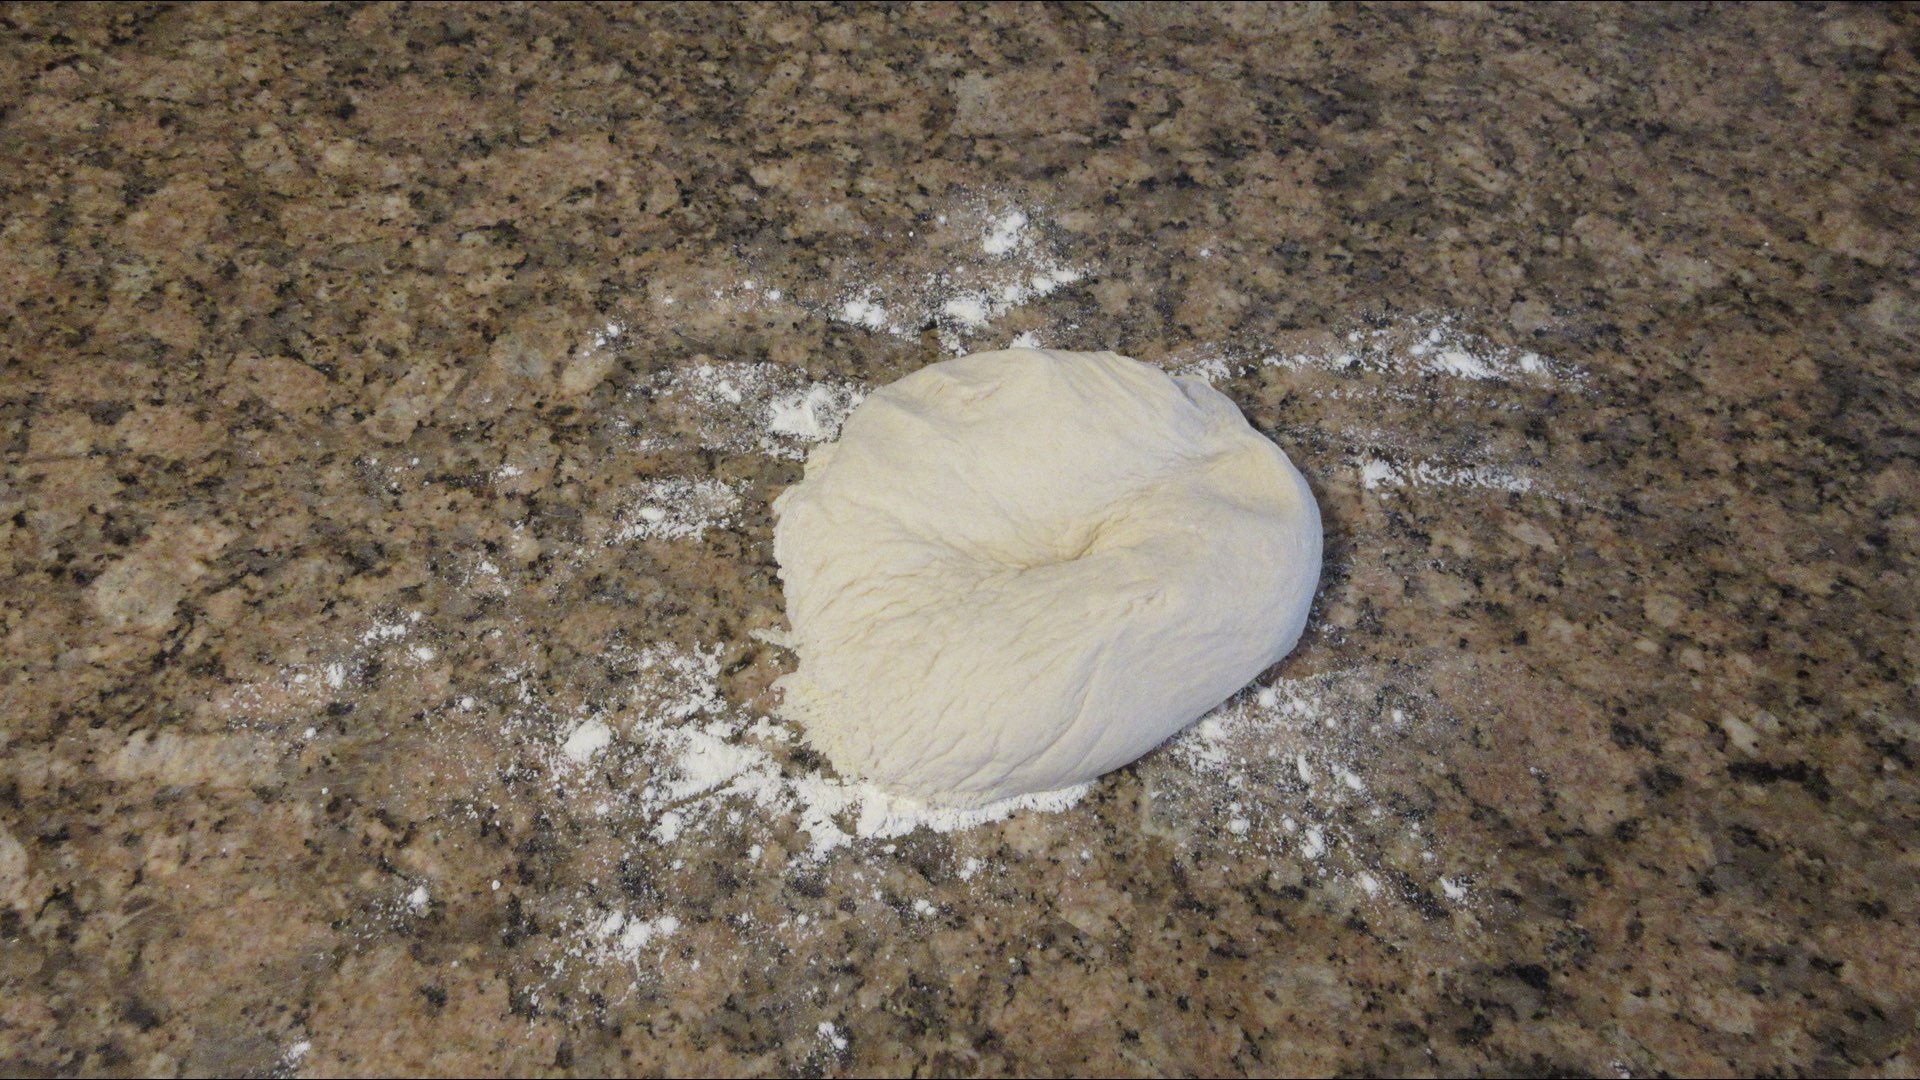
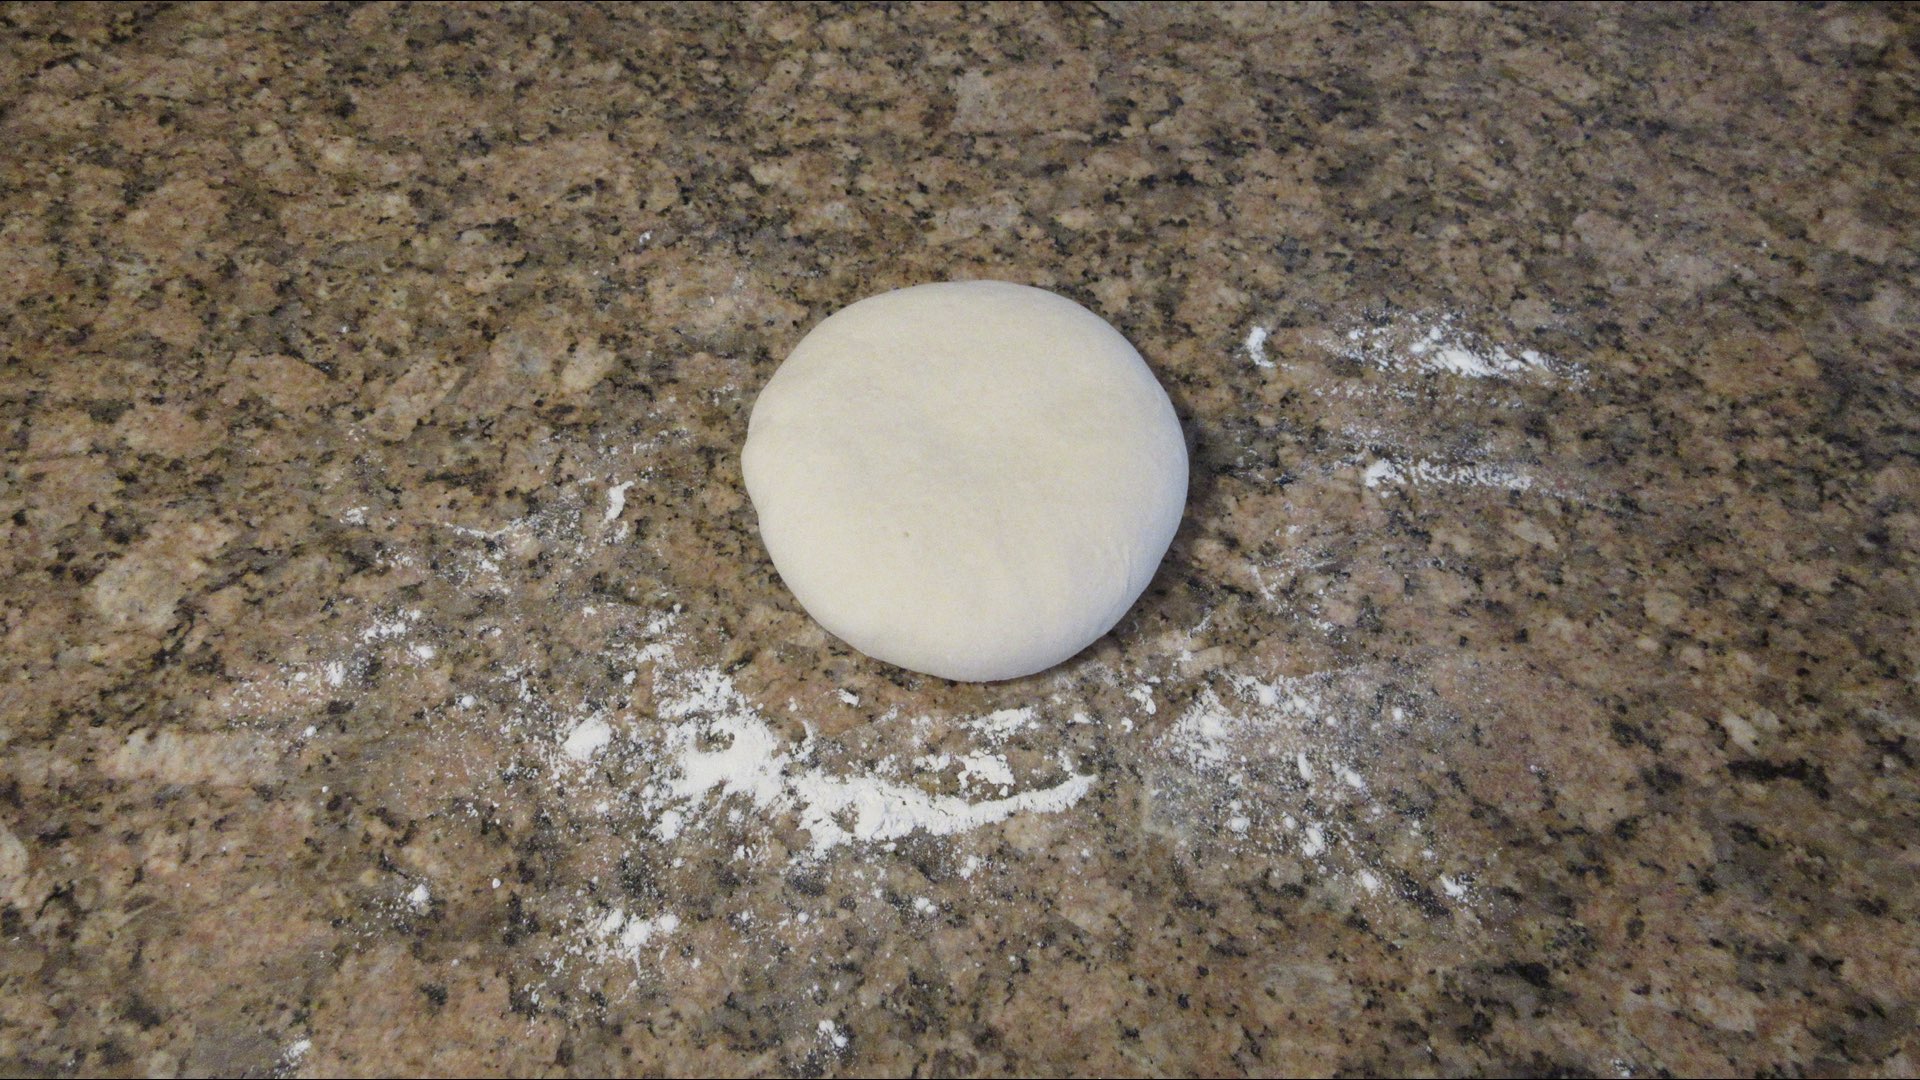
Gently form the dough into a round disc about 1″ (2.5cm) larger than the seal.
Dust the seal with flour.
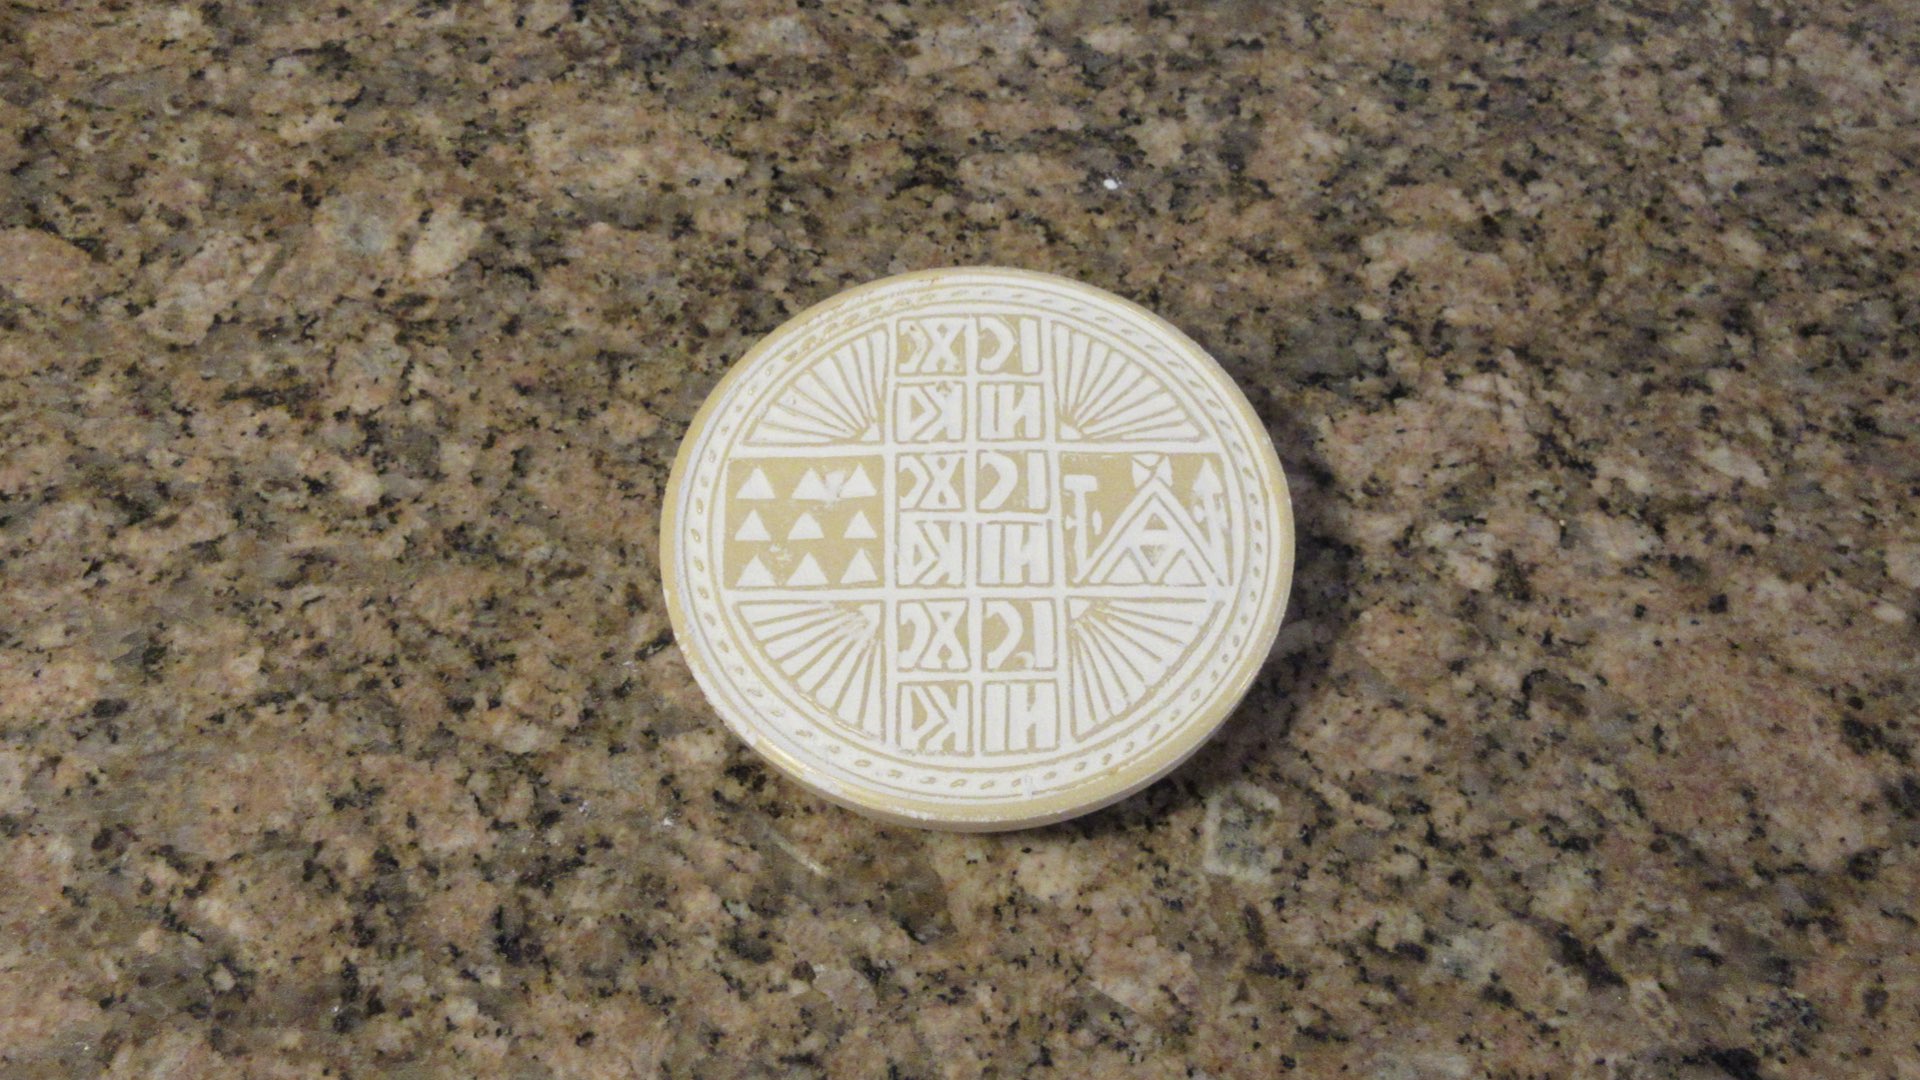
Tap out the excess flour.
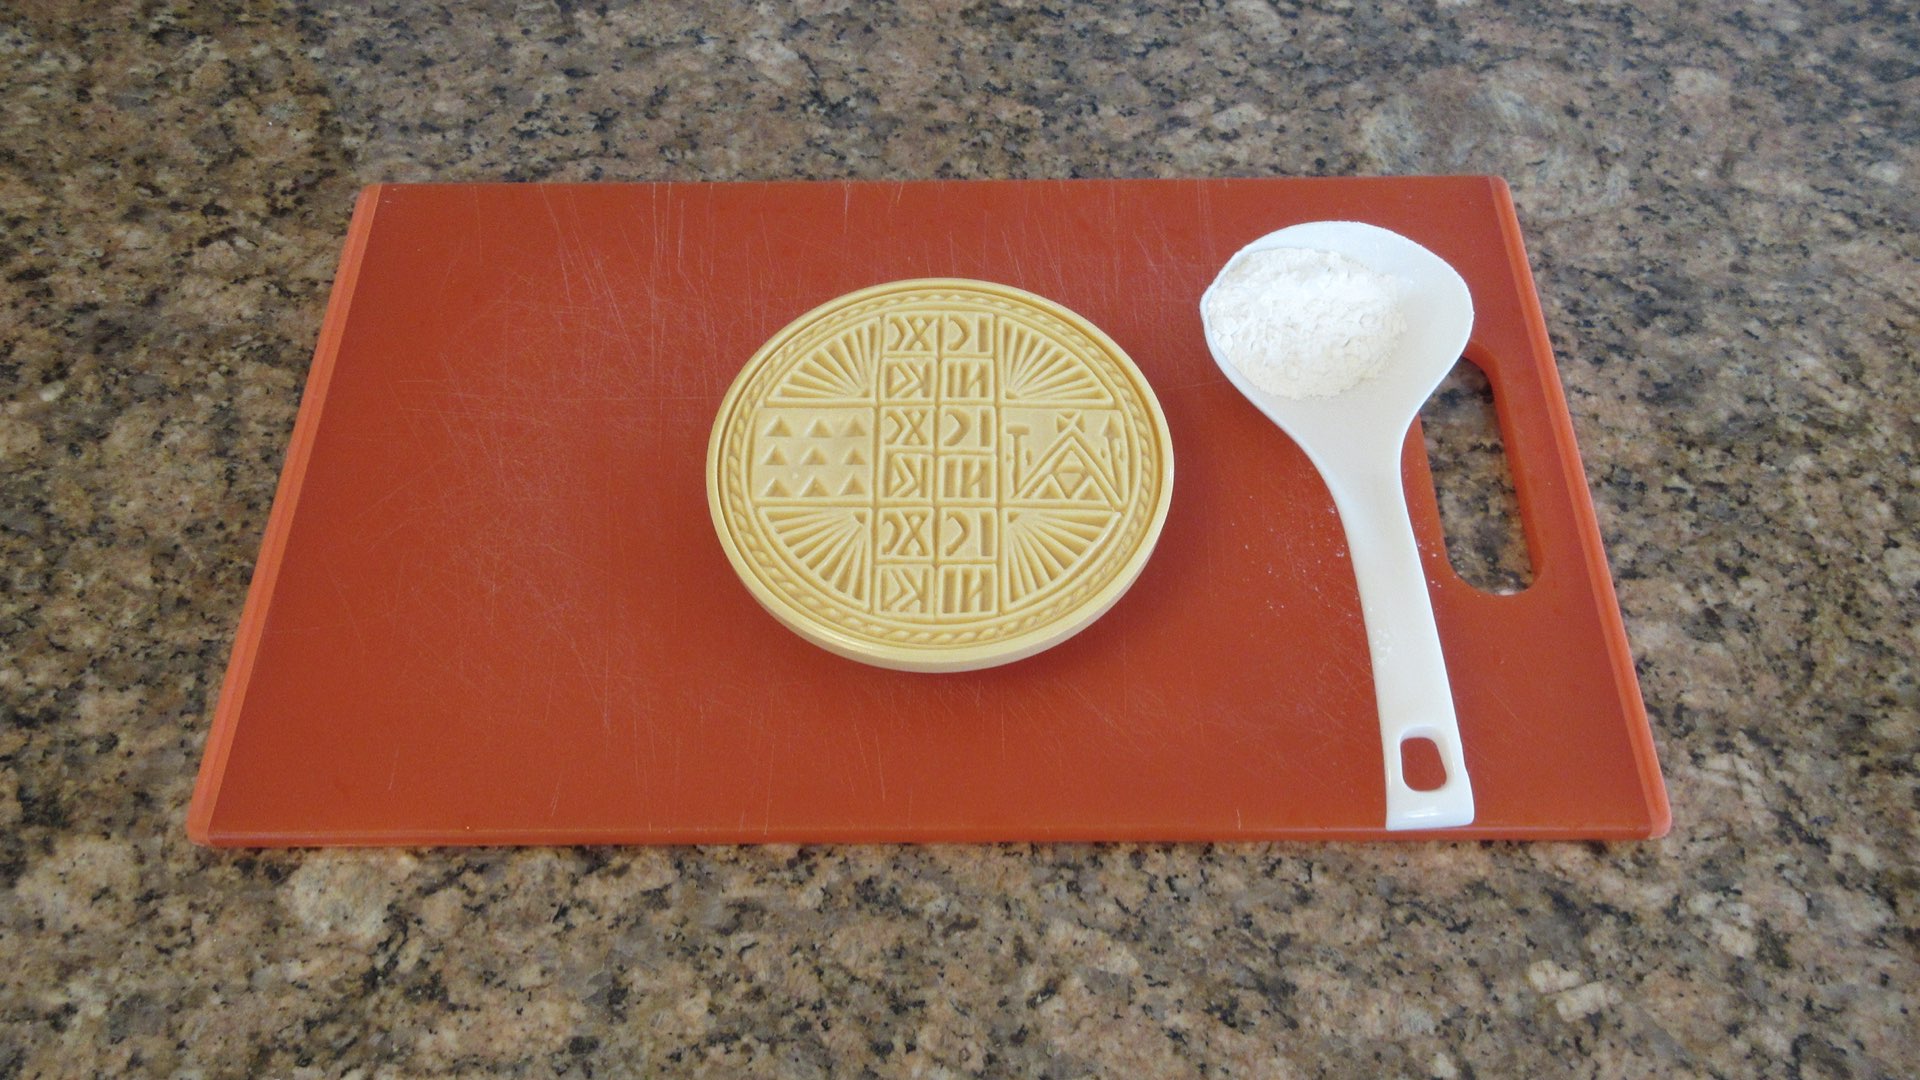
Sprinkle a little flour on top of the dough and dust off excess.
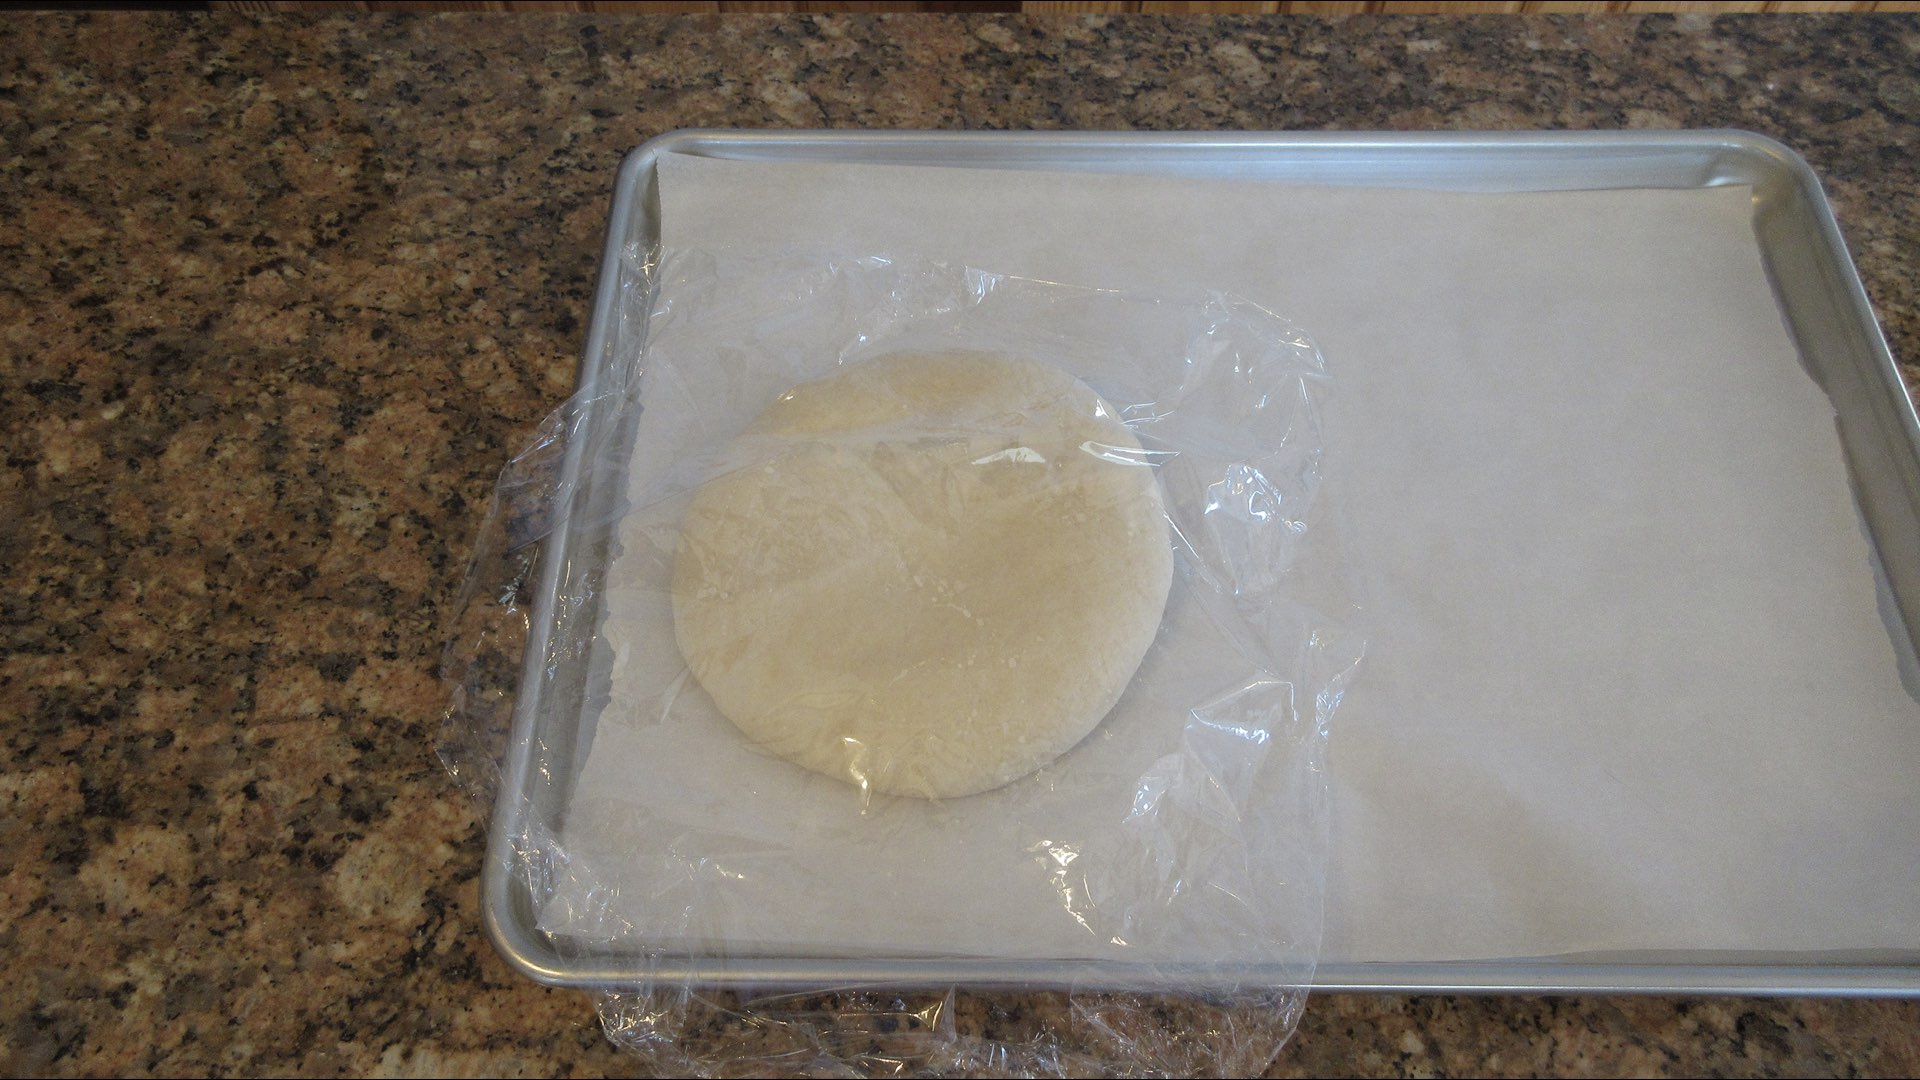
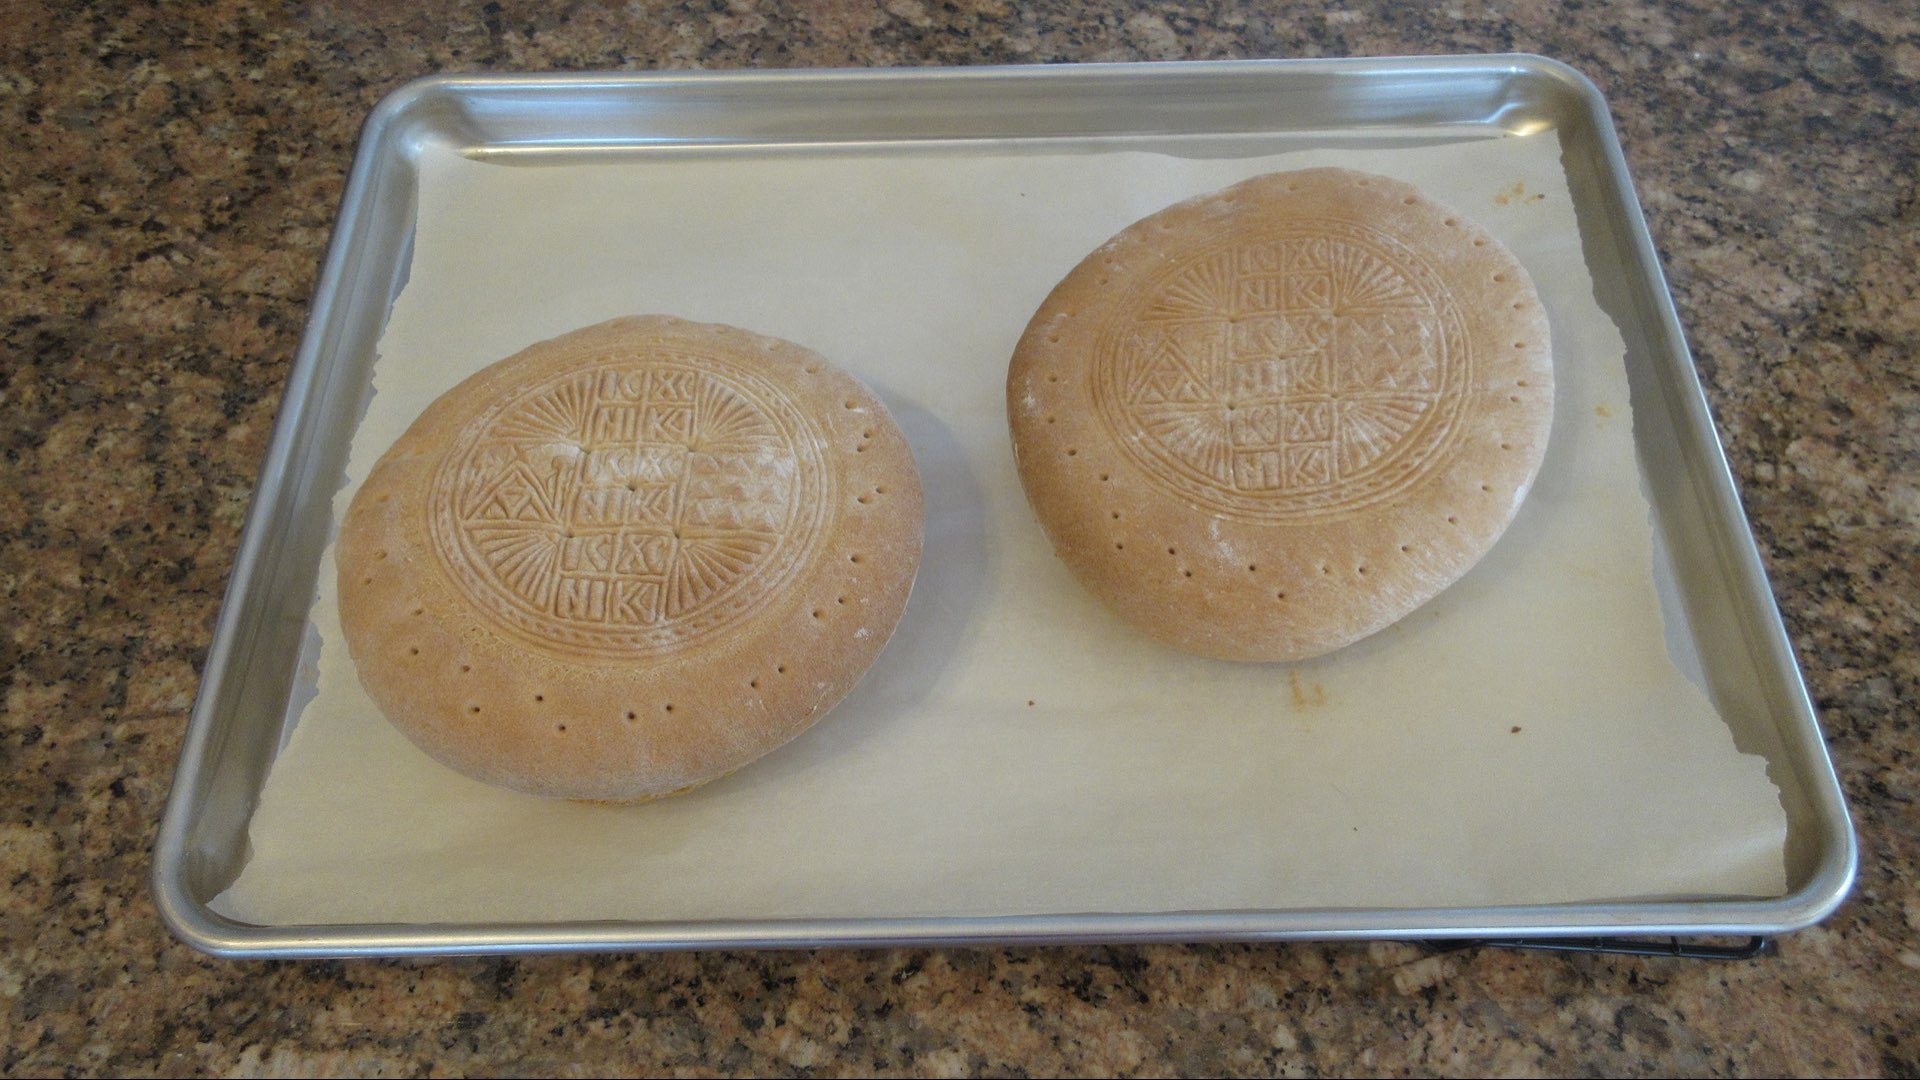
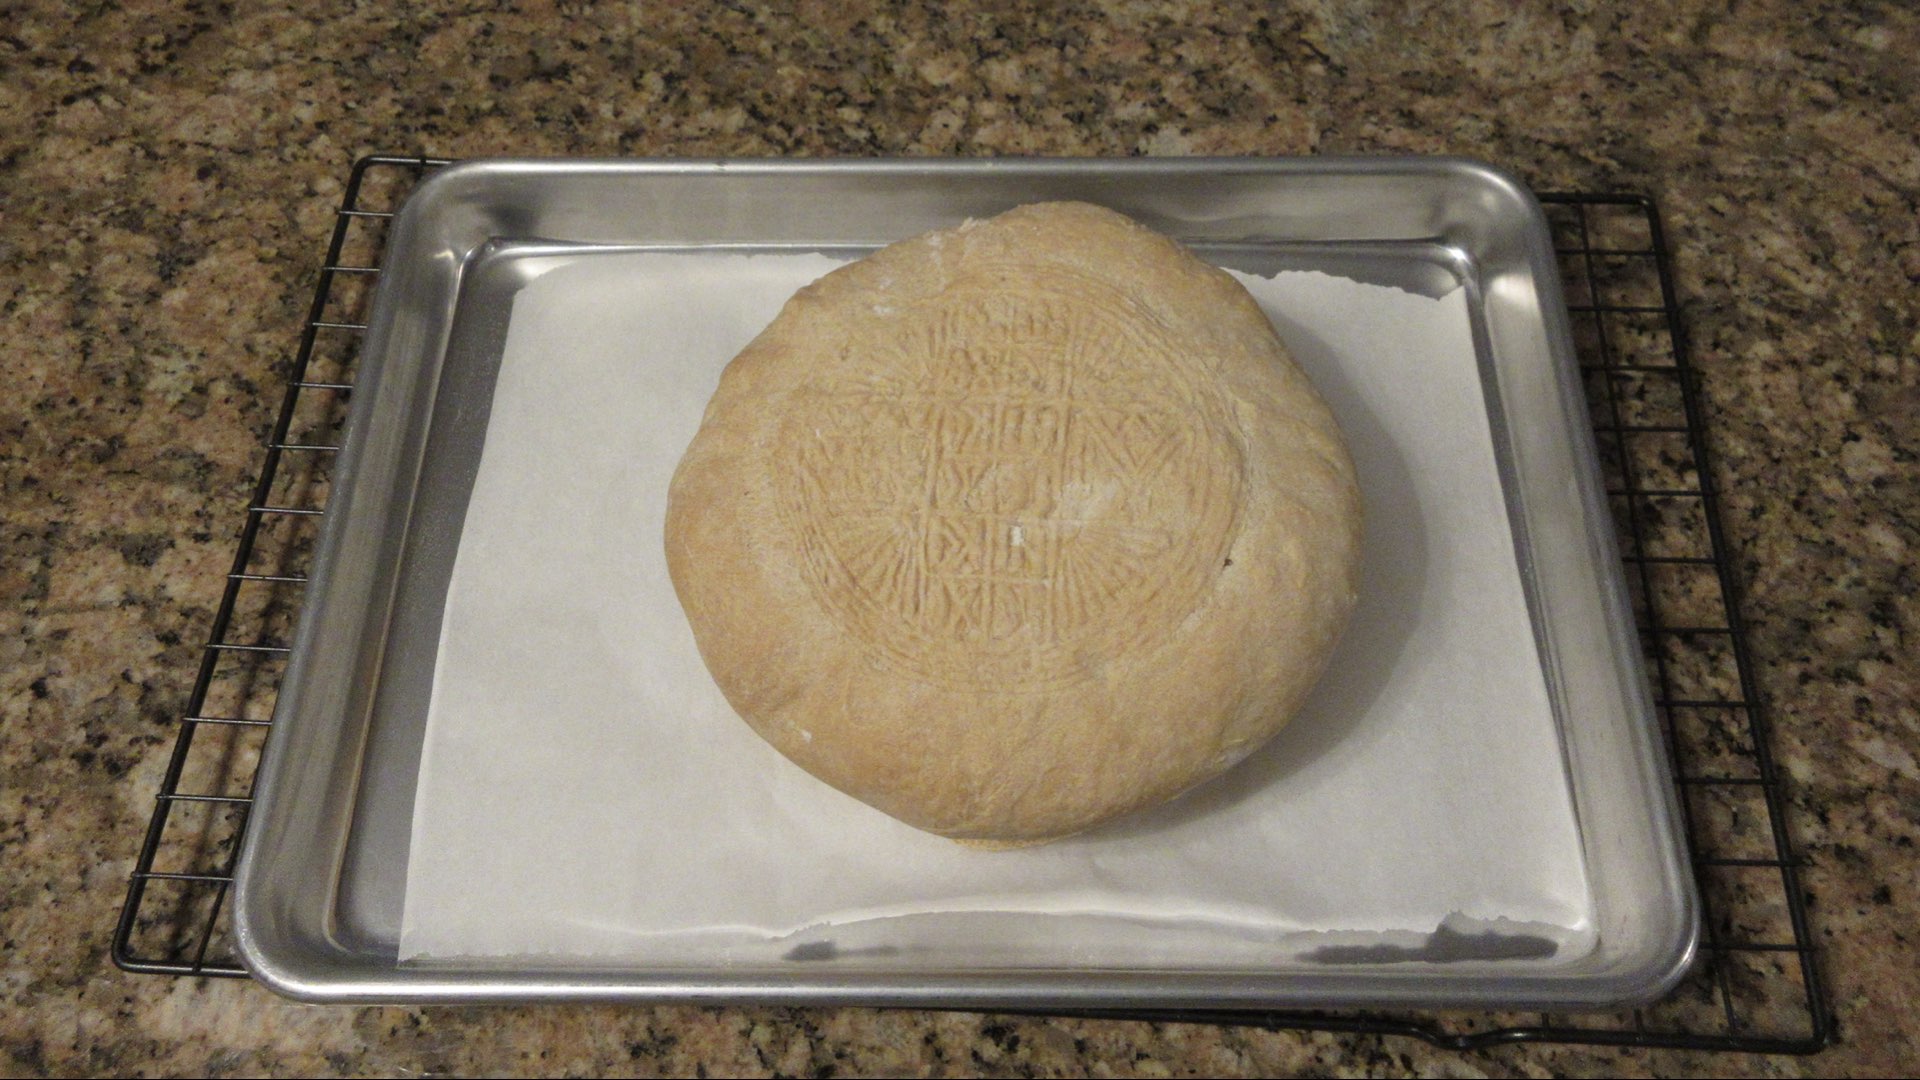
Place the dough on your baking tray, cover and let rest 5-10 minutes.
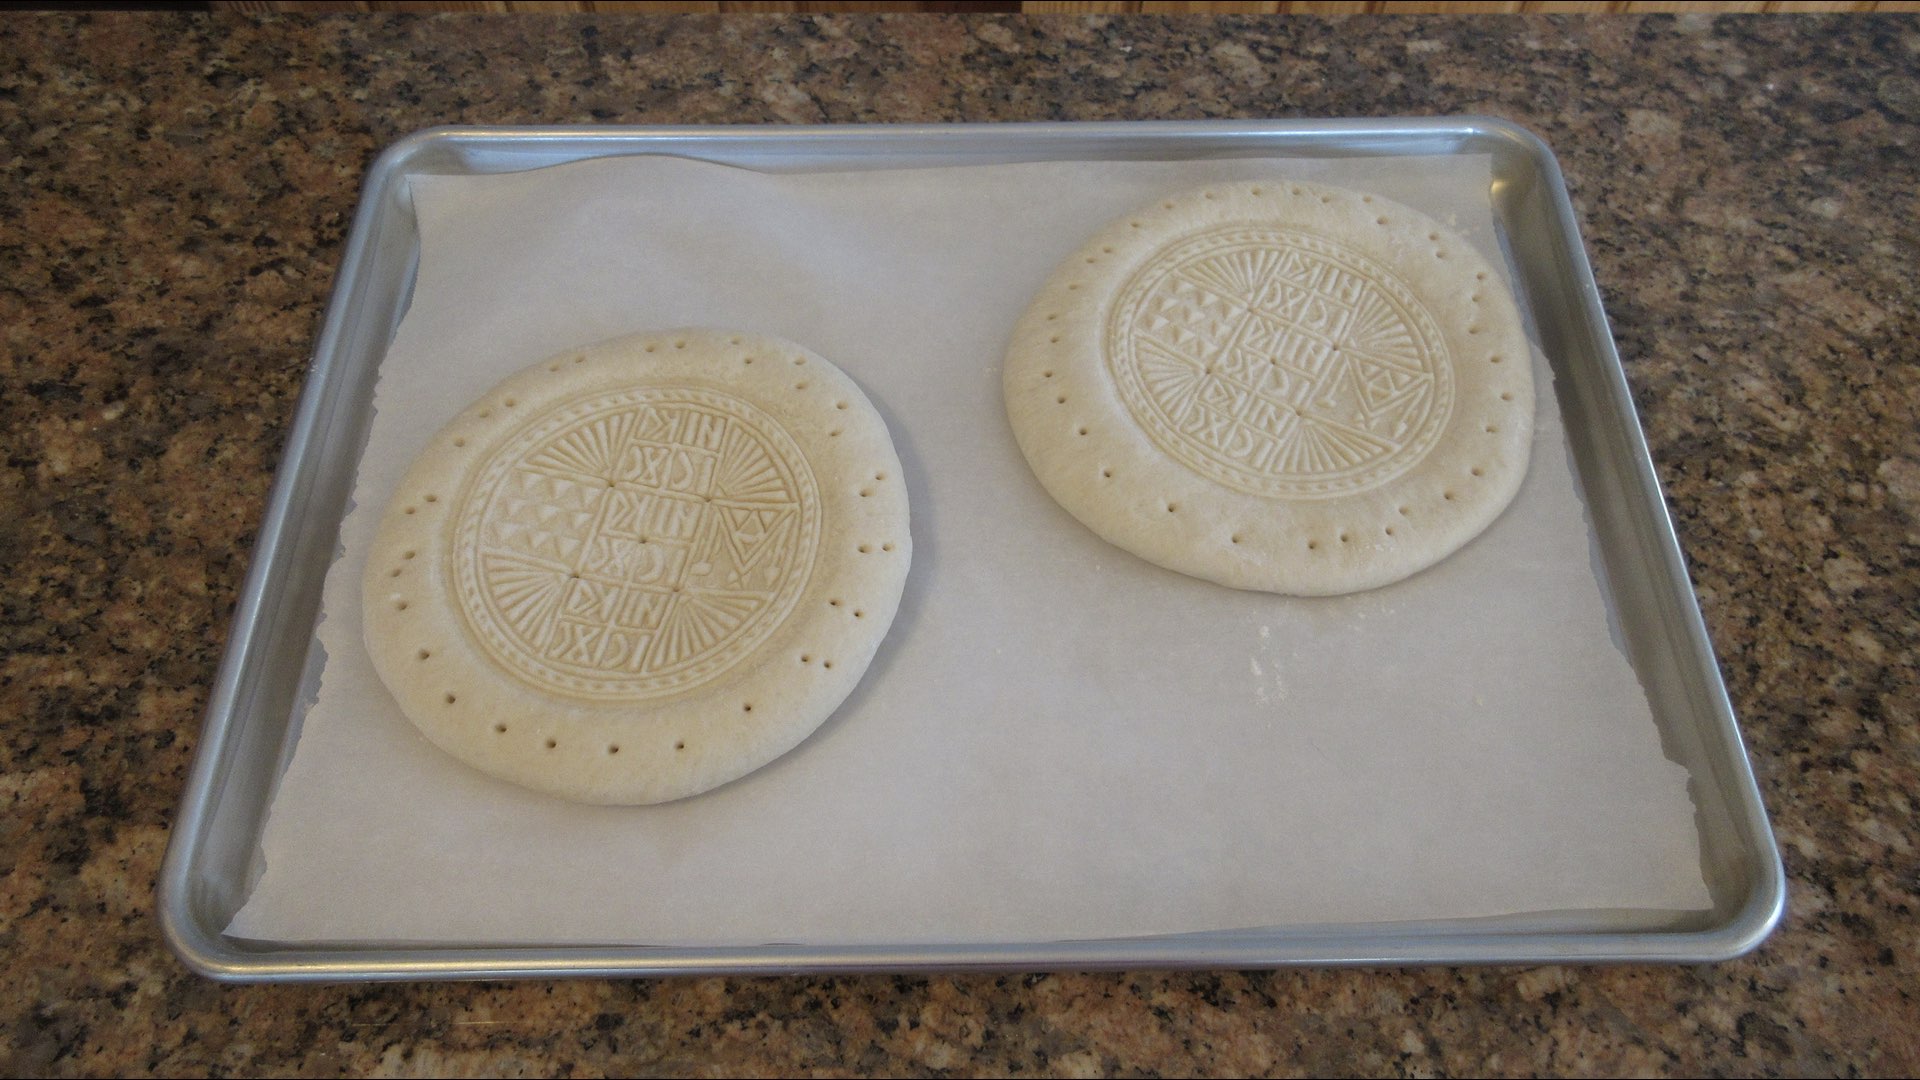
Press the seal down firmly and hold while saying the Lord’s Prayer.

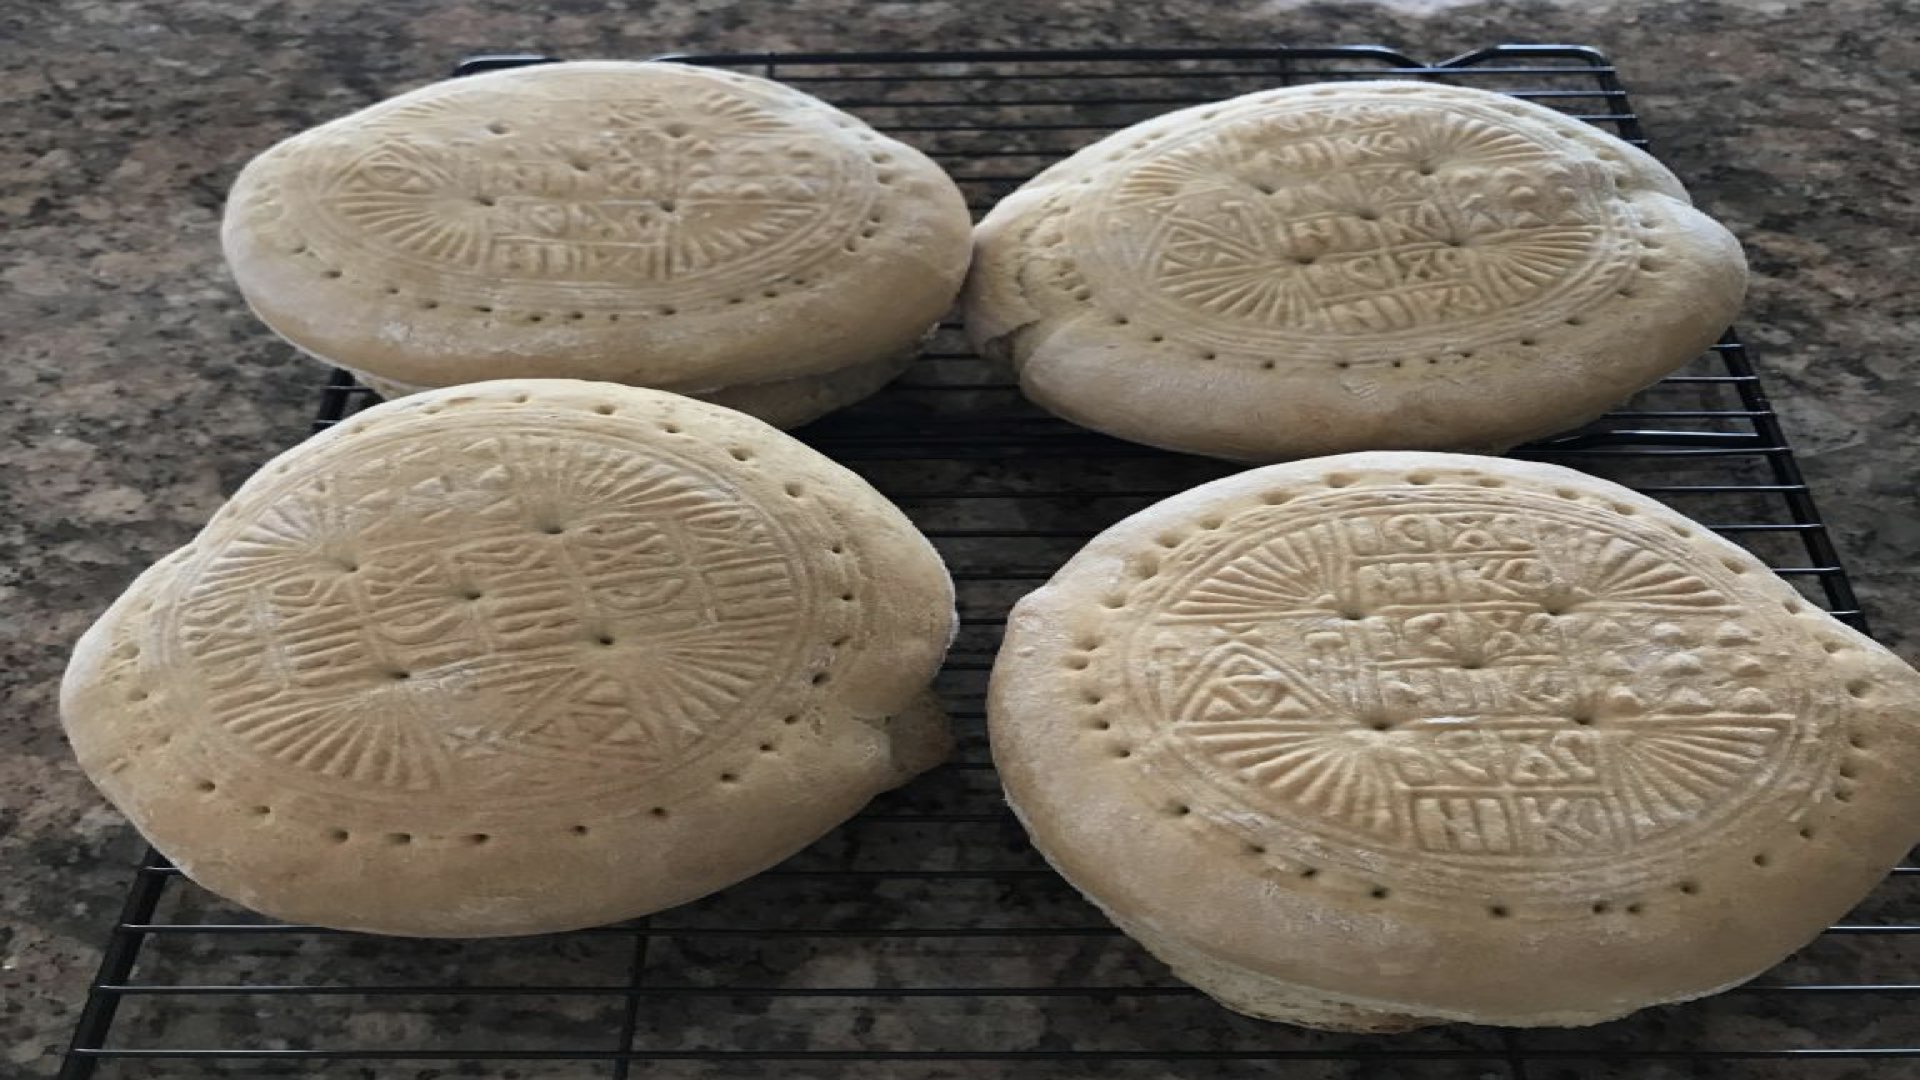
Remove slowly. Pressing holes around the outside with a skewer helps steam escape. Many do 33 holes. Ask your priest before piercing the bread as traditions or viewpoints will vary on this step. Cover while you preheat the oven to 400F (200C.)
Step 4: Bake Orthodox Holy Bread
Baking the holy bread varies from congregation to congregation. Some prefer a lighter bake for longer periods of time. If your church prefers that method, 350F (180C) for 50 – 60 minutes is sufficient. However, 400F (200C) seems to create the most consistent loaves with a lovely golden brown crust that isn’t too tough to cut into during service. When in doubt, ask your priest for baking temperature. If your pan is a dark surface, you may need to adjust the temperature down 25F (10C.) Likewise, if the pan is very light, you may need to adjust the temperature up 25F (10C.)
Do not add any grease to the pan. Just like additions to the bread itself, the grease, especially cooking and baking sprays can damage the delicate metals of the diskos and chalice. Instead, use a non-stick surface, generously floured surface, a silicone mat or better yet, parchment paper. Parchment paper is the best way to ensure the bread will not stick to your pan.
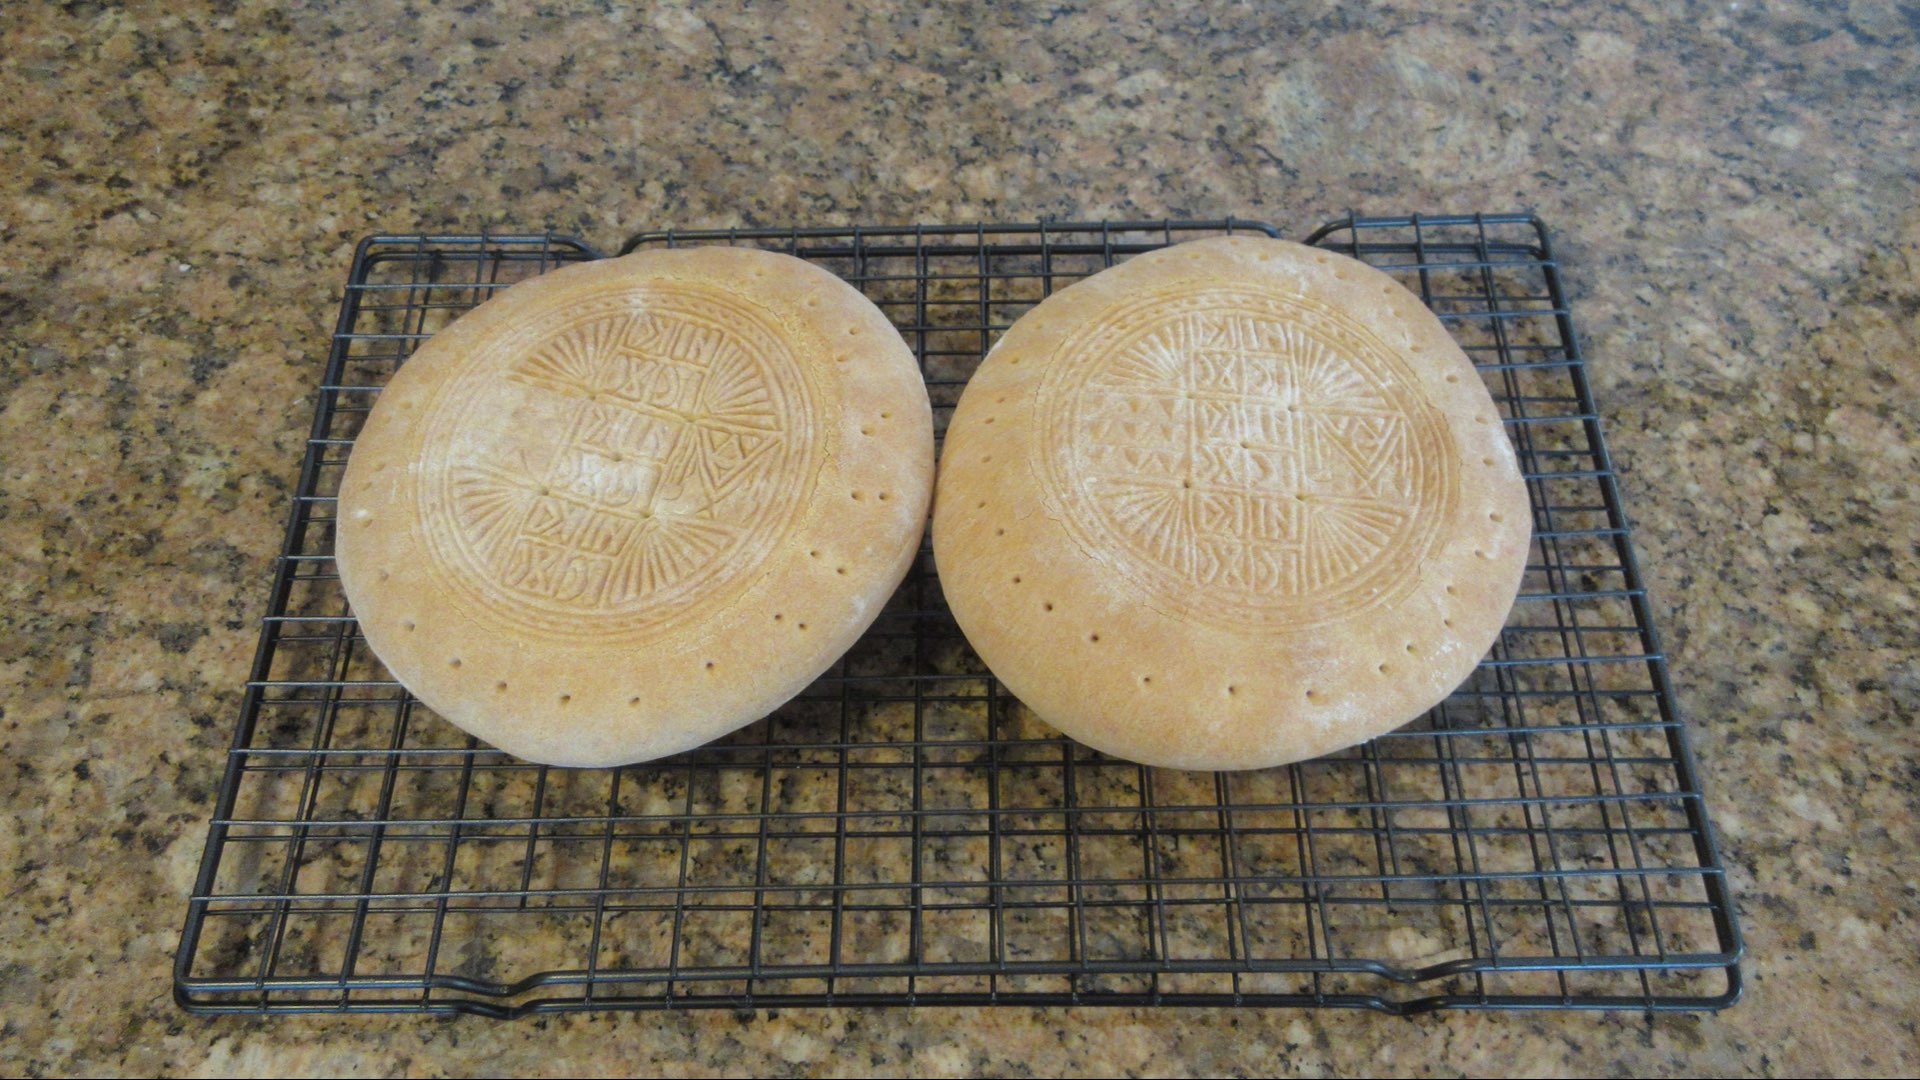
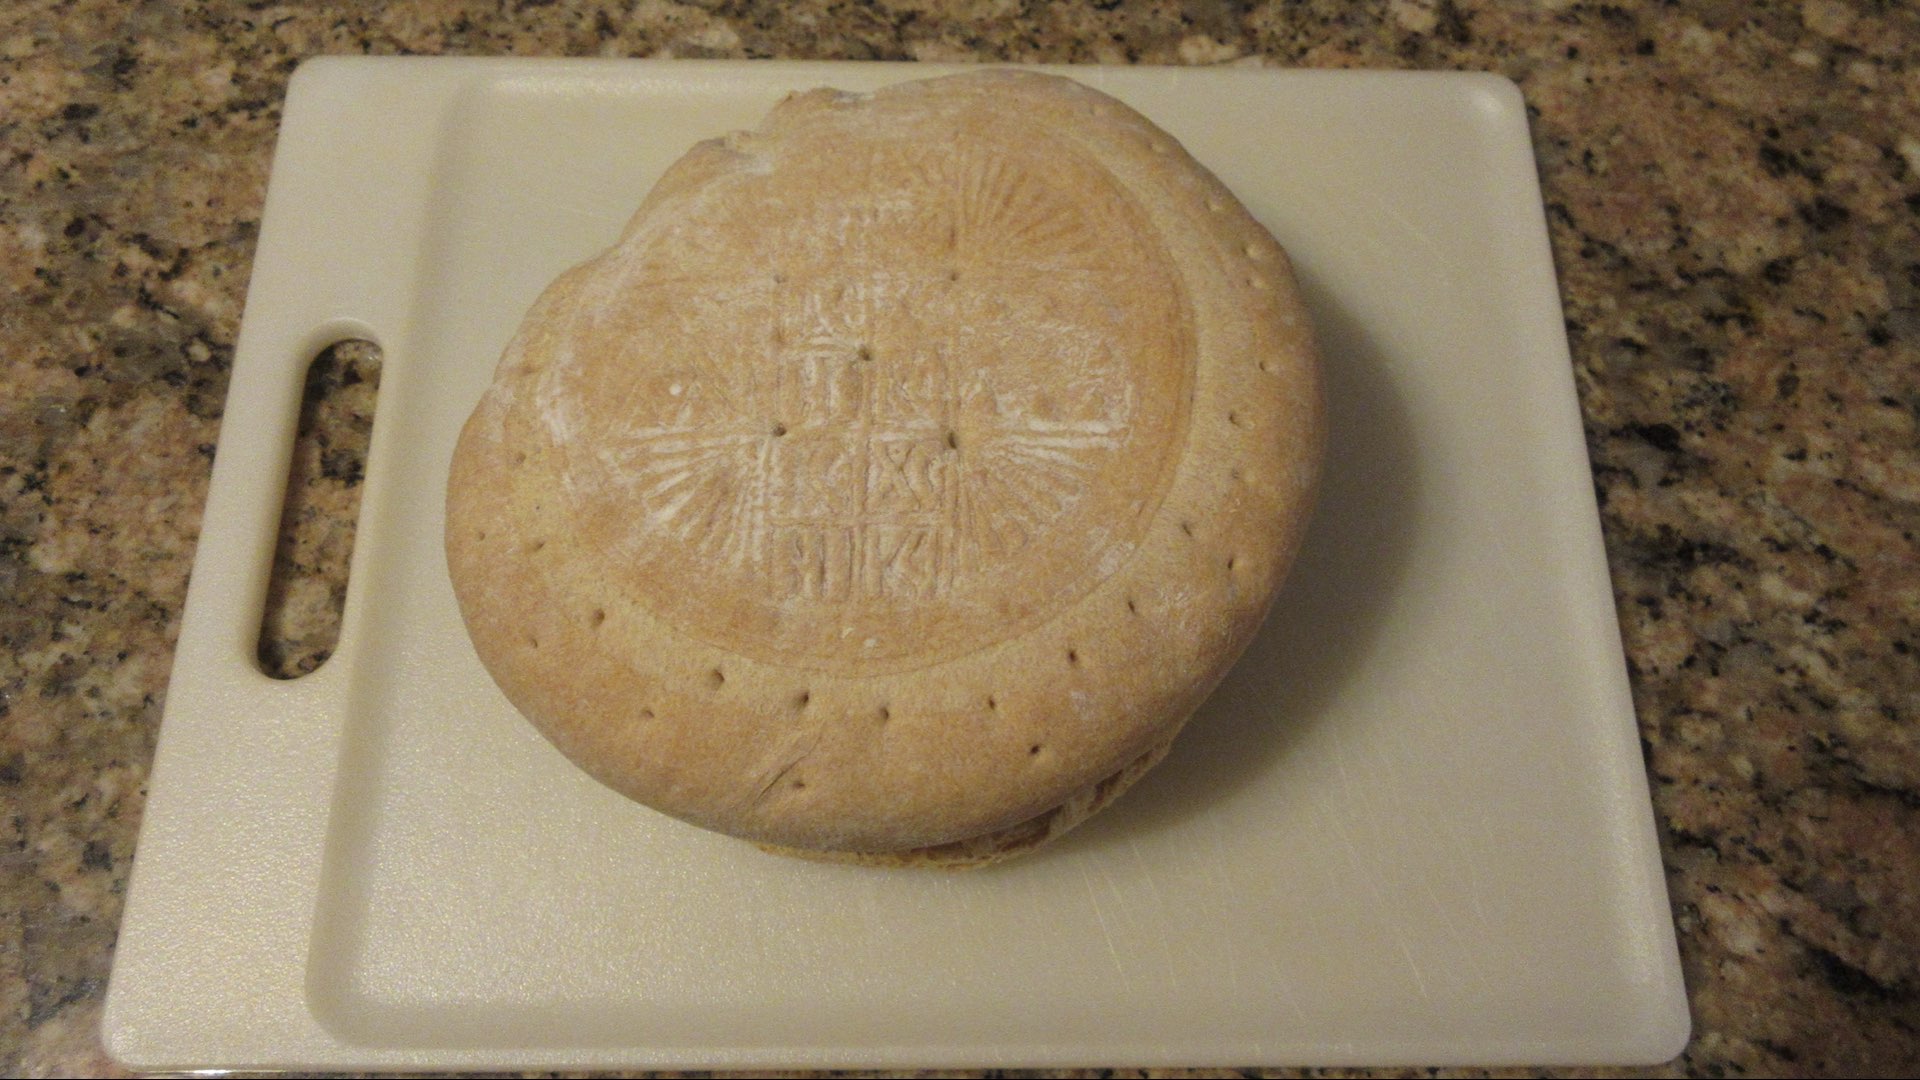
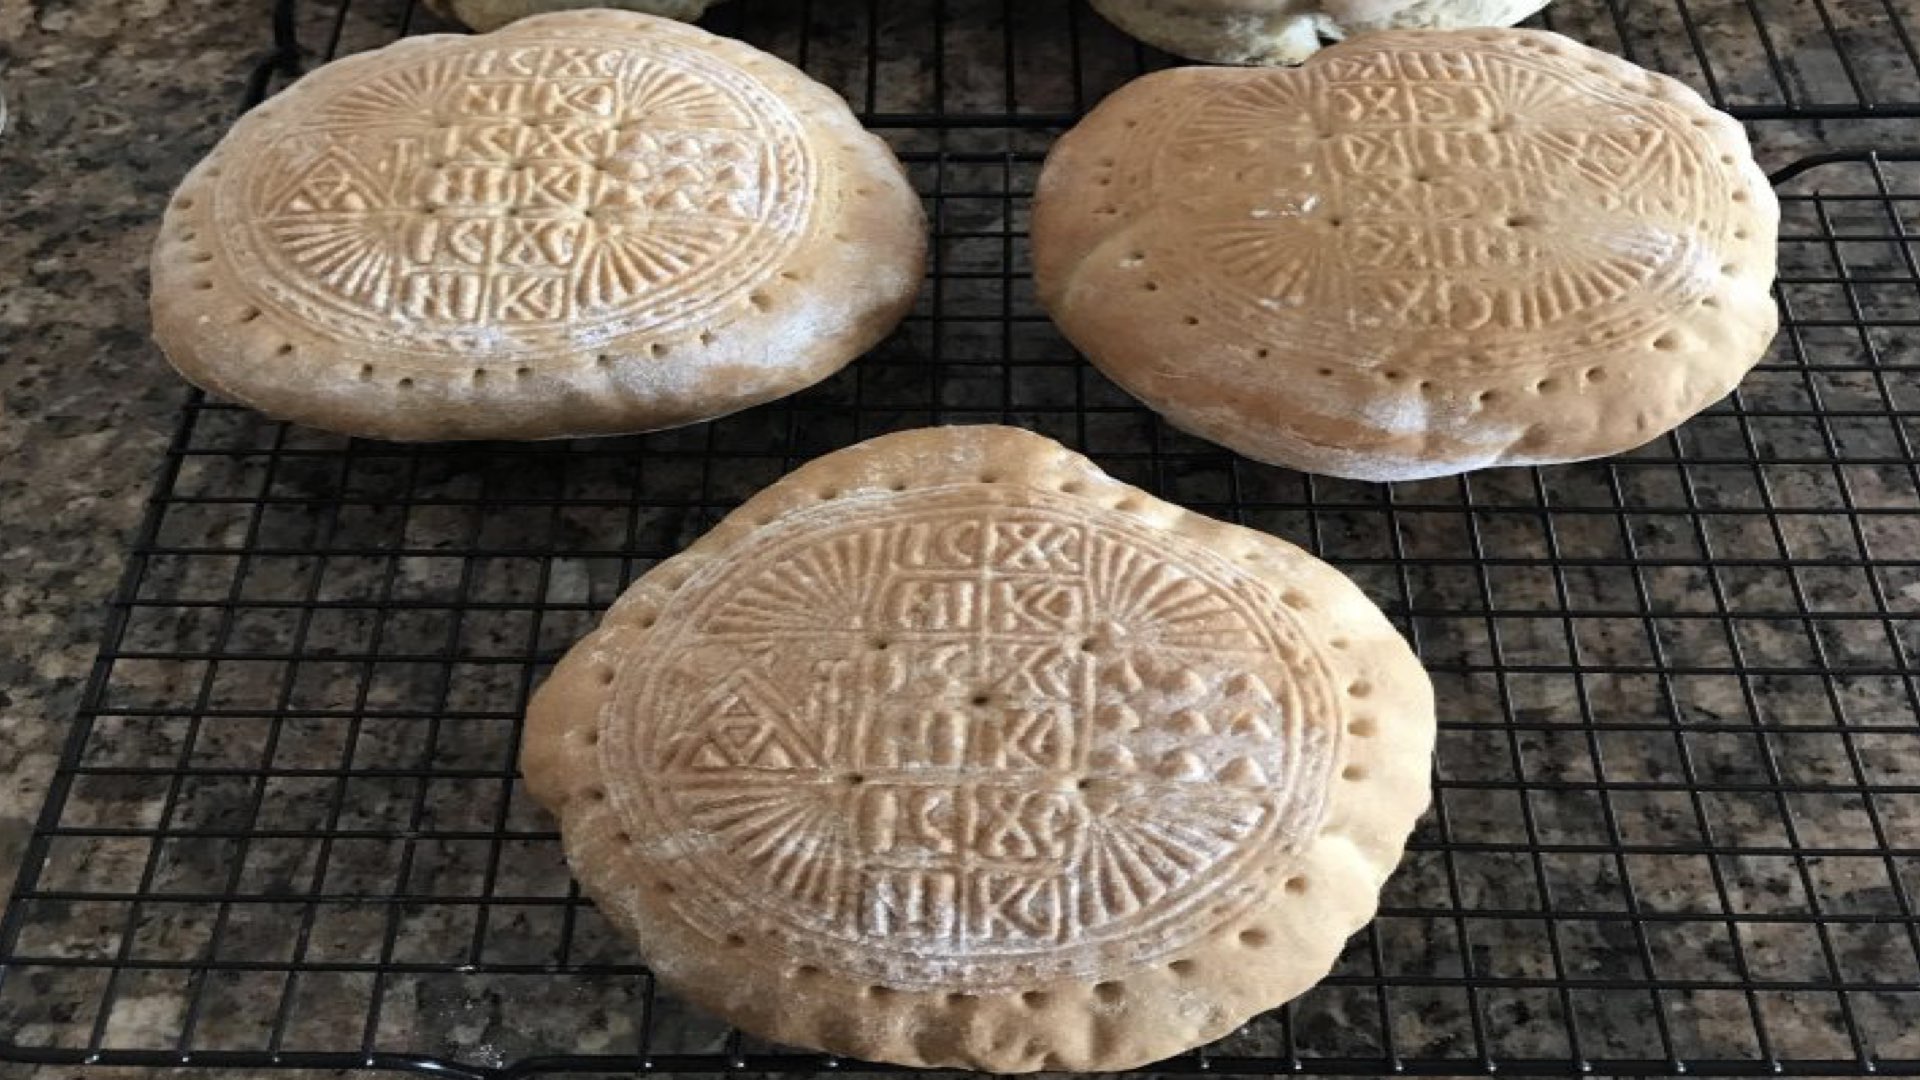
Bake 35-45 minutes or until golden brown and bread sounds hollow when tapped. The internal temperature should reach 212F (100C) when fully baked.
Cool completely on a wire rack before wrapping up.
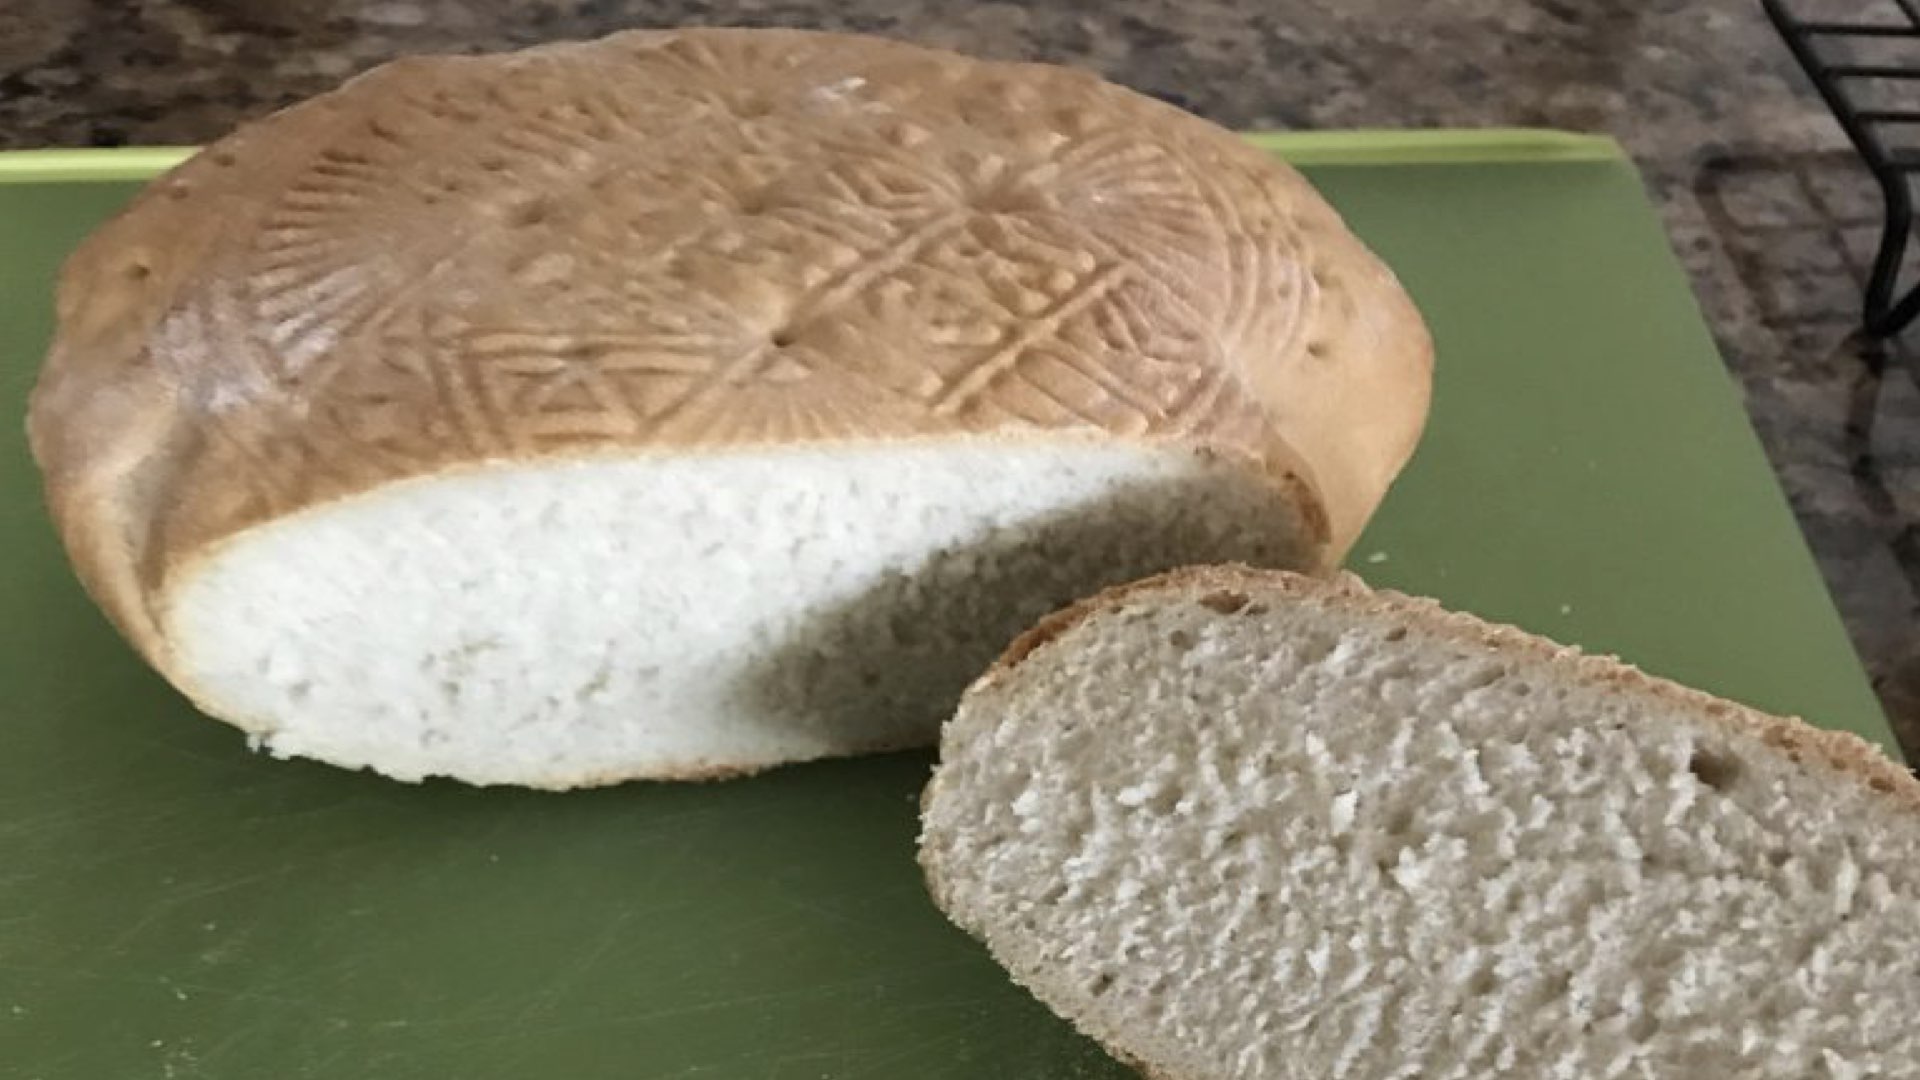
The crumb should be fairly close when finished.
Troubleshooting the Bread
Below, I’ll share a few pictures of loaves that had a mind of their own and what caused them. Baking prosphora or orthodox holy bread is a humbling experience when you first start out, so don’t despair if any of your loaves look less than ideal. Take them to the priest anyway. He only needs one good seal for the church service.
To throw out perfectly good but imperfect Prosphora Orthodox Holy Bread is considered prideful and should be avoided at all costs. A lesson in humility is to take what you have made in prayer anyway. If you still feel too ashamed to take it to the church, it should be fed to wildlife or disposed of as you would any holy item. Then speak to your priest about how you felt this way. He will guide you spiritually to overcome these feelings.
Start practicing and take in those loaves no matter what they look like. No matter how your bread turns out, it’s a gift to God. Do not be ashamed and take your bread to the priest. No one but you studies your bread critically for lumps, cracks and bumps.
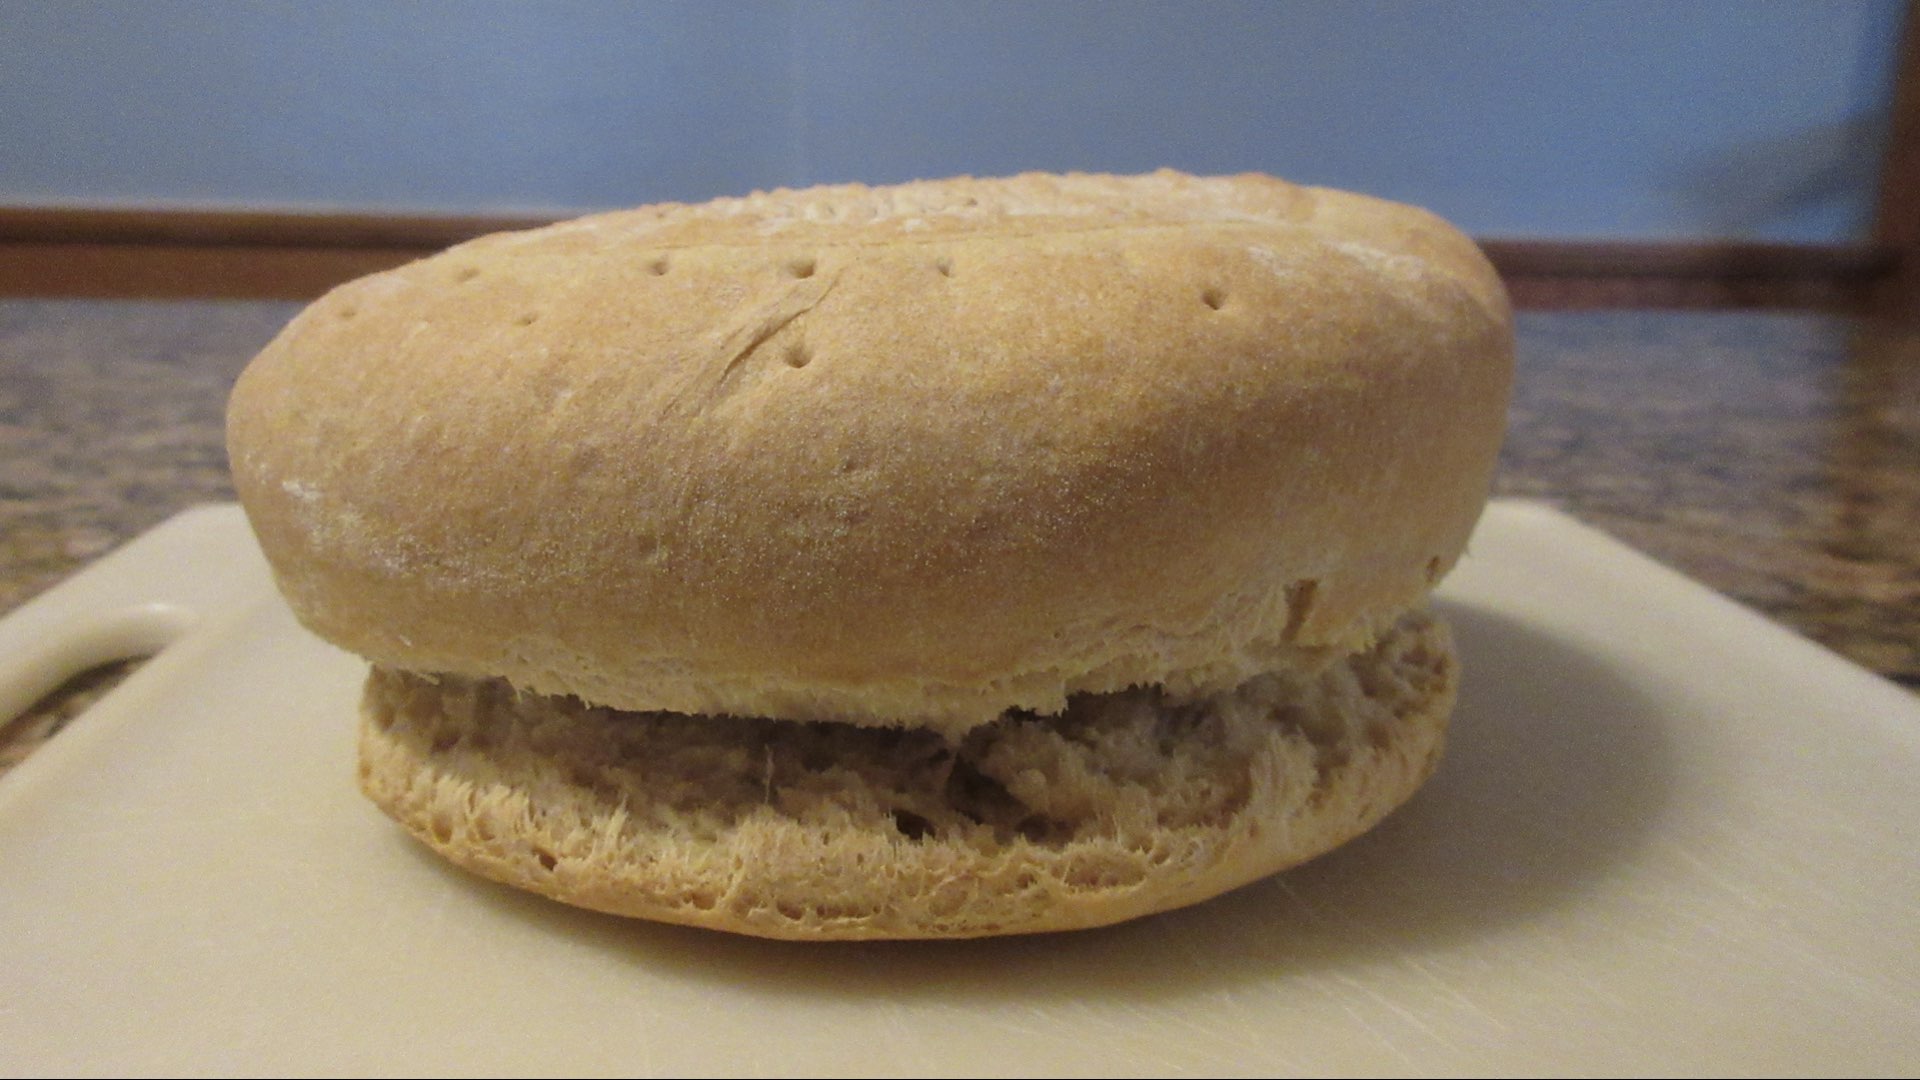
This mushroom top is often caused by allowing the dough to dry out. Keep covered while rising, shaping and preheating oven.
Wrinkled, poorly printed dough is often due to too much water added or over-rising the dough.
Misshapen on one side will often happen if dough was not even before pressing the seal.
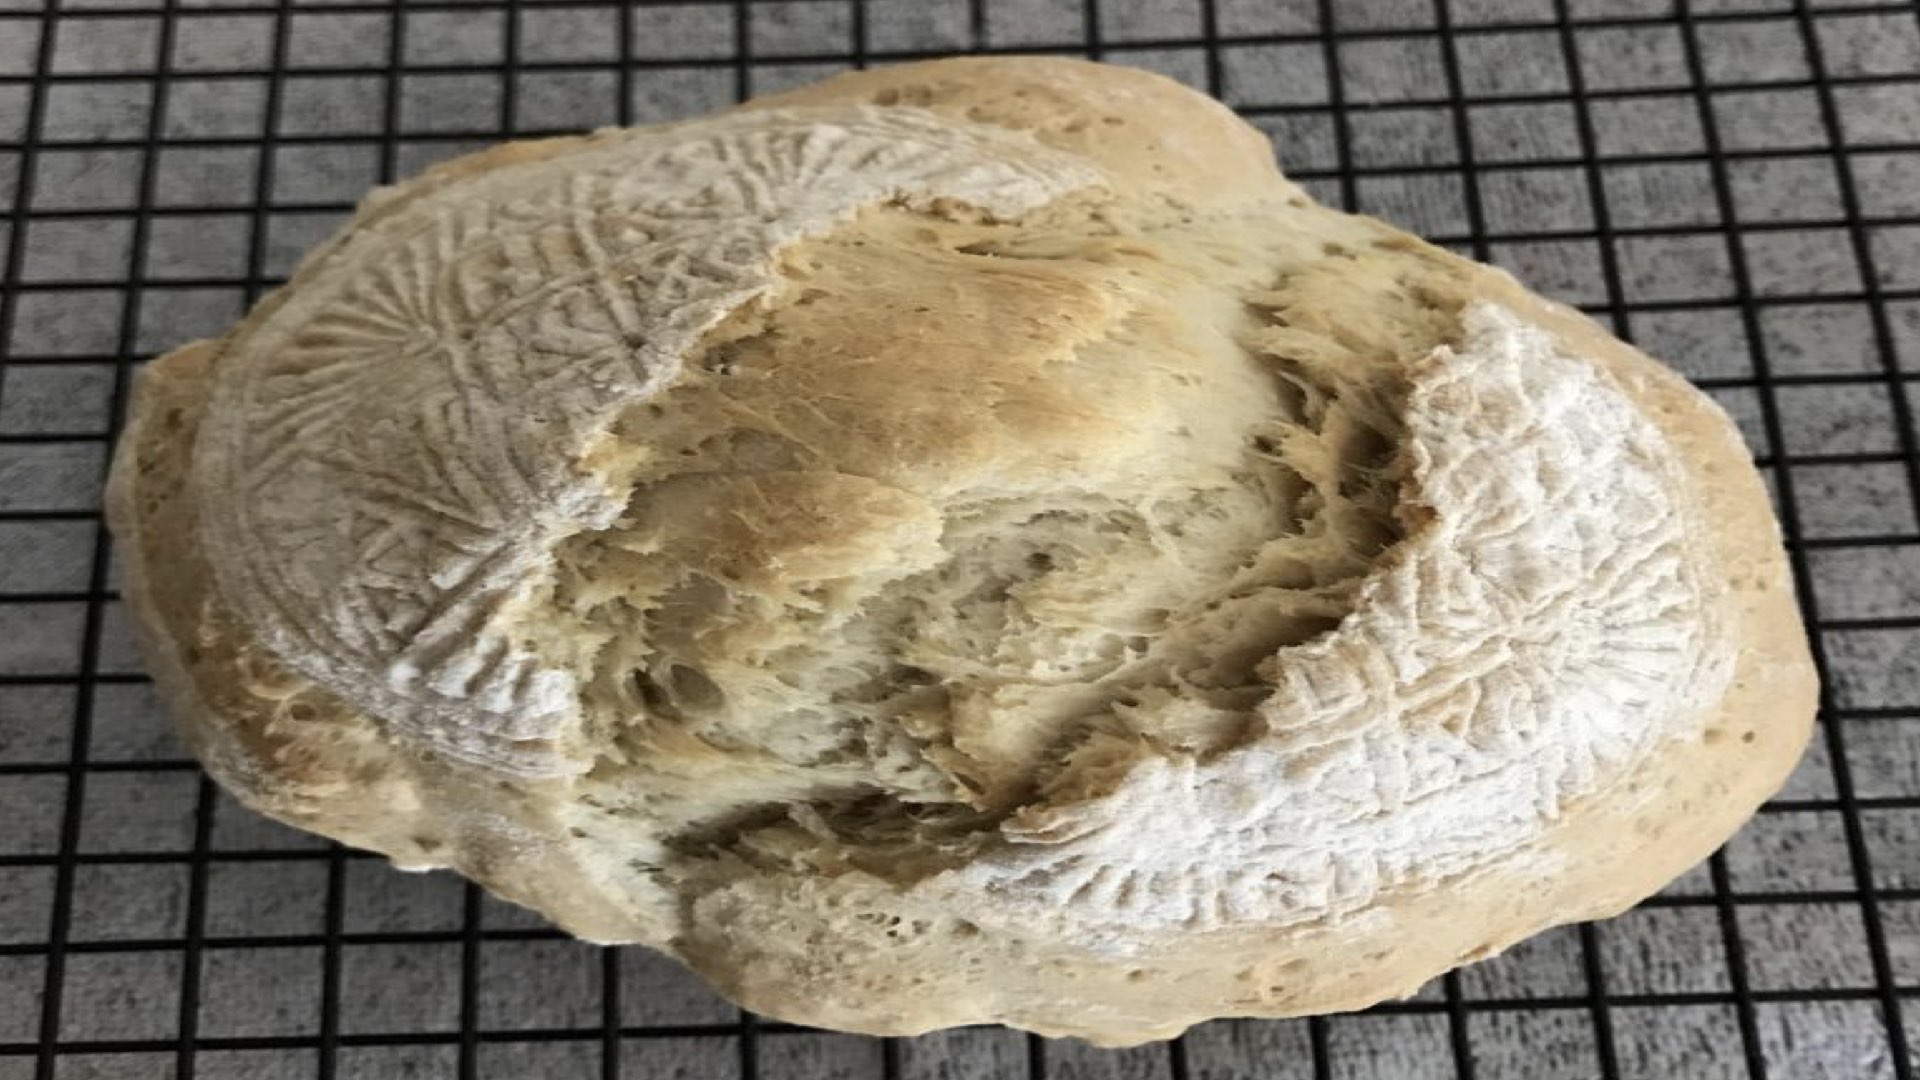
Completely cracked loaves are due to not rising the dough long enough or creating too much tension when shaping the dough.
Too light of crust means your oven temperature is too low or needs additional baking time.
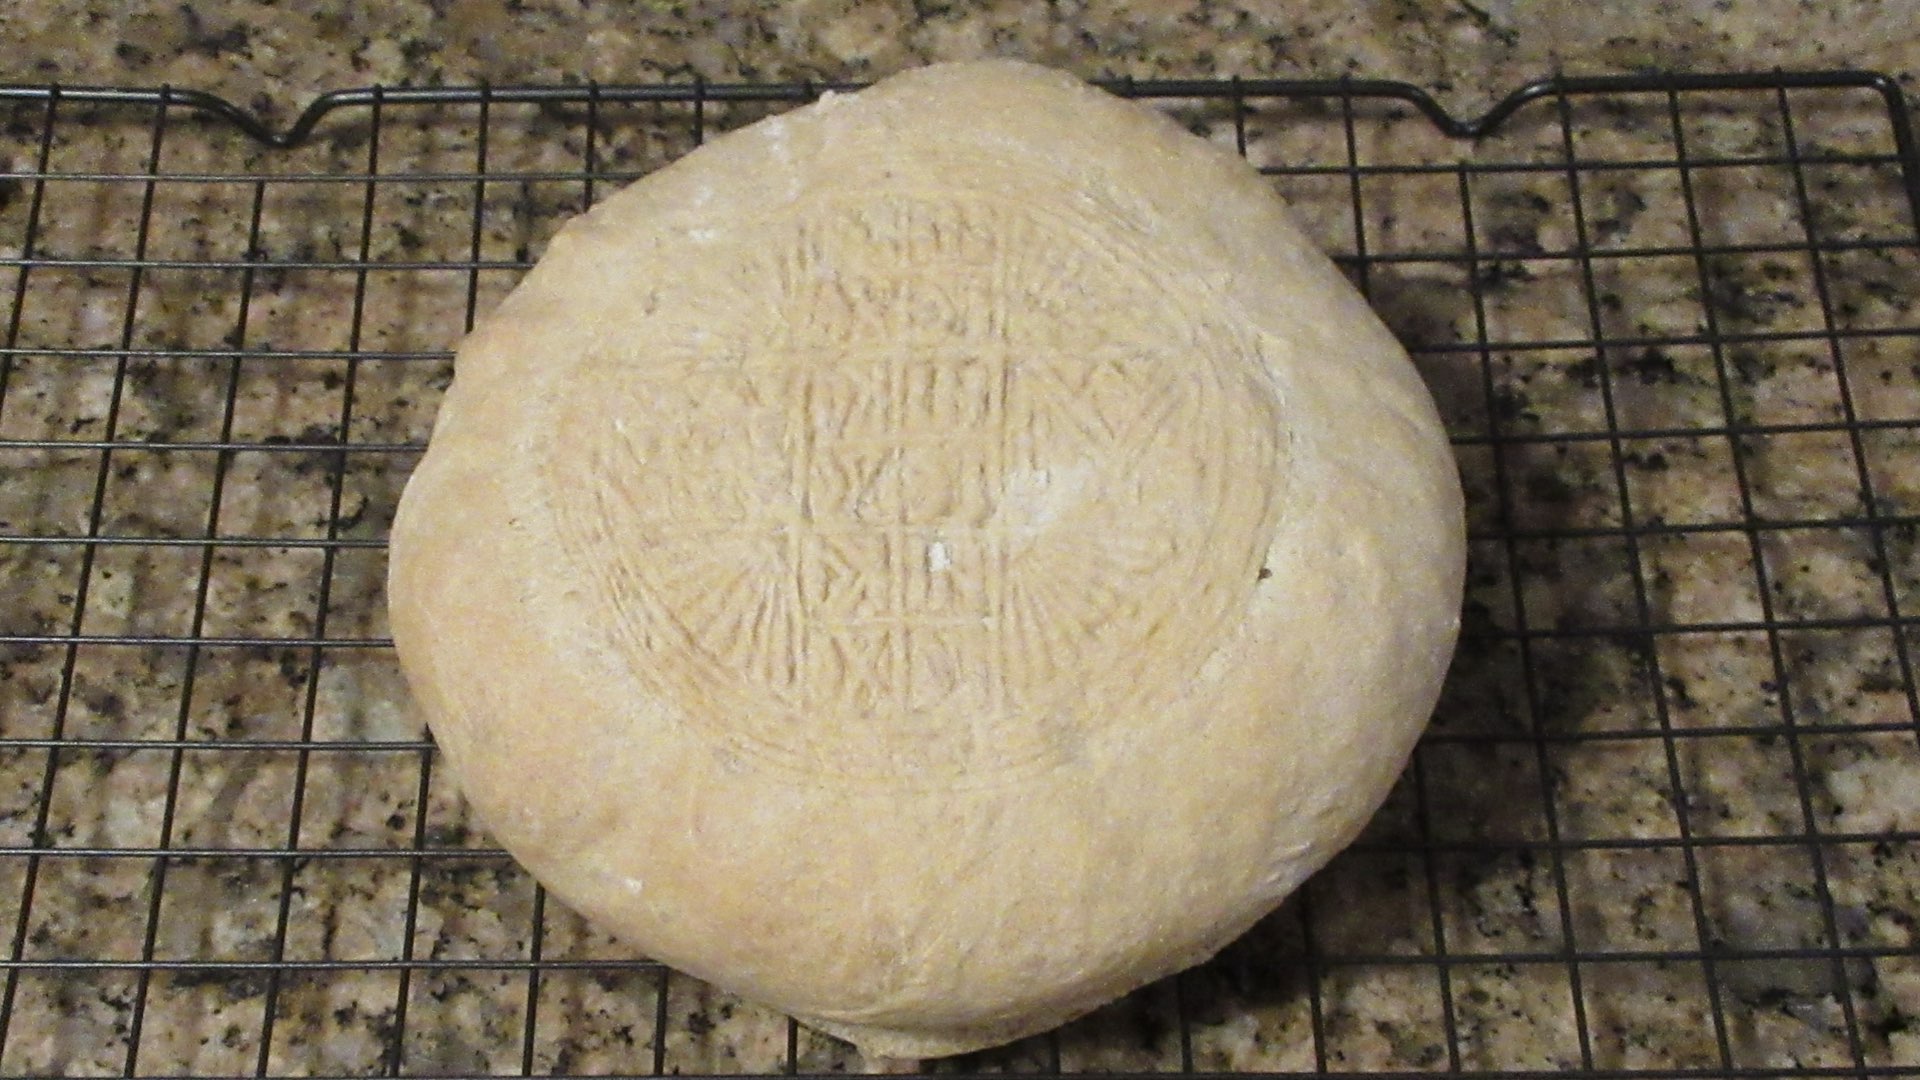
Dough that wrinkles and flattens is often over-risen or has too much water content. Bake it anyway.
These aren’t bad! They cracked during baking due to too rolling dough in a ball and not flattening into a disc. Do not create tension next time. Also, temperature of oven needs increased 25F (10C.)
Bread is a little flat and wrinkled. It was a little over-risen. Still give it to the priest. It tastes fine!
Substitutions and Tips
- Bread flour or all-purpose flour can be used for this recipe. If using bread flour, an additional tablespoon or two (15 – 30mL) of water may be needed if the bread flour has a high protein content.
- A second rise is intentionally omitted in order for the seal to maintain the best possible appearance.
- If the seal is stuck to the bread, gently pry one side loose with a butter knife. If seal is not clear, you can reshape the dough and repress.
- For a lighter crust, bake at 350F (180C) for 50-60 minutes.
- Before poking holes in the bread, ask your priest if this is permissible or desirable. Traditions and views can vary widely across the church among congregations.
- Do not add sugar, rose water, oil or other additives to the bread or baking sheet. They can damage the delicate metals of the diskos and chalice over time.
- Do not grease the baking sheet or use wax paper if you don’t have parchment paper. Use either a baking sheet with a nonstick surface or a silicone mat.
- Some churches make two loaves, one placed one on top of another and baked together to form a single loaf. This double-loaf represents the two natures of Christ: human and divine. You will need to double the recipe above if you are making this style and follow the directions according to your church.
- If using a darker pan, reduce temperature 25F (10C) and bake an additional 5 – 10 minutes to prevent over browning.
- Do not use cooking spray on nonstick coated surfaces. It will ruin them.
- Bake until center reads 210F (99C) and bottom of loaf sounds hollow when tapped.
Storage
Freshly baked bread is always best the day you make it. It doesn’t have a long shelf life at all due to lack of preservatives and enrichment. The bread should be consumed or be frozen within the first 24 hours for best results. Plan your baking with this knowledge in mind. Place in a paper bag or wrap in plastic after the bread fully cools. A paper bag will maintain its crust. The plastic will soften it.
Orthodox Holy Bread can also be frozen and used at a later date when no one has signed up to make the prosphora. Or perhaps the person that signed up had an emergency or illness and could not make the holy bread in time. By making a single loaf and taking it in with you to church every so often, you can alleviate the stress of these types of events. As a result of taking the time to bake a loaf of bread, there will always be a few safely tucked in the freezer for service.
The bread will freeze up to 3 months. Tightly wrap in plastic wrap and then aluminum foil after the bread fully cools and promptly freeze for optimal results.
Orthodox Holy Bread
Ingredients
- 2 cups (300g) flour
- ¾ cup (180mL) water
- 1 tsp (3.5g) yeast
- ½ tsp (2.5g) salt
Instructions
- Add yeast to lukewarm water (100F or 38C) and stir to hydrate the granules. Set aside.
- In a large bowl, mix together flour and salt. Using the handle of a spoon, stir in the yeast mixture until a shaggy dough forms. Turn out onto a clean work surface.
- Knead the dough for 8 – 12 minutes by hand or until the dough stretches easily without tearing. (A stand mixer may be used. Knead for 10 minutes with a dough hook on the appropriate speed for your machine.)
- Cover and allow dough to rest for 1 -2 hours or until double in size.
- Move the oven rack to the middle and preheat oven 400F (200F.)
- Lightly flour the work surface. Turn out the dough, flattening it down. Shape the dough into a flat circle slightly larger than the seal.
- Carefully place the shaped dough onto a baking sheet lined with parchment paper. Rest the dough 5 – 10 minutes to let the gluten relax. Failure to do so will often result in a seal that wrinkles while baking. Lightly flour the surface of your dough.
- Flour the prosphora seal and tap out the excess. Press the seal down firmly while saying the Lord's Prayer. Lift the seal gently and using a skewer, firmly poke 33 holes around the formed seal to allow for ventilation.

- Bake 35-45 minutes or until golden brown. The bread will sound hollow when tapped on the bottom. Center of bread should read 212F (100C.)
- Let cool completely on a wire rack before wrapping and taking to the priest. May also be frozen for future use.
Notes
- If the seal is stuck to the bread, gently pry one side loose with a butter knife. If seal is ruined, you can reshape the dough and repress.
- A second rise is intentionally omitted in order for the seal to maintain the best possible appearance.
- Traditions, beliefs and viewpoints can vary widely among the different branches and within congregations. Before poking holes in the bread, ask your priest if this is permissible or even desirable. We were taught to do this decades ago as the seal in particular was getting air trapped under and it prevented the Priest from being able to cut the bread properly for service.
- For a lighter crust, bake at 350F (180C) for 50-60 minutes or until golden brown and bottom sounds hollow when tapped.
- Do not add sugar, rose water, oil or other additives to the bread or baking sheet. They can damage the delicate metals of the diskos and chalice over time.
- Do not grease the baking sheet or use wax paper if you don’t have parchment paper. Use either a baking sheet with a nonstick surface or a silicone mat.
- Some churches make two loaves, one placed one on top of another and baked together to form a single loaf. This double-loaf represents the two natures of Christ: human and divine. You will need to double the recipe above if you are making this style and follow the directions according to your church.
- This recipe is for a single loaf only. When learning how to make Holy Bread, it is always wise to ask a fellow member for guidance as traditions and techniques will vary across the branches of Orthodoxy.
Thank you for this recipe! The parishioners at my church have commented on how nice prosphora is! Instead of making a large loaf, I make it into about 4-5 smaller loaves about the size of my palm since we have a very small parish.
I’ve had the problem with mushrooming. I try to shape them all evenly, but when I put them in the oven they start to mushroom at the bottoms and become very lopsided around the edges (top is still intact). Do you have any recommendations as to how to improve upon this? I have followed the instructions on kneading times, resting the dough, and trying to keep it from drying out. Maybe I am not shaping them uniformly enough?
Hello Abby,
Sorry for the delay in responding, I’ve been under the weather. I would prolong the resting time of the dough initially by 20- 40 additional minutes to help with the mushrooming. Also, when shaping it, shape it and then cover it with a towel and let it just relax for about 5-10 minutes prior to stamping the seal into the dough. See if those two methods help. If not, let me know and we can troubleshoot further.
Quick question… I am trying to bake more using metric measurements for precision. You have flour listed as listed as 2 cups=300grams. King Arthur lists white unbleached flour as 120 grams per cup, which would only be 240 grams for 2 cups. Overall, that can be a big difference. Do you know which is more accurate, or do you use a special kind of flour that is heavier? My phosphora baking needs all the help it can get. Many thanks for your very detailed instructions and any thoughts you may have concerning flour weight.
Hello! Both are correct depending on who is the author of the recipe. I intentionally use 150 grams per cup of flour and it is correct for my recipes. I write all recipes by weighing out ingredients first and then convert them to the nearest cup measurement based on the typical way most people measure out each ingredient. Volume measurements are based off the manufacturer specifications before it is shipped and sold in stores. As flour sits, it settles. If you look at cereal boxes and other items, they will have a disclaimer about settling. Since most people do not sift their flour or fluff it prior to weighing, on average, their cups of flour weigh heavier than most industry standards. I did a lot of experiments and came up with an average of 150 grams for most measuring cups. You can see more about it here if you are interested: https://jacksonsjob.com/how-much-does-a-cup-of-flour-weigh-in-grams/
Am blessed to see this
I am glad it is useful to you.
Hello! Do you use bread machine instant yeast (rapid rise) or just regular dry active yeast? Also, your dough looks so much smoother than mine. I think it could be because I’m using bread flour instead of regular flour; would this be the case? It was very hard to knead; very tough dough and seemed to never smooth out no matter how long I kneaded it. Thank you! Jo
Hello Jo! I use instant dry yeast. It’s similar to the bread machine yeast, but takes a little longer to rise. You can use either instant yeast or dry active yeast for this recipe. If you use active dry yeast, you will need to follow the directions on the packet. Active dry yeast needs the water to be heated and the yeast “bloomed” for several minutes in order for the dough to rise properly.
If you are using bread flour, you will need to up the water content slightly. The protein is higher, so the flour absorbs and holds onto water more than with all purpose flour. Start out with adding 2 tablespoons (30mL) more to the original recipe. If after 5 minutes, it doesn’t become smooth, you can add 1 teaspoon (5mL) of water at a time every 30 seconds of kneading until it becomes a workable dough for you.
Hi Jackson
Feedback from our Greek Orthodox Priest – under absolutely no circumstances do we pierce the Lamb in the centre as shown in your video and instructions. . If it is pierced then it cannot be used for Holy Communion- only for Andidoron. With love in Christ
Hi Kathy,
Thanks for visiting. This was addressed in both the video and recipe description when it was created. Traditions and beliefs vary across the branches and congregations. You should ideally learn how to make bread by a member of your congregation so that you will be taught the preferred recipe, techniques and handling of of the bread. This tutorial was made for a specific person in mind. It should only be used as a general guideline for anyone outside of that particular church. This method was taught over 20 years ago by the Presbytera. The holes were requested by several different Priests because of air pockets. Always follow the guidance of your Priest and respect their wishes. Many Blessings!
Hi Kathy! I’ve been baking prosphora (with a blessing from my priest of course!) for about 5 years now. During that time my mission parish has said farewell to a priest, welcomed another, and had visiting priests serve the liturgy – and they all have very different preferences for prosphora. The priest I learned from was VERY particular about the prosphora and preferred the Byzantine style large loaf, formed by the two layers which symbolize divine and human nature of our Lord. Our current priest prefers the Russian style 5 small loaves and is less particular about the seal. It never hurts to ask because priests and babushki all have very strong sentiments about what right looks like, and for them that is THE way to do it. 🙂 For what it’s worth, we always pierce the seal of the lamb at the 4 corners and in the center and the Greek recipe I used for Byzantine prosphora said to do this. It may have something to do with the fact that there are two layers of dough. Anyway to anyone reading this, ask your priest what his preference is! 🙂
I am having a tough time getting this recipe to rise after I have flattened it. I am not sure what to do. It doubles in size when proofing but then once I flatten it to put the seal on it doesn’t rise again in the oven. I have tried baking it at 350 and also 400. Help!
Hello Maria, Sorry for the delay in responding. We are currently raising chicks and I’ve neglected looking online recently! I hope this answer doesn’t come too late. The way this particular recipe is written, there will not be a dramatic rise. So you are not doing anything wrong, it’s the method this bread is created. The second rise as it often distorts the seal or splits the bread in an undesired area (often the in the seal.) Therefore, the shape is flattened similar to a pizza. Think about how a deep dish pizza only gets a gentle even rise. This is what we went for to maintain the best looking seal possible.
If you are looking for a good rise like you see in dinner rolls or round loaves, then you will need to create tension in the bread and let it rest prior to baking until it becomes puffy. You will want to roll your dough into a taut ball slightly smaller than the seal and then stamp down firmly. Then you will then want the dough to rest, covered around 20 – 45 minutes prior to baking. Hope this helps!
I can not seem to make the imprint stay when the bred bakes. I flour the press and push very hard. It just does not seem to stay. Please let me know what I am doing wrong.
Hi Terri,
A few things can cause you to not get a great deal. First, the dough could have risen too long before baking. You can try preheating the oven prior to shaping and stamping the dough. Second, the dough didn’t rise enough after kneading. Third, try creating more air holes after stamping the seal. Sometimes the steam inside the bread misshapens the seal as it rises in the oven. Fourth, if you add more yeast than the recipe calls for it will cause the bread to be unstable and creates air pockets in the bread.
Finally, it could be the seal itself. A wooden seal for example never gives as good of an impression as a plastic one. The priest told us he can always tell who uses the wooden seals as they are difficult or impossible to see. Try to remember you only need one loaf to turn out okay. The rest can be cut up and shared with the congregation. Good luck!
Christos Anesti! I have been attempting prosfora since Holy Thursday. It is relaxing yet frustrating. My problem is that the dough under the seal does not rise evenly as the dough around it duting the bake. The sesl is apparent but sunken. Any thoughts?
Alithos Anesti! Learning to make Holy Bread is both rewarding and a bit frustrating. Remind yourself that God sees your efforts and loves the bread all the same whether it is perfect or imperfect when made with good intent and purpose. This most often happens if you are pressing the seal off kilter, the water is warm and not room temp or cool, the dough needs a little more kneading or resting time, your flour is old, if the dough is a bit uneven or if you didn’t let your oven preheat long enough.
A lot of reasons, whew! Let’s go over them.
Feel the dough with the palm of your hand. Does it feel even on all sides? When pressing down the seal, place it on top of the dough and press straight down on the seal with your palm, not grasping the seal edges. After you knead the dough, can you stretch it really thin without it tearing immediately? If not, knead the dough a little longer. When the dough is risen, when you poke the dough, does the dough collapse or bounce right back? If so, you need to let it rise until the indent stays or slowly bounces back over 5 minutes but doesn’t collapse. Hot water can make the yeast rise too quickly and will often cause issues with the second rise. Use tap water on the cold side or room temperature water. Often times, the preheat indicator on modern stoves aren’t accurate. Try waiting until the timer for the preheat cycle dings and then wait 15 minutes before placing the dough in the oven so the temperature is very consistent. Finally, if your flour is really old, it becomes rancid and starts breaking down the proteins which will weaken the gluten. Try fresh flour.
If you are still having trouble after trying these tips, let me know and we will troubleshoot some more!
Can this recipe be doubled to make a larger prosforo?
Hi Maria, Yes, you can double the recipe to make the larger prosforo. However, some parishes only want 1 1/2 times the amount of this recipe. The best way to find out how much dough you’ll need for the larger size is to ask your priest. I hope this helps.
Just a quick question…when using this I made 4 single layer loaves. Two came out fine but the other two the seal was sunk while the outer edge was beautifully risen. The breads were bowl-shaped. What could have caused this?
Hi Rhonda,
A few things can cause this. If your yeast is older, it can become unstable and sink as it hits the oven. Another issue is how hot it is in your kitchen. If you only baked two at a time, for instance, the dough could have risen too much while waiting to bake. A way to combat this is to wait until your other two loaves are nearly finished and then shape and stamp the remaining dough. This can also happen if you slightly underbake the loaves. It’s best to slightly overbake than underbake the bread when in doubt.
Another reason is their is an air pocket that naturally forms in the dough as it is rising and it created a little bubble under the surface. Really punch down that dough after the first rise to help knock out this air. By piercing the middle of the loaves with a skewer firmly down to the bottom of the pan, you often can help prevent these pockets from becoming a nuisance.
The last two things that can cause this bowl shape is you pressed really firmly with the seal and the top of the bread dried out slightly as it was waiting to rise. You can combat this by covering the bread with a damp cloth while it is waiting to go into the oven. The last thing that often causes this is the dough was slightly over-risen and the seal makes the dough collapse in the center but not the edges. You’ll often see a wrinkly appearance when this happens. The best way to combat this is to prep the dough about 10-15 minutes earlier next time. I hope this helps!
Hi, I am making the Holy Bread for our church and I want to use your recipe going forward. Regarding the amount of yeast needed, I would like to know if you refer to dry yeast when instructing to use 1 tsp (3.5g) yeast. If this is dry yeast, do you think that 15 g fresh yeast would be the equivalent for 1 tsp dry yeast? Thank you. Gabriella
Gabriella, I am using instant dry yeast. If you wanted to use fresh yeast in place of instant dry, you need four times the amount. That would be 14g of fresh yeast.
I would highly recommend NOT using wet hands to knead dough! However, if you have a trick for doing this without flouring your hands or making a huge mess, I would love to know your secret!! 🙂 Thank you!!!
Hello Prosphorabaker4, I have found a few things to help is to use the handle part of a wooden or a hard plastic spoon to do the initial mixing and letting the dough just sit for 5 – 10 minutes before removing it from the bowl to knead makes a huge difference in being less messy. The recipe is made with a little wiggle room in mind, so you could safely add 2 tablespoons of flour or water to make it easier for you to work with as well. But the easiest way to make dough without making a huge mess? My in-laws use a food processor with the dough attachment blade or a stand mixer. 😀
A question on flour… There is much discussion regarding protein content of flour for baking holy bread. What is your preference?
Hi Carol,
So I personally like to use all purpose or plain flour over bread flours. The bread flour, which is the higher protein, gives a chewiness to the crust and bread itself which can make it harder for both cutting out the seal and difficult for some of the youngest and oldest members to eat after they take part in communion. The plain flours give a softer texture that makes it easier for everyone to participate in the holy sacrament. It does take a little longer to knead (a few minutes) but it is well worth the effort as it seems to benefit the most people. Also, the higher protein levels tend to make crusts harder and more tough to bite into. I like to reserve my bread flours for pizza or bagels. Hope that helps!
King Arthur all purpose (red bag) is my parish’s prosphora go-to. It’s good quality, whole wheat, white but unbleached, and has a good gluten content without being too high.
Hi my mom is making holy bread but it keeps coming out thin/crispy in the middle and fluffy on the sides. Its never happened before and she keeps redoing it but no idea whats wrong. Its kind of dry on the outside….
Do you know why this could be? Please help!
Hi Sandra. Two things are coming to mind, especially if she never had this happen before. My first thought is the yeast is getting older as it tends to make bread rise funky overall when it starts to get to the point it’s aged. She could try an extra teaspoon of yeast to see if that helps. Another issue could be the humidity levels are unusual for your area and letting the bread dry out a bit during rising. You could have her add a extra tablespoon of water and then add a damp towel over top of the bowl to rise. If it still keeps happening despite both those issues and she hasn’t had trouble baking anything else to indicate the oven needed cleaning, then I would recommend her getting new yeast. I’ve purchased yeast off the shelf that was bad because of the way they store it sometimes. Say a prayer and start again. And if it still turns out funky, take it anyway as she did God’s work and he appreciates all loaves.
one thing Jackson did not question about is the age of the flour being used. flour tends to have a shelf life of about 8 months unless it’s vacuum sealed in a container when not in use.
it might just be that you need fresher flour.
Donut, that is an interesting thought. The age of the flour never would have occurred to me as being a possible issue since it goes rancid and smell quite bad when it goes off. So I have assumed everyone else would also smell the rancidity and just toss the flour instead of using it. Thanks for pointing this out for Sandra future readers!
I made your recipe in January and the texture was perfect! but I had a slight bubble under the seal. In recipe I’ve previously used, following the rise, the dough balls were formed and rested for 30 mins, then moved to parchment lined pans and that’s when I’d start to preheat the oven so that’s what I did when making your recipe. Would that extra resting of the dough have affected the dough to possibly cause the bubble?
With the pandemic going on, we are not offering blessed bread after communion and so smaller loaves are fine. I’m wondering about possibly making 2 small loaves from your recipe?
Hi, Carol! So there are a variety of reasons you can get a bubble under bread. Some has to do with under kneading or under-proving during the first rise, but considering you said the texture was perfect makes me think that wasn’t the cause. A few other causes is proving the dough too fast by using a proving drawer, oven or adding hot water. Two more common issues is adding in more yeast than the recipe calls for and not pressing down the dough after the first rise. However, it’s more likely because of how you did the second rise by following a previous recipe. Normally, this wouldn’t be a big deal for say dinner rolls and I would say you were smart to extend the rise time. After all, just resting until the oven preheats sounds a bit odd, doesn’t it? The reason for the second rise being so short (only the duration of preheating the oven) is two-fold. One, the seal tends to lose its shape with too long of a rise as it will smooth out the edges in both the rise and baking. This makes it hard for the priest to cut out the seals individual parts. The second reason is the holes pressed into the dough for ventilation allows the bubbles to escape as they bake. If you let it rise too much, the holes will fill as the dough expands and the bread will have no where to escape. As a result, a bubble or bubbles will form right under the crust, especially near the center of the seal. My thought it was likely the second rising that caused your issue. It happens to the best of us. Thankfully, you do get better with practice and pretty soon you’ll be making consistent loaves. And yes, you can make smaller loaves from this recipe. I want to say you can make 3 but I would start out with 2. It depends on which side of the seal you are using. I would bake for 20-25 minutes and check it. If in doubt on it being done, the center of the bread should reach 212F or 100C. Good luck and let me know if you need any more help!
The dough is supposed to be divided into two, then formed into two balls, flattened, and “glued” together using a bit of water – it represents the two natures of Christ. Otherwise, great recipe!
Hello, Mary! You and I are both correct, actually. Some of the churches teach you to divide the dough into two and marry them together, which is seems to be a common Slavic tradition. However, many other churches (typically the Greek and Antiochian, but there are exceptions) only use the one loaf which is the method I show here. This method of making holy bread was taught to me by the priest’s wife nearly 20 years ago. It comes down to tradition and it is always wise to have someone from your particular church walk you through the process if you’ve never made it before. That way, your priest is happy with the results. When I shared this recipe ages ago, it was intended for members of my church as it was a very small website and didn’t get much traffic. Therefore, I show the method used for that particular congregation. Hope that help explains the difference in our recipes. Happy baking!
Not always, many monasteries and churches use as in the above photos
good morning in the recipe you talk about water in the pan while baking what does that mean
Hello, vasiliki! Thank you so much for bringing that to my attention. It’s a typo and is now fixed. Completely disregard that section. You just want to bake it 40 – 45 minutes or until a light golden brown.
What type of yeast do you use?
I use instant dry yeast granules that are in the packets/jar or natural starter for the sourdough method. If you use active and not instant, dissolve it in water first. Active yeasts like to be dissolved in lukewarm liquid to “activate.” Read the directions on the yeast packet, they will guide you if it is necessary. You can add it dry, but you may see fine particles and it won’t rise as well. If you want to use fresh yeast, you have to use 4xs the amount of the active dry yeast listed, or about 28g.
Thank you. Another question, I am confused about number 6 and 9 on the instructions. Is it to be baked twice?
Hello, Aspasia. It was a typo that has since been fixed, so sorry about that! You bake it one time at 400F (200C) for 30 – 35 minutes or until golden brown and the bottom sounds hollow when tapped.
I need to make 5 loaves for church. Can I take ingredients times 5 and have it turn out ok?
Absolutely as I used to make it in larger batches all the time. It just takes a lot of work to knead that large amount of dough and can be tiring. Feel free to cover it with a damp cloth after mixing the ingredients together and letting it rest for 20 minutes. It will make it easier to knead.
This recipes is the best one I’ve ever made, everyone at church loves it! Thank you!
I’m glad you like the recipe. Feel free to pass down the tradition to others.