
When you are looking at how to make yeast for bread, many recipes ask for a lot of flour. Some recipes want you to use nearly 5 pounds of flour! Others several pounds. Who can afford to waste so much flour for something they may not even like in the end? With my sourdough starter, I used much less flour than you will find on other sites like King Arthur. Which, I suspect, helps them make a lot of money as you are going through several pounds of flour by the time you finish making your first batch of bread.
When I learned how to make my own yeast, it was from watching Steve’s Kitchen. He really makes learning how to bake bread a fun process. I recommend following his videos, especially if you are a beginner. Once I learned how yeast worked over the past year, I started experimenting with quantities for the fun of it. Could you capture yeast and have bread with less flour? The answer is yes! I was able to make yeast with just 4 tbs of wheat flour the other day. But I did learn 1 cup over the course of one week is best, especially if you are using white flour.
Some claim you need to only use whole wheat flour or other even more expensive flours like pumpernickel. The advantage of using whole grain flours is that they didn’t strip the external parts off of the flour that hold onto more wild yeast naturally. That is why it’s quicker to make a starter with whole grains. They simply have more yeast in the beginning. But don’t worry. My first starter was made with all-purpose bleached white flour, so it’s possible! It just takes a little longer.
So let’s discuss how to make the yeast and then we will go over a basic bread recipe. This will make a bread that doesn’t really have much of a sour taste. Sourdough bread is made by fermenting the flour overnight. By kneading the flour as you’ll see below and only having one rise, you’ll get a bread that is more like a french bread and great for those who don’t care for the taste of sourdough.
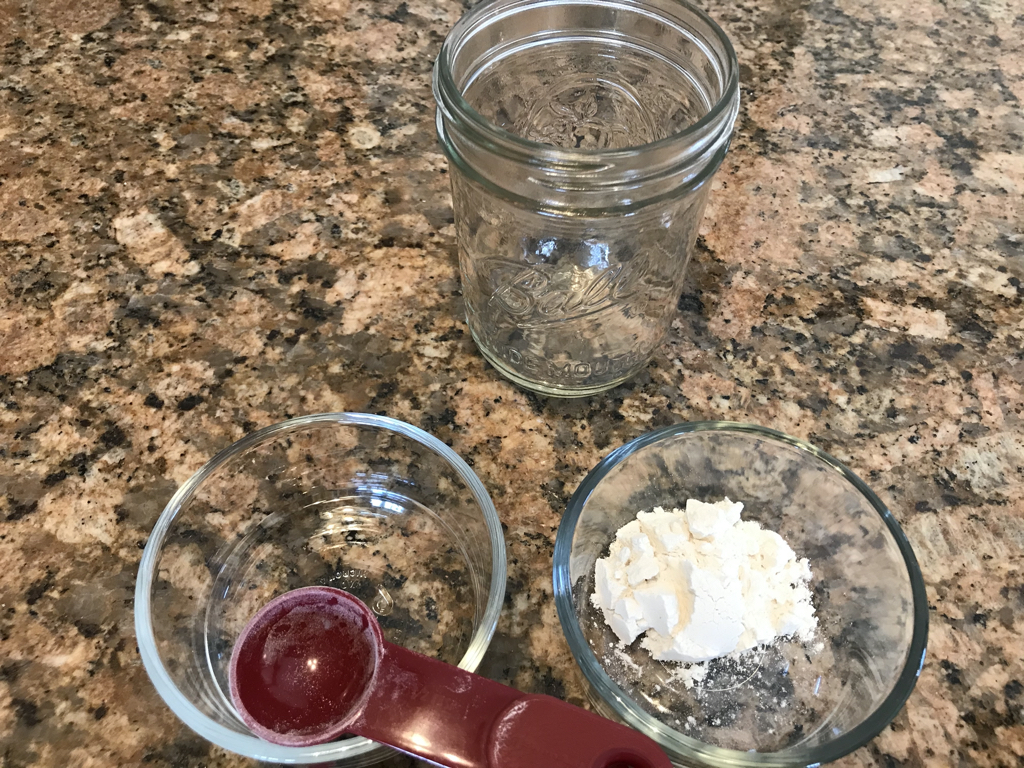
Start out with 1 tbs flour pressed firmly into spoon and 1 tbs water. 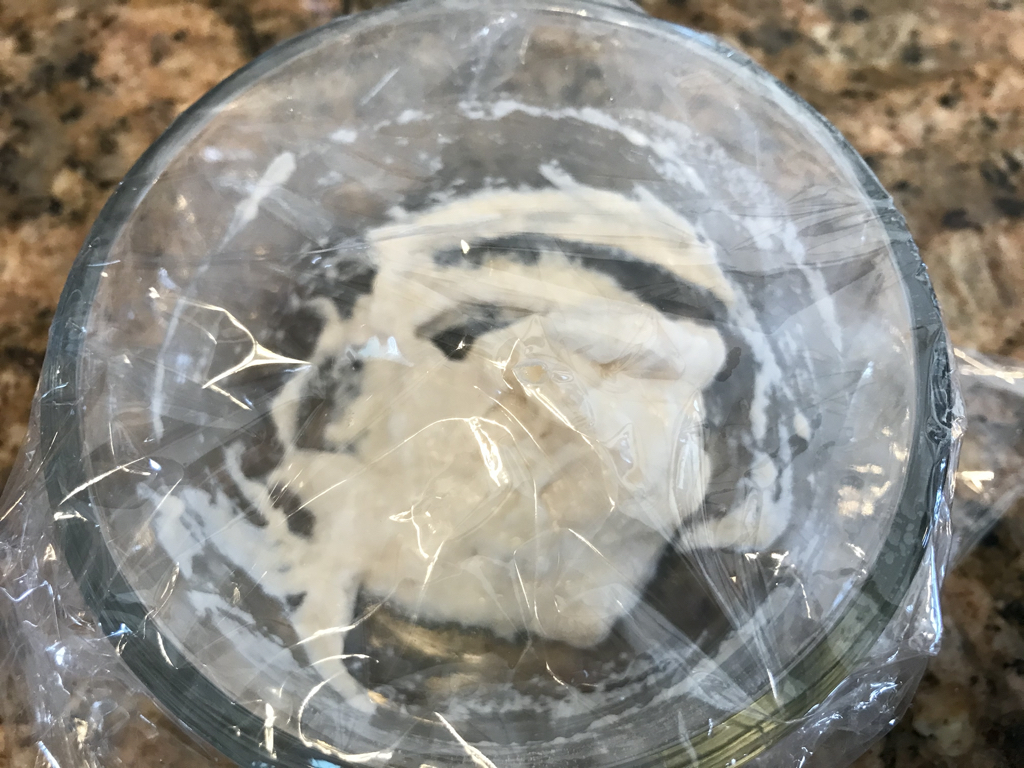
Stir and cover. 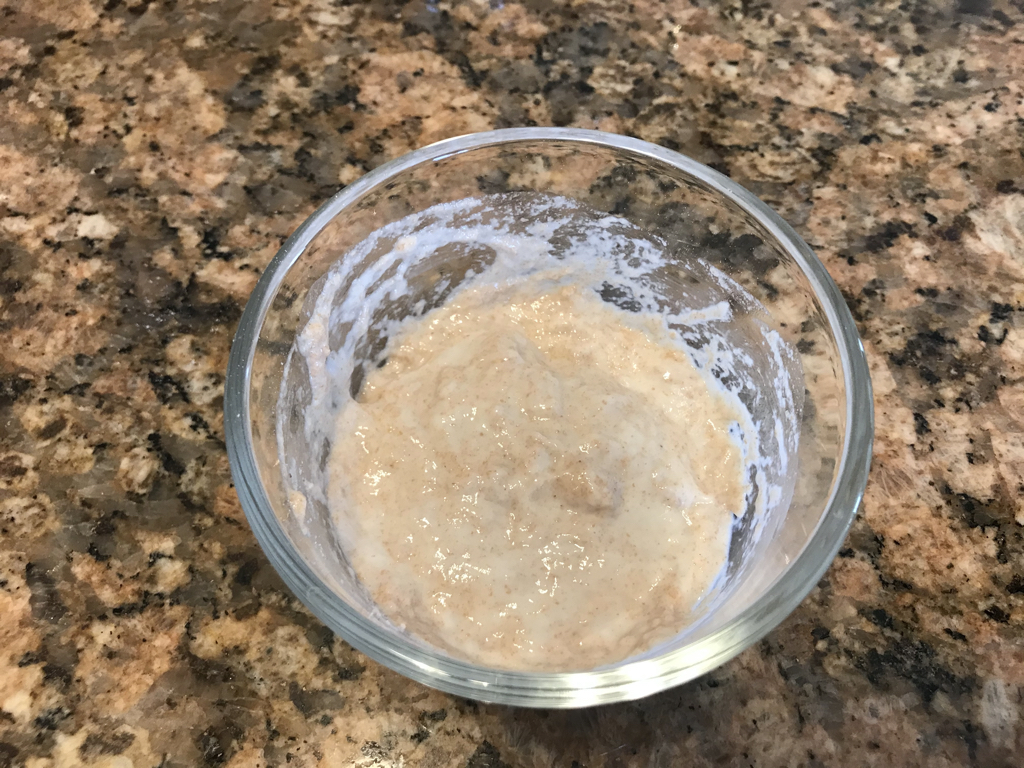
The next day, add another 1 tbs of flour and 1 tbs of water. Stir, and cover. 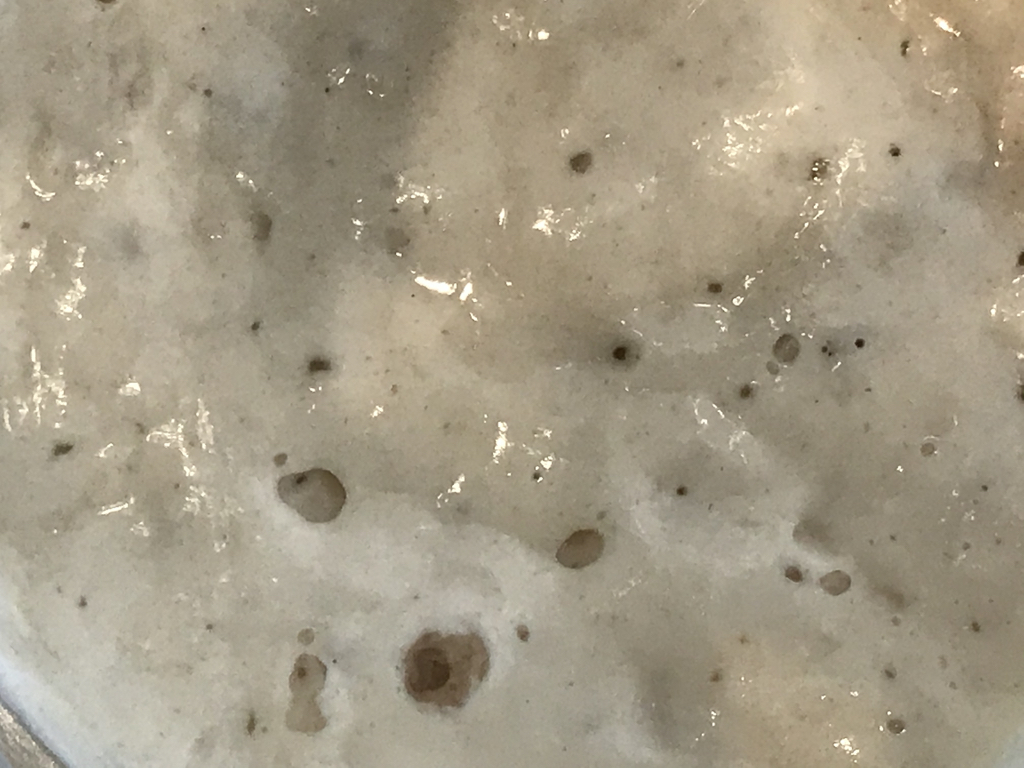
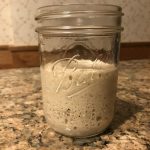
The next day you should see some bubbles. Add 2 tbs flour and 2 tbs water. Stir, transfer to a clean glass and cover. 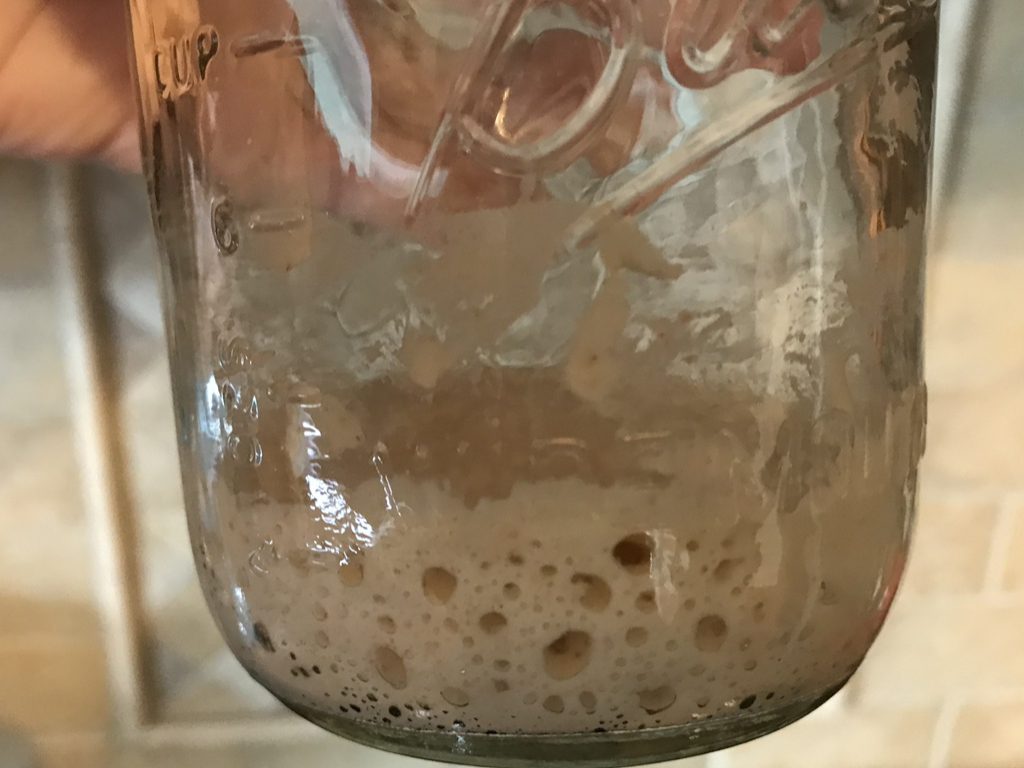
Discard all but 1 tbs and repeat the first three steps. 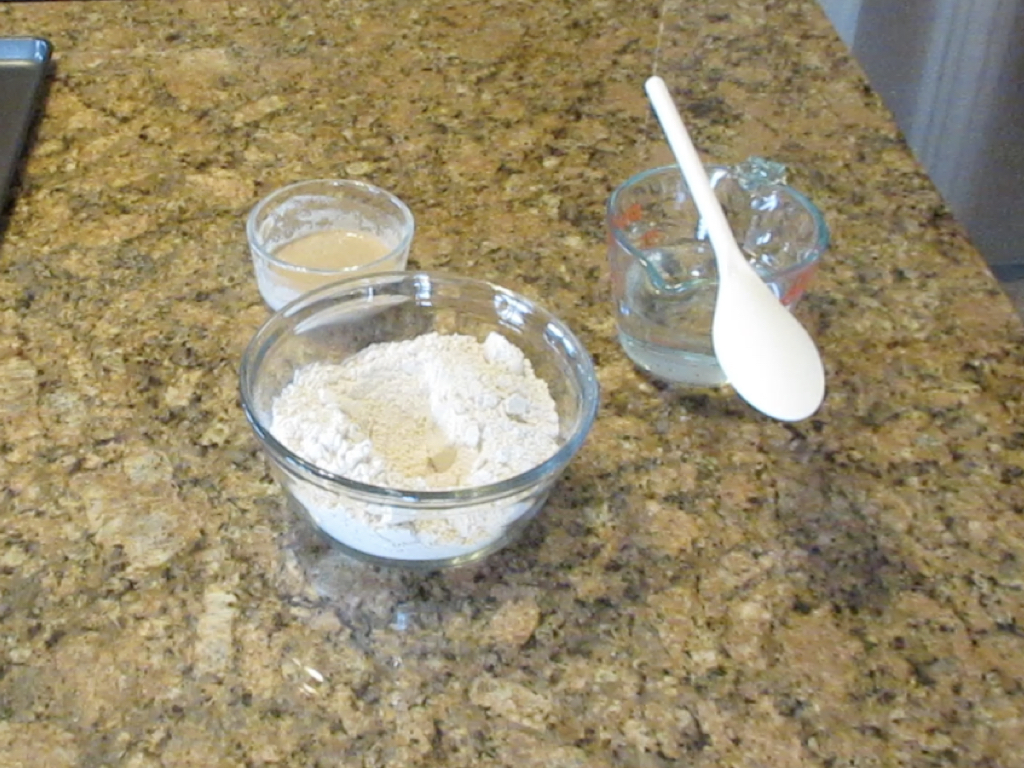
Measure out the flour, starter (yeast) and water. 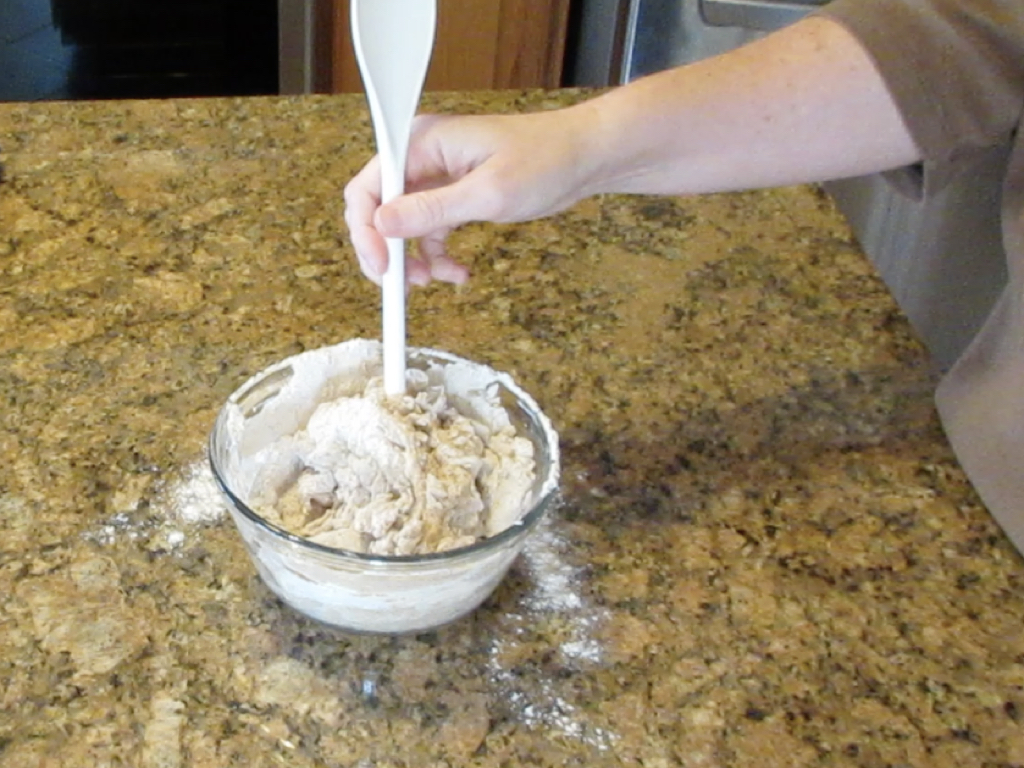
Stir into a shaggy lump. 
Move to a clean work surface and knead until smooth (see video.) 
Cover and let rise for several hours or until double in size. Wheat flour can take up to 8 hours. White can take as little as 2 hours. 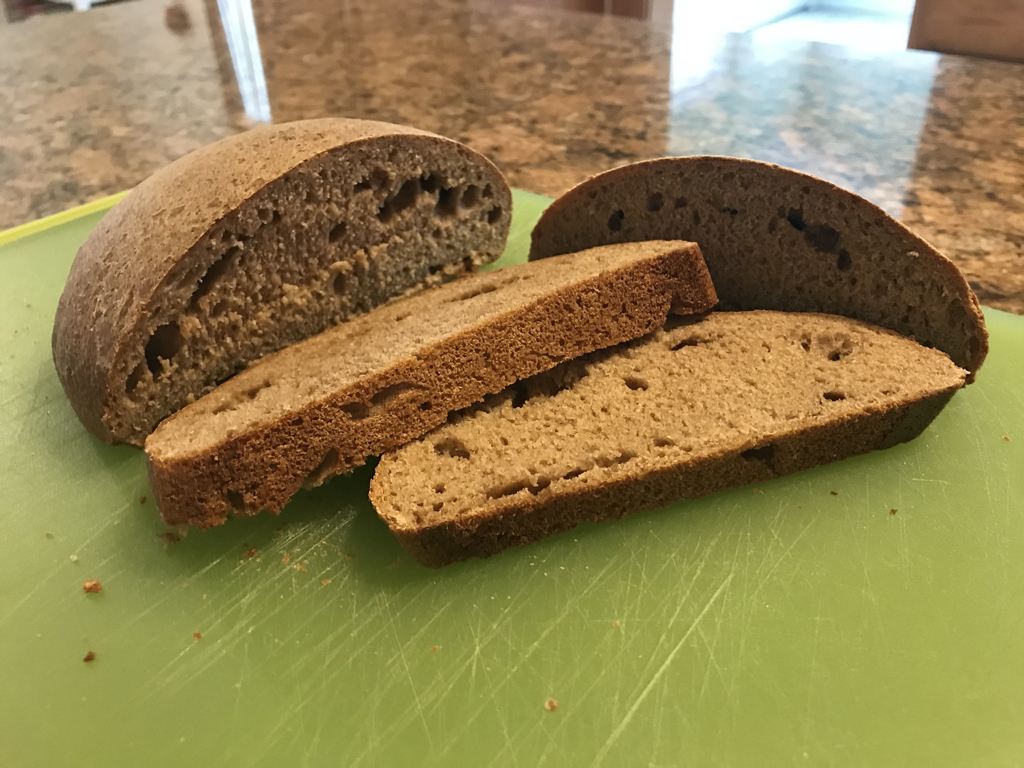
Bake 400F (200C) 30 – 35 minutes or until golden brown. 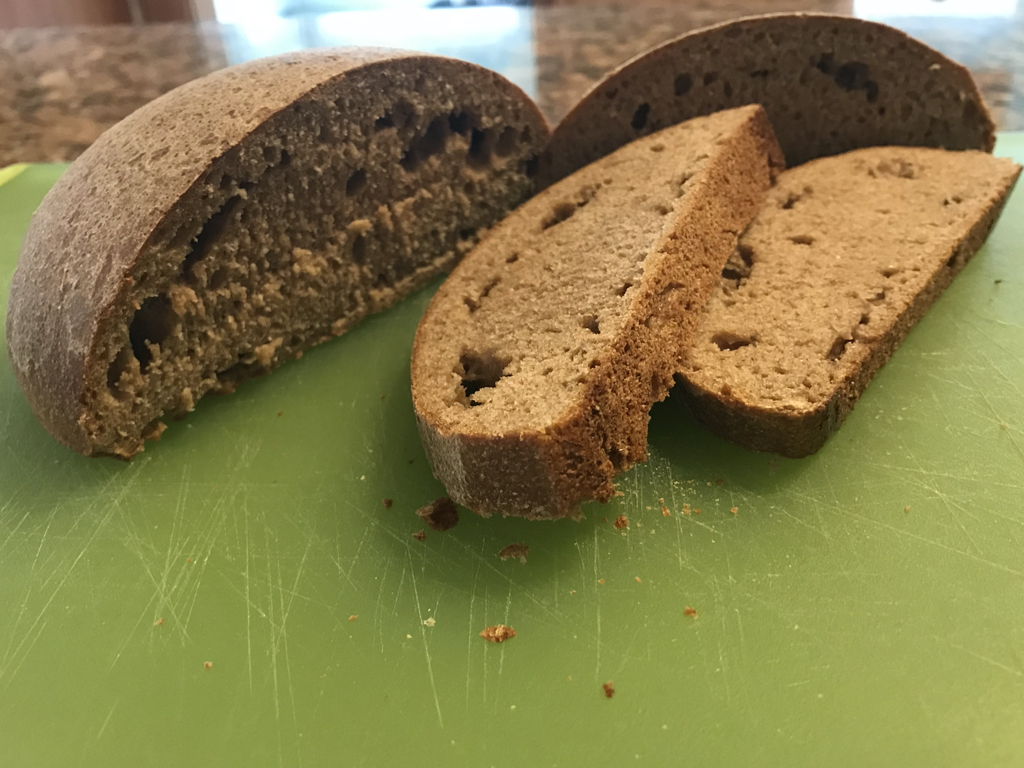
Cool completely before slicing. About 1 -2 hours. 
Double the recipe for a sandwich loaf! 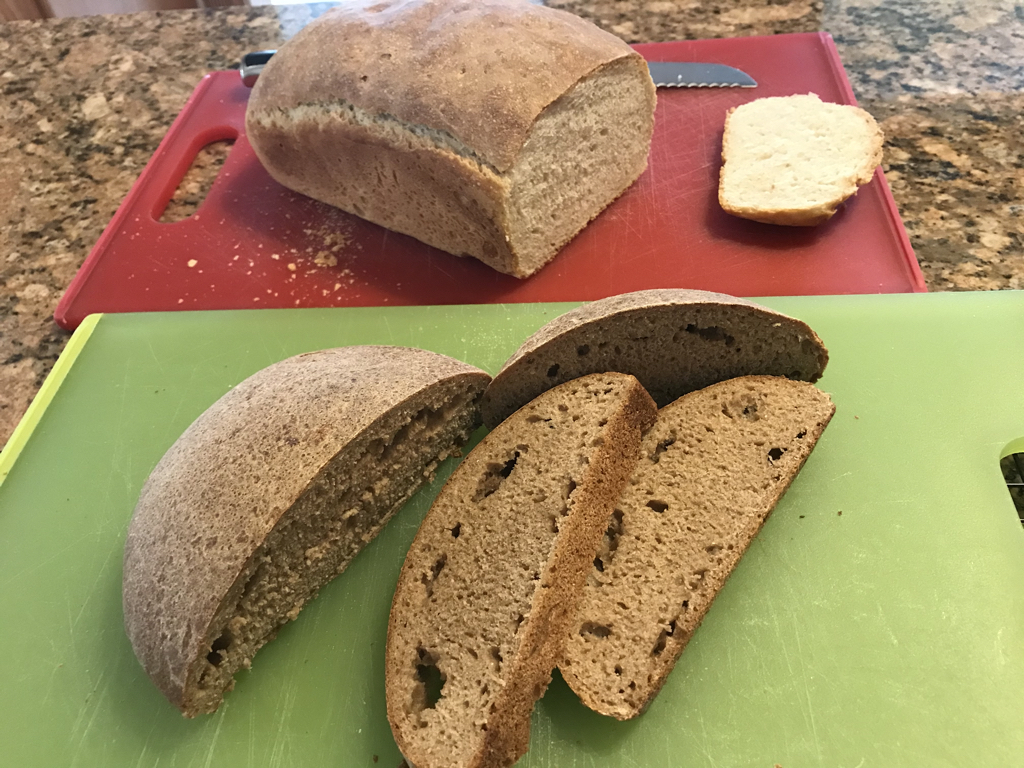
Happy baking!
Here is a video to show you the process in a little more detail. I truly hope this helps you learn how easy it is to cultivate your own yeast. You can also read more about troubleshooting starters here. And as always, feel free to contact us if you have any questions. Happy baking, everyone!
How to Make Yeast with Less Flour
Ingredients
- 1 cup flour (150g)
- 1 cup water (240mL)
Instructions
- Day 1: In a small container, add one tablespoon of water and one tablespoon of tightly packed flour. Stir and cover with plastic wrap. Poke a few holes with a fork or toothpick.
- Day 2: In a new clean container, add one tablespoon of flour, one tablespoon of water and the mixture from the previous day. Stir together and cover with plastic wrap.
- Day 3: You should start seeing bubbles and the flour will start to smell sour. If not, don't worry, keep feeding. In a small mason jar or a container that will hold at least 2 cups of liquid, add the contents from the previous day, 2 tbs of flour and 2 tbs of water. Stir and cover.
- Day 4: Discard all but 1 tbs. Feed 1 tbs water and 1 tbs of flour. Stir and cover.
- Day 5: Feed 2 tbs water and 2 tbs flour. Stir and cover.
- Day 6: By now, you should be seeing a lot of activity throughout the day. It should be bubbling up within hours after feeding. Add 4 tbs flour and 4 tbs water. Stir and cover.
- Day 7: Feed 1/2 cup tightly packed flour and 1/2 cup water. Stir. As long as you see bubbles and the flour rising within four hours and no mold, you can now start using your yeast. If you don't see activity, go back to day for and repeat steps in days 4 & 5 until you see activity.
- Store in the fridge and feed weekly double the volume or keep on counter and feed at least daily. You can discard all but a small amount on feeding days to save flour.
Notes
It is common for starters to need more feedings during summer months or in more hot and humid climates. Warm temperatures speeds up the yeast production. This means the yeast eats through the flour mixture more quickly. If your temperatures are frequently above 80F (26C) you may want to feed the starter three times a day until it becomes active. Once it is active, you can store in the fridge and feed every 7 – 10 days when not baking bread. A sign of a “starving” sourdough will result in very thin mixture, a chemical smell may develop and sometimes a watery substance appears on top. If this happens to you, all is not lost. Discard all but a small amount (1 teaspoon) and give a generous feeding of 1/4 cup water (60mL) and 1/3 cup tightly packed flour (60g) to recover your starter. Then feed whenever the sourdough drops in volume or store in the fridge between uses to prevent further issues.
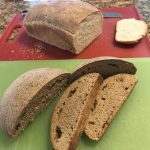
Now that you have made starter, let’s make a small loaf of bread. This will feed two people for 2 – 3 days. The bread freezes beautifully and you can also use this dough for multiple purposes such as pizza dough or flat bread. You can easily double the recipe for a sandwich loaf of bread.
Homemade Bread for Two
Ingredients
- 1 ½ cups (225g) flour
- ½ – ¾ cup (120 – 160mL) water*
- ¼ cup (50g) starter
- ½ tsp (2.5g) salt
Instructions
- In a bowl, mix flour and salt together. Make a well in the center, add starter.
- Pour in 1/2 cup of the water. Stir until a shaggy dough forms. If dry, add more water, one tbs at a time until you have a slightly sticky dough.
- Turn out onto a clean work surface and knead until smooth and no longer tearing easily. About 5 – 10 minutes.
- Form into a round ball and place on a well greased or parchment lined baking paper. Cover with a floured towel or sprayed cling film. Allow to rise until roughly double in size. This can take 2 – 8 hours depending on the flour used and how well you kneaded the dough. White flour takes much less time.
- Once risen, preheat oven to 400F (200C) and bake 30 – 35 minutes or until top is golden brown. Center of bread should read 212F (100C.)
- Cool completely before slicing if using more than one day. Can be frozen up to three months.
Um can i be able to use the yeast for a long time (2-3 weeks) or just for a few days?
Hi Elizabeth,
As long as you continue to feed the yeast on a regular schedule, it will last indefinitely. Once established, the easiest method of feeding is to feed double the weight right after using the amount you need and then store the rest in the refrigerator loosely covered. Then you want to fed every 5-10 days after that. You’ll know the yeast really needs fed when you see a thin layer of liquid form at the top.
I am wondering what that problem is because, on the third day, I didn’t see any bubbles. Do I start over or just wait for the next day.
Hi, Elizabeth!
Not all flour is created equal and some will naturally have less wild yeast. As a result, they can be slow to mature. This is especially true with the bleached white flour. Continue to go through the process and keep feeding. Eventually, enough yeast will be captured through the feeding process and you will get a strong culture going. For reference, I was using 100% organic wheat in the video.
ok thank you so much
You are very welcome. Let me know if you need more help!
My thing is becoming stinky and has not been forming bubbles. So I will be starting over.
Hi Elizabeth, as the yeast culture is starting out, the good bacteria is competing to take over bad bacteria naturally found in flour. As the starter ages becomes more acidic, it will right itself as the acidic environment makes it inhospitable to most of the bad bacteria and that is when the good starts to really develop. It is not uncommon for the mixture to take on very foul odors initially during this process. It can smell quite putrid. Sometimes it will smell like dirty socks, paint thinner or sickly. If you can keep going, the mixture will eventually start to take on a pleasant or neutral smell. If, however, at any time during this process blue, black, green or especially orange or red molds appear, you do want to throw it out and sterilize your containers before starting over. Signs of mold usually means the flour, water or the container has become contaminated. At that point, I would recommend starting with a new batch of flour. I hope this helps.
Ok thank you I will try.
Good luck!
You’re story with the arm injury is so inspiring. I know many others will be encouraged to break their own barriers and forge ahead as well.
I will try out these tips and let you know how my first loaf goes. Thank you again for all the helpful tips. 🙂
Good luck on your first loaf!
I’m so thankful I found your site! You are so patient and diligent in explaining. Thank you!
You are very welcome, Andrea! Please let me know if you need any help along the way. My goal is to aid others in learning how to learn the basics in baking so that they feel confident and enjoy the process. 🙂
Can you use this recipe in a breadmaker please?
You can mix the dough in a bread maker or mixer, yes. However, the rising time takes longer than the typical time they give you on a bread maker (around 4-6 hours) so keep that in mind if you use one. What I have done is after mixing the dough, turn off the machine and let it rest for 4 hours and check back. If it is ready (at least double in size and close to the top of the pan,) then I’d put it on the baking cycle at that point. Hope that helps!
Thanks, Jackson. I put it on the dough setting and left it to rise a good long while. I had to bake it in the oven though as I don’t have a bake only facility.
Fantastic to hear it is working out for you. You can also let the dough rise overnight and get a really sour taste to the bread. Have a great day!
I’ve discovered an’extra bake’ facility and have a loaf rising in the breadmaker right now. So much starter! I’m going to look at scone recipes now.
That sounds like a good plan for scones! A friend on youtube makes english muffins and pancakes with her leftover starter and says it’s amazing. I simply make crackers for my husband as he loves them and they are easy to do. Now I want to make scones! Hope your bread turns out delicious. 🙂
I’m on night 6 of the starter, and I’m so excited to try this recipe. So far so good, there’s lots of bubbles, and a lovely sour smell to my starter jar. This is my very first sourdough loaf attempt. Thank you for sharing this detailed recipe on how to make it. 🙂
Shila, That is excellent news to see that it’s working for you! Starter can be so tricky to learn, so you must be a natural. 🙂 This particular recipe will be a very mild bread flavor. If you want a really good, strong sourdough flavor, this one is my personal favorite sourdough as it’s so easy to do and makes sandwiches: https://jacksonsjob.com/how-to-make-sensational-sourdough-bread-for-beginners/
I hope I’m a natural, that sounds better than obsessive, haha. I’ve been babying my starter like a pet. I love bread too, so it’s definitely an “ingrained” passion.
Oh, yum. Thank you for the link. I like a tangy and stout sourdough, especially for soups and sandwiches.
Have you made this starter in a bread with raisins?
Haha. Nice one on the “ingrained.” If you like a stout taste, play around with whole wheat and other grains like rye as you get better with baking sourdough. I personally love half whole wheat and half white as it gets a very sour taste almost like an Irish beer. Hard to describe.
I personally don’t use raisins anymore or even have them in the house because of how just one can be absolutely deadly to a dog, there is no cure and I drop a lot of things because of my arm issue.
However, I have made bread with dried cranberries and it is absolutely amazing. They bake very similar so I think you’d do well with raisins. Nuts work as well with dried fruit. My mom adds all kinds of interesting things to her sourdough like bananas, shredded carrots and applesauce and swears it’s awesome.
If you add anything to sourdough, wait until the second rise when you shape the loaf. Otherwise, it will take a horribly long time to rise and may collapse on you before you have a chance to make bread. And do be patient as the fruit will weigh it and slow down the second proving.
Let me know how it goes!
Ok, thanks for the tips, I’ll try them out. Yum cranberry bread sounds fabulous.
Awww he’s a cute pup in the bread video, I totally understand. Grapes are a huge no no for them. We lost our Yorkie earlier this year of old age. He was 13, and definitely our doggie buddy. He had a great life though and shared lots of love.
I wanted to give you an update. I reserved 4 tbs of my starter to keep it living until this weekend. I fed it again tonight and plan to put it in the fridge tomorrow after feeding again. That way I can bake a loaf Saturday. 😀 Today was day 7 and it floated, so it’s ready I believe.
I’m trying the method of adding flour to the active yeast with the rest of it. It measured 1 cup after feeding and doubling in size, so I added 3 cups of ap flour to a big glass jar and now I’m letting it dehydrate. I plan to store this homemade “dry active yeast” for later use. https://marysnest.com/how-to-maintain-a-sourdough-starter-with-no-feedings-and-no-discards/
What happened to your shoulder? You mentioned an injury in the video. I hope it heals soon. I was down last year with an injury to my right foot, it was not fun at all.
I’m sorry for the loss of your yorkie! They are great little dogs. My old neighbor had one that Jackson absolutely adored. It sounds like he had a wonderful life with you to make it to such a great old age!
I would say your starter is definitely ready. Once it’s actively bubbling away and doesn’t smell like paint thinner, you can use it pretty quickly. The week timing in the beginning is to ensure most of the bad bacteria that comes with flour can’t survive long term and there is more good bacteria established. Basically you are waiting for the starter to become acidic enough to become inhospitable for the nasties to grow.
By the way, the float test really only tells you if your yeast is well fed or hungry. When you have a starter that is actively eating, it releases air bubbles and let’s the mixture float on the surface. If your yeast mixture is hungry, it will sink but could still be ready to use. When I want to make really sourdough bread, I will actually let the yeast go hungry a little so it will take longer to rise and ferments longer. Something I learned watching a French baking show years ago.
The dehydration method on that link is totally sound. It’s basically what you’d buy if you bought yeast online. I have smeared out some of Marvin years ago, dried it out fully and have him stored away in the freezer. I was curious if it was still good and sure enough it baked lovely bread.
I also have just a small amount I keep in the fridge. I will toss all but a little smidge about the size of a couple grains of rice, feed it about 25 grams water and flour and leave it for another couple weeks when I’m not actively using it.
The shoulder – I got a weird virus a few years ago. Lost my voice and the ability to eat solid food for many months, couldn’t bend my neck, move my arm or upper body without severe pain. Went through over a year of therapies – speech and physical. I couldn’t do anything but watch tv. Started watching the great British baking show and saw Mary Berry could make fabulous desserts with a hand that was limited. Decided to give it. It was the first time in years I felt normal. When my voice and movement in my right arm started slowly coming back, I thought I would document the journey and maybe help others along the way. I have met some wonderful people and made friends which I’m so grateful for.
My voice and arm issues are now permanent and flare up time to time. If you watch enough videos you’ll pick up when I have voice issues and when my arm is acting up. For instance, my voice is raspy/strained, words come out choppy, I will drop stuff, make a total mess or use a lot of plastic opposed to glassware or stainless. I bet you are glad you asked and got a monologue! 😂
I’m so glad your foot injury healed! Those are the absolute worst. You don’t fully appreciate working body parts until they go awry.
Very practical way of showing the procedure. I like it. Will surely try it.
Hope you find it as successful as I do. It’s been very helpful as you don’t have to worry about a lot of flour waste or babying it like other methods out there. 🙂
May I use this starter also to make TEMPEH? Mostley they use Sja-Beans to make TEMPEH; but you can also other Beans.
Unfortunately,TEMPEH really needs the mold spores that are from Rhizopus mould, specifically Rhizopus oligosporus or Rhizopus oryzae found in legumes to really be effective and tasty. Some have made it with wheat, but I can’t recommend it as it’s not very good taste wise and it can be a bit dangerous. Rhizopus stolonifer is the similar mold typically found in grains, but by the time you see them, this often a bad sign for this type of starter. Usually, it is accompanied with other bad bacteria and is often referred to as “black bread death/mould.” For that reason, I can’t really recommend you make it without beans or at the very least, whole grains like barely or rice. Hope that helps!