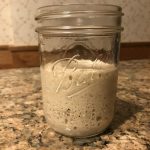
How to Make Yeast with Less Flour
Cultivate your own yeast for bread making. You'll never have to purchase yeast again by letting mother nature do the work for you. This is a great way to learn how to make homemade bread without a lot of ingredients. Just flour and water is all you'll need to get your own batch of starter in a few days time.
Servings: 1 starter
Ingredients
- 1 cup flour (150g)
- 1 cup water (240mL)
Instructions
- Day 1: In a small container, add one tablespoon of water and one tablespoon of tightly packed flour. Stir and cover with plastic wrap. Poke a few holes with a fork or toothpick.
- Day 2: In a new clean container, add one tablespoon of flour, one tablespoon of water and the mixture from the previous day. Stir together and cover with plastic wrap.
- Day 3: You should start seeing bubbles and the flour will start to smell sour. If not, don't worry, keep feeding. In a small mason jar or a container that will hold at least 2 cups of liquid, add the contents from the previous day, 2 tbs of flour and 2 tbs of water. Stir and cover.
- Day 4: Discard all but 1 tbs. Feed 1 tbs water and 1 tbs of flour. Stir and cover.
- Day 5: Feed 2 tbs water and 2 tbs flour. Stir and cover.
- Day 6: By now, you should be seeing a lot of activity throughout the day. It should be bubbling up within hours after feeding. Add 4 tbs flour and 4 tbs water. Stir and cover.
- Day 7: Feed 1/2 cup tightly packed flour and 1/2 cup water. Stir. As long as you see bubbles and the flour rising within four hours and no mold, you can now start using your yeast. If you don't see activity, go back to day for and repeat steps in days 4 & 5 until you see activity.
- Store in the fridge and feed weekly double the volume or keep on counter and feed at least daily. You can discard all but a small amount on feeding days to save flour.
Notes
If you don't have plastic wrap, you can use a baggie with a string or rubber band around it, a loose fitting lid or a lid with small holes poked in it for air circulation.
Watch out for blue or black mold. If you see black mold, discard and start again. Work with very clean containers and hands.
Note about warm temperatures affecting yeast:
It is common for starters to need more feedings during summer months or in more hot and humid climates. Warm temperatures speeds up the yeast production. This means the yeast eats through the flour mixture more quickly. If your temperatures are frequently above 80F (26C) you may want to feed the starter three times a day until it becomes active. Once it is active, you can store in the fridge and feed every 7 - 10 days when not baking bread. A sign of a "starving" sourdough will result in very thin mixture, a chemical smell may develop and sometimes a watery substance appears on top. If this happens to you, all is not lost. Discard all but a small amount (1 teaspoon) and give a generous feeding of 1/4 cup water (60mL) and 1/3 cup tightly packed flour (60g) to recover your starter. Then feed whenever the sourdough drops in volume or store in the fridge between uses to prevent further issues.
It is common for starters to need more feedings during summer months or in more hot and humid climates. Warm temperatures speeds up the yeast production. This means the yeast eats through the flour mixture more quickly. If your temperatures are frequently above 80F (26C) you may want to feed the starter three times a day until it becomes active. Once it is active, you can store in the fridge and feed every 7 - 10 days when not baking bread. A sign of a "starving" sourdough will result in very thin mixture, a chemical smell may develop and sometimes a watery substance appears on top. If this happens to you, all is not lost. Discard all but a small amount (1 teaspoon) and give a generous feeding of 1/4 cup water (60mL) and 1/3 cup tightly packed flour (60g) to recover your starter. Then feed whenever the sourdough drops in volume or store in the fridge between uses to prevent further issues.
Nutrition
Serving: 1 starter | Calories: 400 kcal | Carbohydrates: 88 g | Protein: 12 g